Tag Archives: water leaks

Why Is Water Leaking Through My Ceiling After a Shower?

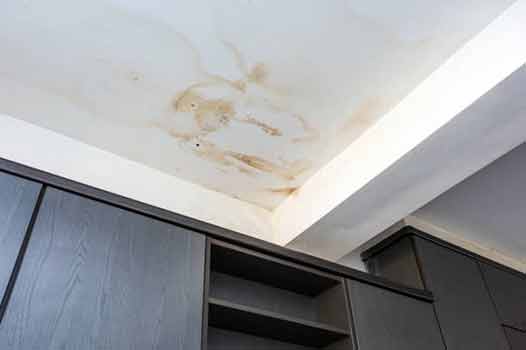
water leaking through a ceiling.

Common Reasons for Water Leaking Through the Ceiling After a Shower

Discovering water leaking through your ceiling after a shower can be an alarming and frustrating experience. Not only does it indicate a potential problem with your home’s plumbing or infrastructure, but it can also lead to costly repairs and damage if left unaddressed. Here we will explore some of the common reasons why water may be leaking through your ceiling after a shower and discuss possible solutions to this issue.

Poorly Sealed Shower Fixtures

One of the most common reasons for water leaking through the ceiling after a shower is poorly sealed shower fixtures. If the showerhead, faucet, or other fixtures are not properly sealed, water can seep through the gaps and find its way into the ceiling. It is essential to ensure that all shower fixtures are tightly sealed to prevent any water leakage. You may need to reseal the fixtures using plumber’s tape or contact a nearby plumber for assistance.

Damaged or Failed Shower Pan

A shower pan is a waterproof barrier installed beneath the shower floor to prevent water from leaking into the subfloor and causing structural damage. Over time, shower pans can become damaged or deteriorate, leading to water leakage. If you notice water leaking through the ceiling after a shower, it could indicate a problem with the shower pan. Inspecting the shower pan for any cracks, gaps, or signs of wear is crucial. If you suspect a damaged shower pan, it is advisable to contact a professional plumber or contractor to repair or replace it.

Blocked or Clogged Drains

Blocked or clogged drains can also contribute to water leaking through the ceiling after a shower. When the drain is obstructed, water may accumulate in the shower stall and overflow onto the floor, eventually seeping into the ceiling. Regularly cleaning and maintaining your drains can help prevent clogs and ensure water flows freely down the drain. If you are experiencing recurring leaks, it may be necessary to call a professional plumber to inspect and clean out your drains.

Improperly Installed Waterproofing Membrane

A waterproofing membrane is an essential layer installed beneath the shower tiles to prevent water from penetrating the walls and ceiling. If this membrane is not correctly installed or if there are gaps or punctures, water can seep through and cause leaks. It is crucial to ensure that the waterproofing membrane is installed correctly by following the manufacturer’s instructions or hiring a professional contractor. Regular inspections of the membrane can help identify any areas that require repair or reapplication.
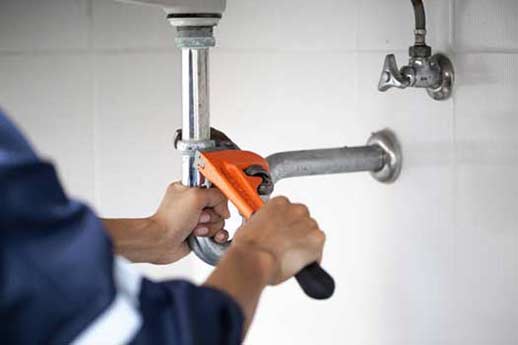
damaged pipes being fixed.

If you suspect that damaged pipes or plumbing may be the cause of the leaks, it is recommended to contact a licensed plumber who can assess the situation and make any necessary repairs.

Damaged Pipes or Plumbing

Another possible reason for water leaking through the ceiling after a shower is damaged pipes or plumbing. Over time, pipes can deteriorate due to age, corrosion, or external factors, leading to leaks. Additionally, loose pipe fittings or joints can also result in water seepage. If you suspect that damaged pipes or plumbing may be the cause of the leaks, it is recommended to contact a licensed plumber who can assess the situation and make any necessary plumbing pipe repairs.

High Water Pressure

Excessively high water pressure can also contribute to water leaking through the ceiling after a shower. When the water pressure is too high, it can put stress on the plumbing system, causing leaks to occur. Installing a pressure regulator or adjusting the water pressure at the main water supply can help prevent excessive pressure and potential leaks. It is best to call a professional plumber to determine the appropriate water pressure for your home.

In Conclusion

Water leaking through the ceiling after a shower is a problem that should not be ignored. It can indicate various underlying issues, such as poorly sealed fixtures, damaged shower pans, blocked drains, improperly installed waterproofing membranes, damaged pipes or plumbing, or high water pressure. Identifying and addressing the root cause of the leaks is essential to prevent further damage to your home and costly repairs. If you are unsure about the source of the leaks or require assistance, it is recommended to contact a professional plumber who can provide expert advice and help resolve the issue effectively.
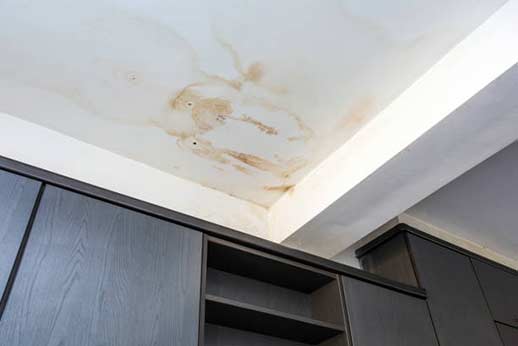
What Should I Do About a Water Stain on the Ceiling?

a ceiling leak that needs attention.

Understanding Water Stains on the Ceiling

Discovering a water stain on your ceiling can be quite alarming. Not only is it unsightly, but it also indicates that there might be a leak or water damage present. Ignoring a water stain on the ceiling can lead to further issues like mold growth, structural damage, or even potential health hazards. Therefore, it’s crucial to address this issue promptly and effectively. In this article, we will guide you on what to do about a water stain on the ceiling, ensuring that you take the necessary steps to prevent any further damage.

1. Identify the Source of the Leak

Before attempting to fix the water stain, it’s essential to identify the source of the leak. Water stains on the ceiling can be deceptive, and the actual leak might be originating from a different location. Look for any signs of water damage nearby, such as wet spots on the walls or floor, dripping water, or moisture. Common causes of ceiling water stains include roof leaks, plumbing issues, condensation, or even a faulty appliance. By determining the source, you can address the root cause and prevent future water stains from appearing.

2. Fix the Underlying Issue

Since a water stain on the ceiling is merely a symptom of a larger problem, it’s crucial to fix the underlying issue. Depending on the source of the leak, you may need to take different actions:

Roof Leaks

If the water stain is a result of a roof leak, it’s essential to inspect your roof for any damaged or missing shingles, cracks, or gaps. In this case, it’s recommended to hire a professional roofer to assess and repair the roof, as working at heights can be dangerous and requires expertise.

Plumbing Issues

In case the water stain is caused by plumbing problems, such as a leaking pipe, you might need the assistance of a licensed plumber. They can identify the specific area of the pipe that needs repair or replacement, ensuring the leak is properly fixed.

Condensation

Condensation can also lead to water stains on the ceiling, especially in areas with high humidity levels. To prevent condensation, ensure proper ventilation in rooms such as bathrooms, kitchens, and laundry areas. Installing exhaust fans or a dehumidifier can help reduce moisture levels and minimize the chances of water stains.

Faulty Appliances

If the water stain is a result of a malfunctioning appliance, such as an air conditioner or a refrigerator, you may need to contact a professional appliance repair service. They will be able to diagnose and fix the issue, preventing any further damage to your ceiling.

3. Assess the Damage

Once you have addressed the underlying issue causing the water stain, it’s necessary to assess the damage on your ceiling. Depending on the severity of the stain, you may need to decide whether to tackle the repair yourself or hire a professional.

4. Repair the Ceiling

Repairing the water stain on your ceiling can be a task that requires attention to detail and proper techniques. If the stain is small and superficial, you may consider repairing it yourself by following these steps:

Step 1: Prepare the Area

Start by preparing the area around the stain. Lay drop cloths or plastic sheets on the floor and move any furniture or belongings away from the work area. This will protect your floor and prevent any accidental damage.

Step 2: Remove the Stain

Before attempting to remove the water stain, it’s crucial to ensure that the underlying issue causing the stain is fully resolved. Otherwise, the stain will likely reappear. Use a stain-blocking primer to cover the affected area, applying multiple coats if necessary, until the stain is no longer noticeable.

Step 3: Paint the Ceiling

Once the primer has dried, paint the entire ceiling to achieve a uniform appearance. Select a paint color that matches your existing ceiling color for seamless blending. Apply at least two coats of paint, allowing sufficient drying time between each coat.

Step 4: Finishing Touches

Finally, inspect the repaired area and make any necessary touch-ups to ensure a smooth and flawless finish. Check for any remaining traces of the water stain and correct them accordingly. Once you are satisfied with the result, clean up the work area and remove the protective coverings.

5. Monitor for Future Issues

After addressing the water stain on your ceiling and completing the necessary repairs, it’s essential to monitor the area for any signs of recurring damage. Keep an eye out for new water stains, discoloration, peeling paint, or any other indications of water intrusion. Maintaining regular inspections will help detect potential issues early and prevent extensive damage in the future.

Discovering a water stain on your ceiling can be a cause for concern, but with proper understanding and prompt action, you can effectively address the issue. Start by identifying the source of the leak and fixing the underlying problem, whether it’s a roof leak, plumbing issue, condensation, or a faulty appliance. Assess the extent of the damage and decide whether to tackle the repair yourself or call in a professional. Follow the necessary steps to repair the water stain, ensuring a seamless and long-lasting result. Lastly, monitor the area for any signs of future water damage to prevent further issues. By taking these proactive measures, you can keep your ceiling in excellent condition and maintain the integrity of your home.

Essential Steps to Take When Dealing with Home Flooding from a Water Leak

flooding from a water leak.

The accidental release of water within a home is the leading cause of house damage. Clockwork Property Management warns that once unleashed inside your home, water does not need more than a few minutes to cause damage that can cost you tens of thousands of dollars to fix. That is why it is essential to know what to do if your home is ever flooded by a plumbing leak. 

Speed is of supreme importance when dealing with this kind of issue. Ideally, you want to arm yourself with the proper knowledge to deal with the situation before the need arises. Knowing the first step to minimize the problem and being able to take that step can make the difference between a thousand dollars versus ten thousand dollars in repair costs.

8 essential steps to take if your home is flooded by a plumbing leak

Locate the leak

The first thing is to determine where the water leak is coming from. If it is a pipe or plumbing fixture you have access to, stop the water supply by turning off the control valve (if it has one). If the pipe or fixture doesn’t have its shut-off valve, shut the water supply to your home by turning off the main water shut-off valve for the house.

Turn off the power

Turning off the power is unnecessary if there is only a small amount of water on the floor. But if this is a major flood and there is a risk of water getting into outlets and electrical appliances, you will need to turn the power off from the mains. If the electrical panel is in your flooded basement, do not enter the basement to turn off the power; wait for an electrician or call the utility company.

Call your insurance company

You should inform your insurance company as soon as possible. They may want to ask some questions to get more details about the problems, do not answer questions unless you are sure of the answers. What you need from the insurer is information on how to deal with the issue. Your insurer may also have their preferred water restoration professional and mold expert.

a woman documenting the damage of flooding in her home.

Before you start fixing your home, you want to document the damage. Walk through your home and take pictures of the damage.

Document the damage

Having visual proof of the cause and extent of the damage makes it easier to process your insurance claims. Before you start fixing your home, you want to document the damage. Walk through your home and take pictures of the damage. You may also use a video accompanied by a clear audio commentary accompanying the video. A written record of the damage also helps.

Remove wet items

Actually, as a first step, you should remove your belongings from the path of the water. Do this as soon as you shut down the water supply. It will help to minimize the damage to your home. Subsequently, when you assess and document the damage to the house, you should remove all items that have been partly or fully submerged. Do this for every wet article, whether you think they can be salvaged or should be discarded.

Contact a water restoration expert

If your insurer has their preferred water restoration expert, use that company. It is not easy or even possible to assess the competence of a water restoration expert when you have an emergency on your hands. Finding a water restoration company that has been vetted by other people is a big help in these situations. You may ask family, friends, and neighbors for their recommendations. Hiring a water restoration professional as soon as possible will help reduce restoration costs.

Decide what needs to be restored

You will not be able to restore everything that was damaged by the water. There are some items you should not try to salvage. For instance, if a carpet has been submerged, it is best to discard it. Your flooring and parts of your walls may also need to be replaced. Depending on how wet they are and for how long, furniture and other items in your home may be salvageable.

a mold specialist.

One of the aftermaths of having a flood in your home is a high probability of mold.

Hire a mold specialist

One of the aftermaths of having a flood in your home is a high probability of mold. If you can dry out your home within 24 hours of the flood, the chances of mold growing in the house are slimmer. But even if there are no visible signs of mold in your home, you should still call the mold specialist. This is because the higher humidity levels caused by flooding will increase the risk of mold.

To reiterate, speed is essential when dealing with flooding incidents in the home. But the best protection against flooding in your home is to commit the steps discussed in this post to memory. It is also a good idea to find a competent water restoration expert in your area, even if you think you will never have a flooding emergency in your home.

Expert Advice on Handling Home Flooding Caused by a Water Leak

a man temporarily handling home flooding.

Home flooding caused by a water leak can be a stressful and challenging situation for any homeowner. Not only does it cause immediate damage to your property, but if left untreated, it can lead to long-term issues such as mold growth and structural damage. In this article, we have gathered expert advice to help you handle home flooding caused by a water leak effectively.

Identifying the Source

The first step in handling a home flooding situation is to identify the source of the water leak. This is crucial as it will determine the appropriate course of action. Common sources of water leaks include burst pipe emergencies, faulty water heaters, leaky appliances, and damaged roof.

If you are unable to identify the source of the leak, it is recommended to contact a professional plumber or water damage restoration company. They have the necessary expertise and equipment to locate and fix the leak in a timely manner.

Shutting Off the Water Supply

Once you have identified the source of the water leak, the next step is to shut off the water supply to prevent further flooding. This is typically done through the main water shut-off valve, which is usually located near the water meter or in the basement. It is important to know the location of this valve beforehand to ensure a quick response in case of an emergency.

If you are unable to locate or operate the main shut-off valve, consider contacting your local water utility company or a nearby plumber for assistance.

a person turning off the main water supply.

Mitigating Further Damage

After shutting off the water supply, it is crucial to take immediate action to mitigate further damage to your property. The following steps are recommended:

1. Remove standing water using a wet/dry vacuum or mop and buckets.

2. Place towels or blankets to absorb excess moisture from affected areas.

3. Turn on fans and open windows to facilitate drying and ventilation.

4. Move furniture, electronics, and other valuable items to a dry area.

5. If possible, lift wet carpets and rugs to allow airflow underneath.

6. Remove any damaged materials, such as wet drywall or carpet, to prevent mold growth.

Assessing the Damage

Once you have mitigated further damage, it is important to assess the extent of the damage caused by the water leak. This will help you determine the necessary steps for restoration and insurance purposes.

Check for the following signs of damage:

– Warped or buckled flooring

– Stains or discoloration on walls and ceilings

– Damp or musty odors

– Mold growth

It is advisable to take photographs or videos of the damage for documentation purposes. This can be helpful when filing an insurance claim or seeking professional assistance.

a person turning in their dehumidifier.

Drying and Dehumidifying

Proper drying and dehumidification are essential in preventing mold growth and further structural damage. Here are some guidelines to follow:

– Use dehumidifiers to reduce excess moisture in the air.

– Use fans to promote air circulation and accelerate the drying process.

– Consider renting industrial-grade drying equipment for large-scale flooding.

– Monitor moisture levels with a moisture meter to ensure thorough drying.

Professional Assistance

In cases of extensive damage or if you are unsure about the proper restoration techniques, it is highly recommended to seek professional assistance. A water damage restoration company will have the necessary expertise and equipment to restore your home to its pre-flood condition.

When choosing a restoration company, consider the following:

– Experience and reputation in the industry

– Proper certifications and licenses

– Availability of emergency services

– Knowledge of insurance claim processes

a plumber providing a whole house plumbing inspection.

Prevention for the Future

Once your home has been restored and the water leak issue has been resolved, it is essential to take preventive measures to avoid future flooding incidents. Here are some tips to prevent water leaks:

– Regularly inspect and maintain your plumbing system, including pipes, faucets, and water heaters.

– Monitor your water bill for any sudden increases, which may indicate a hidden leak.

– Install water leak detection devices and automatic shut-off valves.

– Ensure proper drainage around your property and keep gutters clean.

– Insulate pipes to prevent freezing during cold weather.

Conclusion

Handling home flooding caused by a water leak requires prompt action and the right approach. By identifying the source, shutting off the water supply, mitigating further damage, assessing the extent of the damage, and taking the necessary drying and restoration steps, you can effectively handle the situation and minimize long-term issues. Remember, professional assistance is always available if needed, and implementing preventive measures can help you avoid future flooding incidents.

Common Causes of Water Leaks and How to Address Them

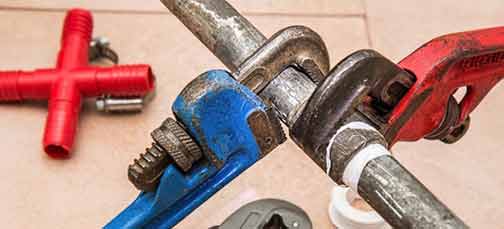
Tools used to fix water leaks in pipes.

If left unattended, water leaks can be a homeowner’s worst nightmare, causing significant damage and costly repairs. From faulty plumbing systems to leaking fixtures and appliances, identifying and addressing these issues promptly is crucial. In this article, we’ll explore the most common causes of water leaks that homeowners face. By understanding these causes and learning how to address them effectively, you can protect your property, save money, and ensure a safe living environment for your family. Let’s delve into the world of water leaks and empower you to tackle them head-on.

Common Causes of Water Leaks

Faulty Plumbing Systems

One of the leading causes of water leaks in homes is a faulty plumbing system. Over time, pipes can deteriorate due to age, leading to cracks and leaks. Loose or damaged pipe connections can result in water seepage at the joints. Corrosion or rust buildup weakens the integrity of pipes, making them prone to leakage. Pipe joint failures can occur due to poor installation or wear and tear. Regularly inspecting your plumbing system is essential to detect any signs of aging, corrosion, or loose connections. If you notice persistent or worsening leaks, it’s advisable to choose a plumber to work with for professional expertise and reliable repairs.

Leaking Fixtures and Appliances

Leaking fixtures and appliances are another common cause of water leaks in homes. Dripping faucets waste water and can be a nuisance with the constant sound. Malfunctioning toilet flappers can result in continuous water running and unnecessary water usage. Faulty washing machine hoses are notorious for causing significant water damage if they rupture or leak. Additionally, leaking water heaters can not only result in water wastage but also affect the efficiency of your heating system. Promptly addressing these leaks by replacing faulty washers, seals, or components is crucial to prevent water wastage, reduce utility bills, and avoid potential damage to your home.

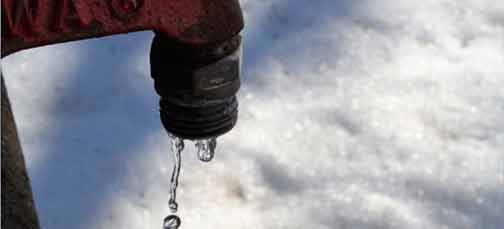
An outdoor faucet leaking in the winter.

A dripping faucet can be very dangerous, especially if it’s external.

Roofing Issues

When it comes to water leaks, roofing issues can’t be ignored. Damaged or missing shingles create openings for water to penetrate your home during rainfall. Improperly sealed roof vents can be another vulnerable spot for water intrusion. Cracked or damaged flashing around chimneys, skylights, or roof valleys can allow water to seep in. Clogged gutters and downspouts can lead to water overflow, causing potential leaks and water damage.

Foundation Problems

Foundation problems can contribute to water leaks and require immediate attention. A cracked or shifting foundation can create openings for water to seep into your home. Improper drainage around the foundation can result in water pooling near the base, increasing the likelihood of leaks. Plumbing leaks beneath the foundation can go unnoticed for extended periods, causing water damage and structural issues. Remember, leaks in the basement can be very dangerous, leading to mold growth and compromising the structural integrity of your home. It’s crucial to consult with foundation specialists to assess and address any foundation problems promptly.

How to Address Water Leaks

Early Detection and Monitoring

Early detection of water leaks and monitoring are crucial in preventing water leaks and minimizing potential damage. Regularly inspecting your plumbing system, fixtures, and appliances can help you identify leaks or signs of deterioration. Keep an eye out for water stains, dampness, or unusual odors. Monitoring your water bills for unexpected increases can also indicate hidden leaks. To enhance monitoring, consider using leak detection devices and other technology to detect leaks before they become major problems.

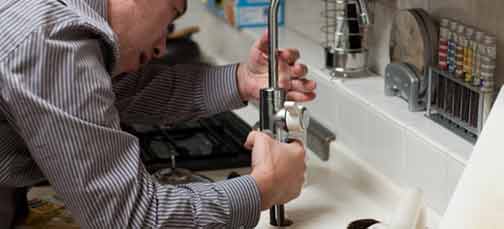
A plumber working on something that causes water leaks.

One of the smartest things you could do when handling common causes of water leaks is to call a professional for help.

Fixing Plumbing System Leaks

When it comes to addressing plumbing system leaks, swift action is key. If you notice a water leak, the first step is identifying its source. That may involve visually inspecting visible pipes, checking for water stains, or employing leak detection equipment. Once the source is determined, repair or replace the damaged pipes or fittings promptly. For complex repairs or if you’re unsure about the best course of action, it’s advisable to contact a nearby plumbing professional.

Resolving Fixture and Appliance Leaks

Dripping faucets and faulty toilet flappers are common culprits that can often be fixed by replacing worn-out washers or seals. Similarly, addressing faulty components in appliances like water heaters and washing machines is essential to prevent leaks and ensure optimal efficiency. Upgrading to more efficient fixtures and appliances can also help prevent future leaks and conserve water.

Addressing Roofing Issues

As we’ve mentioned, unkempt roofing is one of the most common causes of water leaks. Regular roof inspections are essential to promptly identify and address issues that faulty roofing causes. Timely repairs or replacements of damaged roofing and ensuring proper roof ventilation can safeguard your home against water leaks. By implementing the following maintenance strategies, you can effectively safeguard your home against water leaks and protect its structural integrity:

  1. replacing damaged shingles, 
  2. resealing roof vents, 
  3. repairing flashing, 
  4. maintaining clean gutters and downspouts. 

Dealing with Foundation Problems

Plumbing leaks beneath the foundation can easily go undetected but cause substantial damage over time. To tackle these problems, consult foundation specialists who can assess and address the underlying issues. Fixing drainage problems, repairing foundation cracks, and resolving plumbing leaks are crucial steps to prevent water intrusion and preserve the stability and safety of your home. Choose trusted professionals to ensure effective solutions and minimize the risk of future foundation-related leaks.

A crack in the foundation of a home.

Promptly fixing some of the more serious cracks and issues in your home’s foundation is important for addressing current and preventing future water leaks.

Preventive Measures for Future Leaks

Preventive measures are vital to minimize the risk of future water leaks in your home. Insulating exposed pipes is a simple yet effective way to protect them from freezing and potentially bursting during cold weather. Installing water leak detection systems adds an extra layer of security by alerting you to potential leaks early on. Regular maintenance of fixtures, appliances, and plumbing systems helps identify and address issues before they escalate into major leaks.

Protect Your Items During Repairs

While addressing water leaks is essential, protecting your belongings during repairs or renovations is also crucial. If you need to temporarily store furniture, electronics, or other valuables during the process, consider renting a storage unit. A secure and climate-controlled storage unit can safeguard your items until your home is leak-free and fully restored. Experts from City Movers also recommend utilizing certain packing and inventory strategies while your items are in the unit. That way, you can more easily access them if needed.

Conclusion

Water leaks can wreak havoc on your home and finances if left unaddressed. By understanding the common causes of water leaks and taking proactive steps to resolve them, homeowners can prevent costly repairs and maintain a safe living environment. Remember, early detection and regular maintenance are key to preventing water leaks. When faced with plumbing issues, choose a nearby local plumber to work with for prompt and reliable service. By staying vigilant and taking preventive measures, you can protect your home from the damaging effects of water leaks and ensure peace of mind for years to come.

Top Reasons for Water Leaks in the Home

water leak in home.


Leaks can cause extensive damages to your home and the repairs may be costly. The impacts of water leaks are numerous. Some of them include:

Increase in your water bills

If you have leaks in your home, your water bills will increase. Even when the leaks appear small, they can waste a copious amount of water. According to epa.gov, if one faucet is leaking at the rate of one drop per second, it translates to about 3000 gallons of water in a year. You can as well shower that volume of water about 180 times. Imagine how much you are spending on 3000 gallons of water every year without using it.

Water damage and mold growth

Leaks cause water damage, and molds thrive in high humidity. The presence of water leaks in your home will create a suitable environment for mildew. Molds that grow during water damage are harmful to the health of occupants. Water damage causes several negative impacts on your home. It can damage your ceiling, drywall, wood, furniture, carpet, and appliances. Water damage can also destroy the foundation of your property and reduce the home’s value.

Safety concerns

Leaks in a property can render it unfit for habitation. Remember, water and electricity do not mix. If the leak is close to electricity sources, it can make the house prone to electrocution. We advise that you always switch off the electric supply to the area where the leak is active. Another safety concern is that the water spills on the floor will make it slippery and cause falls.

There are several other impacts of water leaks. To protect your home from all these occurrences, it is essential to know the top reasons for water leaks. When you know the causes, you can prevent them from occurring. Below are the common causes of water leaks in the home.

High water pressure

The normal pressure of water inside the pipes in your home should be between 40 to 70 psi. Appliances, pipes, and pipe joints cannot withstand water pressures higher than 70 psi. If the water pressure in your home is too high, the pipes will rupture, resulting in leaks or burst pipes. To prevent this, you can monitor the water pressure in your home by using a pressure gauge.

Damaged pipe joints

Pipe joints are the weakest spots in water pipes. Because of that, leaks often occur here. If there is excessive water movement or pressure at the pipe joints, they easily break down and cause leaks. Your plumber can help you assess the pipe joint and reinforce them to prevent leaks.

Broken seals

Seals occur in several parts of your plumbing system. Following high water pressure, age, or poor installation, the seals break down. When this happens, water starts to leak from those spots. Your plumber can remove all old seals and install new ones properly.

Air conditioners

Functioning air conditioners produce water, but this water flows through a duct and discharges outside the house. Sometimes, this may not be the case. Instead of the water flowing outside, it drips inside and pours on the walls. That may be due to overflowing condensate pans or poor installation. Here, your HVAC specialist should assess the air conditioner and fix the problem.

Clogged lines

The primary reason you have clogs in your drain pipes may be because you pour harmful things into your drain. One of such things is grease or cooking oil. Grease solidifies inside the drain pipes and causes clogging. Clogs often manifest as leaks. If you have been pouring grease, cooking oils, or other harmful things into your drain, get professional drain cleaning plumbers to clear these clogs.

Corroded pipes

Pipes corrode for various reasons. It could be due to corrosive substances in the water, age, destabilizing movements, bacteria, or normal wear and tear. When pipes corrode, they start leaking. Hire a plumber to locate and assess your leaking pipes and replace corroded ones to prevent leaks.

Loosening water connectors

During the installation of water appliances, water connectors help to attach the water fixtures to the water supply. Over time, the water connectors may loosen following vibrations or shifting of the gadgets. If you notice that there are leaks at these spots, get an expert to fix it.

Other appliances

Leaks can occur because of your water appliances. Common appliances that can cause water leaks include washing machines, dishwashers, refrigerators, and water heaters. Conduct routine servicing and maintenance of your water appliances to prevent leaks.

In a nutshell

Outdoor leaks are not as common as indoor leaks. You can also inspect your outdoor areas for leaks. The sources of outdoor leaks are the roof, gutters, ruptured underground pipes, tree root intrusion, downspouts, and sewer pumps. As a routine, always hire professional plumbers to conduct a comprehensive assessment of your plumbing system.