Tag Archives: water heater repair

Causes of a Burst Water Heater

Causes of a Burst Water Heater

Water heaters are one of the most important components of a home. They provide hot water for showers, laundry, and household cleaning. Unfortunately, water heaters can malfunction and cause serious damage to your home and belongings. One of the worst malfunctions that can occur is a burst water heater. Here we will discuss the causes of a burst water heater and what you can do to prevent it.

Causes of Water Heater Failure

Water heater failure can be caused by several different things. The most common causes of water heater failure include corrosion, leaking pipes, and faulty thermostat. Corrosion occurs when metal parts of the water heater are exposed to oxygen and water. This can cause the metal to rust and weaken, leading to water heater failure. Leaking pipes can also cause water heater failure as water will escape from the pipes and cause the water heater to malfunction. Finally, a faulty thermostat can also cause water heater failure as it can cause the water to become too hot, leading to the water heater bursting.

Reasons for Water Heater Explosion

Water heater explosions are rare but can be devastating when they do occur. The most common cause of a water heater explosion is a build-up of pressure inside the tank. This can be caused by a faulty pressure relief valve or by a buildup of sediment in the bottom of the tank. The pressure can build up until it is too much for the tank to contain, resulting in an explosion.

Causes of a Water Heater Leak

Leaking water heaters are a common issue and can cause damage to your home and belongings. The most common cause of a water heater leak is a faulty pressure relief valve. The pressure relief valve is designed to release pressure that builds up inside the tank, preventing an explosion. If the valve becomes blocked or fails to open, the pressure can build up and cause a leak in the tank. Other causes of a water heater leak include corroded pipes, loose fittings, and a broken tank.

Preventing a burst water heater is important to protect your home and belongings from damage. Regular maintenance and inspection of your water heater can help you identify potential problems before they become serious. Paying attention to any signs of wear and tear and replacing parts that are worn or damaged can help you prevent a burst water heater. If you do notice any of the above-mentioned issues, it is important to have a local plumber inspect your water heater as soon as possible.

In conclusion, a burst water heater can be a serious issue that can cause a lot of damage to your home and belongings. Knowing the causes of a burst water heater and taking steps to prevent it is important to ensure your water heater is functioning properly. Regular maintenance and inspection of your water heater can help you identify any potential problems before they become serious. If you notice any signs of wear and tear or if the water heater is not functioning properly, it is important to have a licensed plumber replace the water heater as soon as possible.
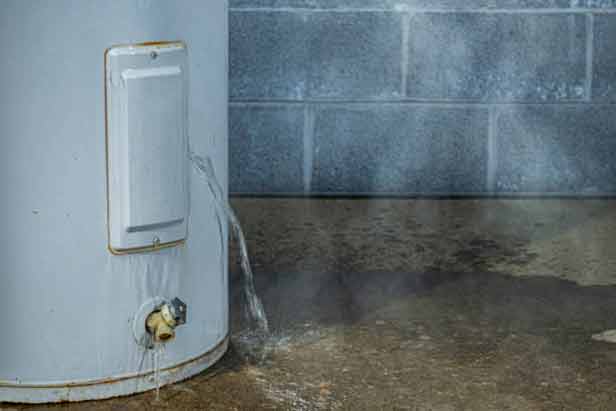
What to Do When your Water Heater Breaks?

What to Do When your Water Heater Breaks

Although it doesn’t happen often, water heaters sometimes break, and when they do, they can cause massive damage to your home. If this problem happens and you don’t know how to handle it, you will not only be looking at the cost of fixing extensive water damage to your home but may also be exposed to the risk of electric shock or gas fire, warns Florida Property Management.

What do you do when your water heater breaks? Whether you are dealing with this issue right now and looking for guidance on how to tackle the problem or trying to update your level of emergency preparedness, this post will help you. 

The steps below will teach you how to minimize the damage a broken water heater can do to your home and prevent you from needing a water heater replacement prematurely.

Step one: Turn off the water supply

Your water heater has a cold water inlet pipe and a hot water outlet pipe. These two pipes are often located on the top of the water heater. You can identify the cold water supply line by the shut-off valve (usually a ball valve) on it. The arm of this valve will typically be in a position where it lines up with the cold water inlet pipe; this is the open position. 

You want to turn the valve clockwise until the arm is perpendicular (ninety degrees) to the cold water pipe. If your cold water pipe has a gate valve instead, turning it to the right should close it. This step will keep more water from flowing into the tank and flooding your home.

Step two: Turn off the power or fuel

The next thing is to eliminate the risk of a gas fire or electric shock. You want to cut the power supply by turning the circuit breaker off if this is an electric water heater. For gas-powered water heaters, look for a dial on the top of the water heater and turn it until it is in a horizontal position (ninety degrees). If you cannot find the valve, turn off the gas at the gas line leading to your water heater. 

There is a huge risk of electrocution when a water heater leaks. Please get in touch with your plumber if you are unsure how to turn off the power on an electric water heater. Also, if there is a gas smell in the room, even after you shut off the gas, please call a professional plumber

Step three: Empty the water heater tank

At this point, you have turned off the water supply to the water heater and shut off the electricity or gas. But water is still coming from the tank onto the floor of your home. You want to get your garden hose and fix it to the drainage valve at the bottom of the water heater. Make sure the connection is tight, and then open the drainage valve. 

You will need a screwdriver to open it if it is a ball valve. But you should be able to turn it by hand if it is a gate valve. Ensure the other end of the hose is at a low spot in your home where the water can be released safely. Open the T&P valve of the water heater to let air into the tank and help the water flow out of the tank freely.

Step four: Start cleanup

Once the above steps are completed, you can wait for your plumber to arrive. While you wait for the plumber, you may begin the cleanup process. The sooner you start this, the lower your repair costs will be. However, it is essential that you create a visual record of the damage caused by the event before you start the cleanup. This will be vital for filing your insurance claims. 

Take detailed photos of the water heater’s damage to your home; floors, walls, furniture, etc. After, you may proceed to remove the salvageable items from the area. Depending on how long the leak had been going before you discovered it, you may be able to remove the water with a mop or have to rent a wet/dry vacuum. If necessary, hire a basement flood pumping service to handle the cleanup.

Step Five; File an insurance claim

Unless the accident happened because of your negligence (maybe you had prior warnings of the issues with your water heater), your insurance homeowners’ insurance should cover the cost of replacing the damaged items and fixing your home. 

Even if the damage was minimal and you did not suffer any losses, you should still inform your insurer. The company will send an adjuster to your home to determine the cause of the accident and quantify the losses.

Troubleshooting an Electric Water Heater

Troubleshooting an Electric Water Heater

Are you having trouble with your electric water heater and trying to figure out the problem? Water heater repairs are a big headache, and they can throw your entire home out of order. As JTS Management points out, knowing how to detect the root of the problem when a water heater malfunctions can be a great help.

How do you troubleshoot a water heater if it is not working? To do that, you must be familiar with the water heater’s components. You also need a step-by-step process for checking the water heater. This post provides the information you need to do all of these.

How to troubleshoot an electric water heater

Part one: Testing the water heater elements

  • Step one: Shut off the power

You need to locate the breaker that says “water heater,” “tank,” or “HWT” inside your circuit breaker box and flip it to the off position. You may also want to unplug the water heater from the wall if you can see the power outlet where it is plugged in.

  • Step two: Open the access panels

Remove the covers of the upper and lower access panels to reveal the element and thermostat. After you do this, you will want to remove the insulation. After, carefully remove the plastic cover over the part and thermostat.

  • Step three: Check that power is off

Before figuring out the problem with your water heater, you need to verify that the power is off. To do this, touch the electric wires inside the access panels with a volt-stick. If there is power in the water heater, the volt-stick will light up.

  • Step four:  Test the upper element 

Remove the two wires connected to the upper element and then do a resistance test to see if the upper part is working. For this, you will need a voltmeter. Simultaneously touch the voltmeter probes to the two terminals on the upper element where the wires were attached: one probe to one screw and the other probe to the second screw. If the meter registers resistance, the element is fine, but you need to replace the part if it registers no resistance.

  • Step five: Test the lower element

Repeat the above steps with the lower element

  • Step six: Test for grounded element

This test follows the same process as the ones already done. You will need the voltmeter, but you want to set it to ohms this time. Touch the probe to one of the terminals on the element and, instead of the other terminal, touch the second probe to the steel surface on the inner wall of the water heater behind the element. If the element is in good condition, the voltmeter will not register any resistance. If the voltmeter reads resistance, the element is grounded and needs to be replaced.

Part two: Testing the thermostat

The thermostat controls the heating element in the water heater. The thermostat maintains water temperature inside the tank by opening or closing the contacts that allow power to flow to the elements. If a water heater has two heating elements, it will also have two thermostats.

When testing the water heater thermostat for defects, you are looking for continuity. This is a continuous electrical path that should be present within the device. If there is no continuity, the thermostat is damaged and needs to be replaced. Here is how to test the thermostat in a water heater.

  • Step one: Getting ready

You will need a multimeter for this test. If using an analog multimeter, set the dial to the lowest level for ohms of resistance. Calibrate the meter by pinching the needles together and adjusting the needle to read zero. If using a digital multimeter, rotate the dial to the lowest level for ohms of resistance or resistance with tone.

  • Step two: Check the power supply and remove the access panel cover

Follow steps two and three in Part One above.

  • Step three: Reset the thermostat

The upper thermostat has a reset button; this can trip if the water in the tank is overheating. Overheating is often caused by thermostat contacts that have fused, shorted heating elements, or the thermostat is out of calibration. Push the reset button to reset the thermostat.

  • Step four: Test the thermostat

Isolate the thermostat from the circuit by disconnecting the wires. Note the position of each wire before you do this. Next, touch one multimeter probe to one left side terminal on the thermostat and the other probe to the other left side terminal. For digital meters, the thermostat is okay if the reading is zero (or almost zero) ohms. But if using an analog meter and there is no movement in the needle, the thermostat has no continuity and should be replaced. If all else fails, call a plumber for an electric water heater repair. In some cases a full replacement of your water heater may be in order.

How to Maintain an Older Water Heater

How to Maintain an Older Water HeaterOld household appliances are more susceptible to breakdowns than new ones; all the years of use start to take their toll. The wear and tear on your equipment often mean you can’t get as much work from an old appliance as you can from a new one. Usually, the only way to deal with this loss of reliability is to replace the old water heater tank with a new one.

Along with your refrigerator, the water heater is one of the most used appliances in your home. Water heaters are indispensable for making simple things like taking a shower or washing dishes convenient. Without a reliable source of hot water in the house, it would be almost impossible to live in it. Water heater malfunctions are therefore one of the most distressing issues in the home.

Since an older water heater can mean more home maintenance issues, how can you reduce incidences of breakdowns with the older water heater in your home?

There are only two ways to deal with that old appliance. You can replace it with a new one or look for ways to extend its life. Is there any way to keep getting value out of your water heater even when it is old? The answer is yes. All water heaters have their expected lifespan, but you can extend the equipment’s life through proper maintenance, says Rollingwood Management Inc.

The steps for prolonging the life of a water heater are easy to do and affordable. They do not require special knowledge, and you can do them with the tools you already have in your home. All that is needed is to be timely in applying the steps and enlist the help of an expert when it is necessary. Here are the steps to keep your old water heater running smoothly.

Six steps for maintaining an older water heater

Test the TPR Valve

The TPR valve (temperature & pressure relief valve) keeps the water heater safe. It releases water and pressure if these get too high inside the tank. If the thermostat inside your appliance fails and the temperature gets too high, the valve lets the excess steam escape to prevent an explosion. The TPR valve should be tested twice a year by simply carrying it up and down several times. A gurgling sound should follow this action as water flows into the drain tube.

Insulate the pipes

By reducing the rate of condensation, insulated hot water pipes cut heat loss by as much as 45% and reduce your heating costs by 9% or more. To insulate the pipes, you need self-sticking 3/8-inch foam pipe insulation. The foam should match the diameter of your pipes. Slide the foam over the hot/cold water pipes as far as it will go. Then squeeze the end of the foam and tape it. Ensure at least 6 inches of space between the insulated pipe and the flue.

water-heater-insulation

Insulate the water heater tank

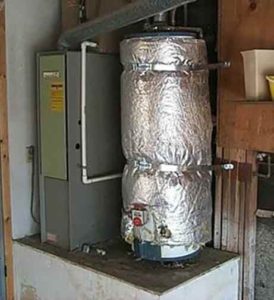
Insulating your water heater will improve its efficiency, reduce heat loss and shave dollars off your heating bill. Insulating the water heater is as simple as wrapping the tank with an insulating blanket. Buy an insulating blanket that matches the size of your water heater tank. Turn the power off on the appliance and wrap the blanket tightly around the tank. Cut off those parts of the blanket that cover the valves and panels. Turn the power back on.

Setting the temperature

The optimal temperature setting for your water heater will let you maximize the appliance and prolong your water heater’s life. For the best results, set the temperature between 130F° and 140F°. Higher temperature settings can result in burns. Lower settings may encourage bacteria to grow inside the tank. To set the temperature, look for the temperature dial on the side of the tank. Unscrew the cover. Using a flathead screwdriver, adjust the dial to the required settings.

Flush the tank

All the mineral content and particles in the water entering your water heater can end up inside the tank. As the water gets heated and evaporates, it leaves sediments that can impair the performance of your appliance. Sediments also increase the risk of rust and explosions. To get rid of deposits, you should flush the water heater tank twice a year. That is as simple as opening the drain cock and cold water supply valve. Let the water run for five minutes or until all sediment at the bottom of the tank washes out.

Check the anode rod

The anode rod protects your water heater from corrosion. It is the first thing the chemicals inside the water entering your home will attack. That is why the anode rod in your water heater gets eaten up. Without the anode rod, the corrosive elements in water will start attacking your water heater. Replacing the anode rod can save you the cost of buying a new water heater. Inspect the rod every year to ensure it is still in good shape.

Reasons Your Hot Water Heater is Not Working and How to Fix

Water heaters are one of the most used appliances in the home. They are the reason you can turn the tap and expect an instant supply of warm water. Water heaters make everyday household activities like taking a shower, washing the dishes, or doing the laundry so much easier.

This is why water heater malfunctions can be so utterly disruptive to your lifestyle. Until it breaks down, most of the time your water heater does its work unnoticed in an out-of-the-way corner of the home. The only water heater that gets attention is one that is not working.

Reasons Your Hot Water Heater is Not Working and How to Fix

But why do water heater malfunctions happen? How can you detect small issues with the water heater before they become big problems? What are the most common water heater malfunctions and how can you avoid or fix them? Find the answers to these questions in this post.

5 common water heater problems and what to do about them

Insufficient or extremely hot water

Sometimes a water heater will not produce enough hot water or the water is too hot. This is a fairly common problem. To fix it, go to the water heater tank and adjust the thermostat. You may have turned the thermostat down during the summer (to save energy) but forgot to turn it up in winter. Thermostat settings may also change if the water heater is bumped accidentally. If the water temperature doesn’t change after you do this, you may need to replace the thermostat.

A water heater will also have water temperature issues if the tank is leaking, the temperature relief valve has stopped working, the gas control or burner assembly is damaged, or there are mineral deposits in the tank. Temperature-pressure relief valves are easily replaced. You can flush the tank to get rid of deposits. But if the tank is leaking, it is probably time to get a new water heater.

Discolored water

Water discoloration is often caused by a high iron and copper content in the water. If the water in your area has a high mineral content, it will cause problems in the components of the plumbing system and the water heater. You may have issues with lime deposits in pipes, showerheads, and taps. This will show up as scaling inside the water heater, washing machine, and dishwasher. If scale builds up long enough inside a water heater, the appliance will start producing discolored water.

Water discoloration is mostly caused by rust (which is accelerated by scale deposits) or anode rod issues. Depending on how soon you detect the problem, it can easily be fixed, that is if the issue is from the anode rod. If the water from the municipality has high mineral content, you can solve it by installing a whole house water filter or water softener.

Smelly water

Water coming from the water heater may have a bad odor, smell of rotten eggs, sewage, or garlic. If this issue is not noticed with all the faucets in the entire home, it may not be from the water heater. Sometimes water will become smelly if it has not been used for a long time. Running the taps in your home for a while will solve the problem.

If this doesn’t resolve the situation, the water heater could be the cause. Rotten egg and sewage smells are caused by heavy bacteria growth inside the tank. This can be fixed by flushing the tank. A garlic-like smell means you need to relight the pilot light. Gas line damage will also cause a strong smell. If the problem persists, get an expert to inspect the appliance.

Strange noises from the water heater

water-heater-repair-chicago

A noisy water heater may be suffering from excessive mineral buildup and sedimentation. Mineral buildup comes from the water and, as already explained, is worse in areas with hard water. Sedimentation may also happen as a result of issues with the heating element. If you hear the sound of boiling water from the water heater, the system is dangerously overheating due to extreme pressures inside the tank. You need a professional plumber to fix these kinds of problems.

Leaking water heater

Leaks can happen in different parts of the water heater.  Leaks caused by a loose in-line valve are easily fixed. This is the valve that controls the flow of water in and out of the tank. To fix the problem, simply tighten the nut that holds the valve in place. If the leak gets worse, you may need another in-line valve. Pressure relief valves can also leak, but they are also easy to replace.

In addition to the above, the water heater may leak because of age, bad plumbing connections, poor maintenance, corrosion, and too much pressure inside the tank. If you find that water pools near the water heater or there is dripping water from the unit, you have a leak. Most of the time, leaks from the water heater tank means your water heater needs to be replaced.

When to Change The Water Heater In Your Rental Property

When to Change The Water Heater In Your Rental PropertyUnlike refrigerators, stoves, and ovens, which are optional, the water heater in a rental property is a must-have. The presence of a working water heater is one of those things that determine the livability of a rental property. If the rental doesn’t have a water heater at all or the water heater is not working, the landlord’s warranty of habitability is voided.

This is why issues with the water heater in a rental property are very important. As a landlord, you want to make sure the water heater in your rental is performing optimally at all times. But at the same time, you don’t want to spend too much money maintaining the system. This means you should know when it makes more sense to replace your water heater than to repair it.

When to replace the water heater in your rental property:

  • When the water heater is old

On average, most water heaters have a lifespan of ten years. But storage tanks and heat pumps can last up to 15 years. Solar water heaters and tankless water heaters, on the other hand, will last 20 years and more than 20 years, respectively. Depending on the type of water heater, if the system is nearing the end of its life expectancy, it is time to replace it.

  • There are too many repair requests

If your tenants are always requesting that the water heater be fixed, it is time to replace it. A water heater that breaks down often can be very frustrating for your tenants and this may be the singular reason why a tenant leaves your rental property. Moreover, the cost of maintaining the system goes up in proportion to the number of repair requests.

  • It is not producing enough hot water

If the water heater is not producing sufficient hot water, there are two possible causes. It could be that the demand on the water heater exceeds its capacity. A water heater can only have 75% of its capacity as hot water. It could also be that the water heater has failed before its expiration date. The solution to both problems is to get a new water heater.

  • Unreliable hot water production

This is similar to the previous problem but a little worse. Here the water heater does not produce any hot water at all or it doesn’t produce enough. This is usually due to internal problems with the tank. Solving internal water heater tank issues is expensive. As a rule, if the cost of repairs is 10% of the replacement cost of the water heater, it is better to buy a new one.

  • The tank is leaking

Not all water heater leaks are caused by a leaky tank. Sometimes they are the result of leaks around the plumbing pipes, connector pipes, or valves. These types of leaks can be fixed at no great cost. But a leaky tank is a different story. The cost of the repair will often be more than 10% of the cost of a new water heater. If the tank is leaking, replace the water heater.

  • Excessively high energy bills

Even if a water heater doesn’t have any of the above problems, it should be replaced if it is using up too much power. Water heaters often lose efficiency as they get older and their energy use can increase, as a result. The cost of buying a new water heater will easily be recouped through the lower energy bills that the new water heater makes possible.

Important factors when buying a water heater for your rental property

tankless-water-heater-repair

For landlords whose water heaters were manufactured before April 2015, there are few things to note when buying a new one. New guidelines require that water heater manufacturers make their units more efficient. This is a good thing, from the perspective of energy usage, but it also means the new systems are larger and more expensive.

More importantly, it means you may require additional space to install the water heater, if it was previously installed in a confined space, such as a closet or crawlspace. If you want to install the larger new water heater in the same area, you may need to retrofit the space. The alternative is to install a water heater with a smaller capacity.

In addition to the above, you have to think of what kind of fuel you want the water heater to use. If you previously had an electric-powered system, this may be a good time to switch to a natural- or solar-powered alternative. You should also take this opportunity to decide what kind of water heater is best for the rental. Should it be tankless water heater installation, storage tank, heat pump, or combo heaters?