Tag Archives: water heater repair

What to Do When Your Water Heater is Leaking from the Top: A Step-by-Step Guide

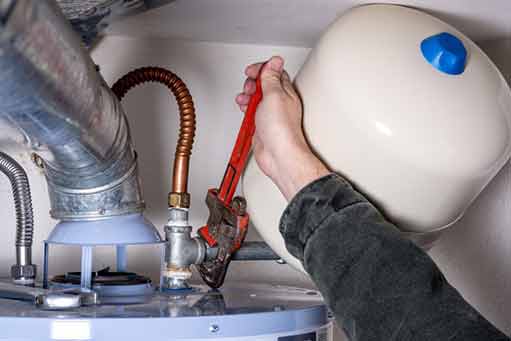
water heater is leaking from the top`

Discovering a leak in your water heater can be a cause for concern, but don’t panic. Below we will provide you with clear and concise instructions to help you address the issue and potentially prevent further damage. Whether you are a seasoned DIY enthusiast or a first time homeowner, our guide is designed to assist you in resolving this common household problem.

Understanding the Problem

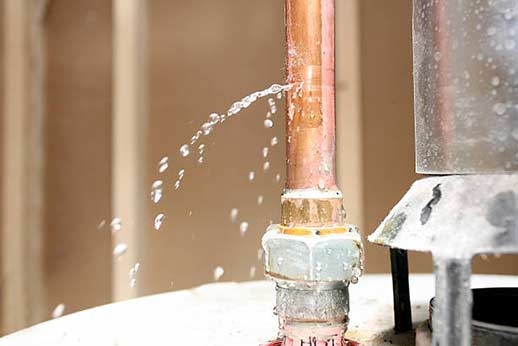
Before we get into into the steps, let’s take a moment to understand why your water heater may be leaking from the top. The top of a water heater is typically the location where the hot water exit pipe and the cold water inlet pipe are connected to the unit. A leak in this area can indicate a few potential issues:

  1. Pressure Relief Valve: The pressure relief valve may be malfunctioning or experiencing excess pressure, causing it to leak.
  2. Temperature and Pressure Relief Valve: The temperature and pressure relief valve (T&P valve) could be releasing water due to high temperatures or pressure within the water heater.
  3. Loose Connections: The connections between pipes and the top of the water heater may have become loose over time, resulting in a leak.
  4. Corrosion: Corrosion can weaken the top of the water heater, leading to leaks.

Step 1: Turn off the Power

The first step when dealing with any issue related to your water heater is to turn off the power supply. This is crucial for your safety and to prevent any potential accidents. Locate the circuit breaker or switch that controls the electricity to the water heater and switch it off. If your water heater is gas-powered, turn off the gas supply.

Step 2: Shut off the Cold Water Supply

Once the power is turned off, locate the cold water supply valve connected to your water heater. This valve should be located on the top or side of the unit. Turn the valve clockwise (to the right) to shut off the water supply.

Step 3: Release Pressure From the Temperature and Pressure Relief Valve

The next step is to relieve the pressure from the temperature and pressure relief valve (T&P valve). This valve is usually located on the side or top of the water heater. Place a bucket or a container beneath the T&P valve to catch any water that may be released. Carefully lift the valve’s lever to open it and allow the pressure to release. If water flows out continuously or doesn’t stop after releasing the lever, it is advisable to contact a professional plumber.

Step 4: Inspect and Tighten Loose Connections

After relieving the pressure, inspect the connections at the top of your water heater. Check for any visible signs of leaks and make sure all connections are secure. If you notice any loose connections, use a wrench or pliers to tighten them. Be cautious not to overtighten, as it may lead to further damage or leaks.

Step 5: Check the Pressure Relief Valve

If you suspect that the pressure relief valve is the source of the leak, it may need to be replaced. However, before replacing it, it is worth testing it to ensure it is functioning correctly. Consult your water heater’s manual for instructions specific to your model. In general, testing the pressure relief valve involves the following steps:

  1. Place a bucket or container beneath the valve to catch any water that may be released.
  2. Lift the valve’s lever partially to allow some water to flow out and relieve pressure.
  3. If water continues to flow once you release the lever or the valve doesn’t seal properly afterward, it is recommended to replace the pressure relief valve.

Step 6: Assess for Corrosion

If all previous steps have been completed and the leak persists, it is possible that corrosion has caused the issue. Carefully inspect the top of your water heater for signs of rust or corrosion. If corrosion is present and causing the leak, it may be necessary to reach out to a professional plumber to evaluate the extent of the damage and recommend appropriate solutions.

Step 7: Contact a Professional Plumber

If you have followed all the steps in this guide and the leak from the top of your water heater continues, it is advisable to contact a local plumber. They have the knowledge, skills, and equipment to diagnose the problem accurately and provide the most effective and long-lasting solution.

Preventative Measures

To avoid potential leaks and prolong the lifespan of your water heater, consider the following preventative measures:

  1. Regular Maintenance: Schedule annual maintenance for your water heater, including inspections, flushing, and testing of pressure relief valves.
  2. Temperature and Pressure Monitoring: Keep an eye on the temperature and pressure gauge of your water heater. If they consistently exceed recommended levels, it may indicate an underlying issue.
  3. Water Quality: Ensure your water heater is filled with good quality water. Consider installing a water softener or filter if your water supply has high mineral content.

Summing it Up

Dealing with a leaking water heater can be a stressful situation, but with the right knowledge and steps, you can address the issue effectively. Remember to prioritize your safety, turn off the power and water supply, and assess the potential causes of the leak. While certain problems can be resolved through DIY methods, don’t hesitate to seek professional help if needed. By following our step-by-step guide and implementing preventative measures, you can minimize the chances of future leaks and maintain the efficiency of your water heater for years to come.
Recognizing the Red Flags of a Deteriorating Water Heater

a deteriorating water heater in need of replacement.

The Importance of Recognizing the Red Flags of a Deteriorating Water Heater

A water heater is an essential appliance in any household, providing hot water for various activities such as bathing, cooking, and cleaning. However, like any other mechanical device, water heaters have a limited lifespan and can deteriorate over time. It is crucial for homeowners to recognize the warning signs of a deteriorating water heater to prevent potential disasters, such as leaks or complete system failure.

Understanding How Water Heaters Work

Before we dive into the red flags, let’s take a moment to understand the basic functioning of a water heater. Most residential water heaters rely on a storage tank system, where cold water enters the tank through a supply line. The water is then heated using an electric or gas-powered heating element, depending on the type of water heater. Once the desired temperature is reached, the hot water is ready for use and is delivered to the various taps and fixtures in the house.

Now that we have a basic understanding of how a water heater works, let’s explore the common red flags that may indicate a deteriorating unit.

Inconsistent Water Temperature

One of the earliest signs of a deteriorating water heater is inconsistent water temperature. If you notice that your showers are starting off too hot or too cold, even if you haven’t made any adjustments to the temperature settings, it could be a warning sign. A failing heating element or a malfunctioning thermostat can result in fluctuating water temperatures, making it uncomfortable and inconvenient for daily activities.

Unusual Noises

If your water heater starts making strange sounds, it is definitely a cause for concern. Banging, popping, or rumbling noises coming from the unit can indicate sediment buildup inside the tank. As water heaters age, sediments can accumulate at the bottom of the tank, causing efficiency issues and potentially damaging the heating element. Regular maintenance, such as flushing the tank to remove sediments, can help prevent further deterioration.

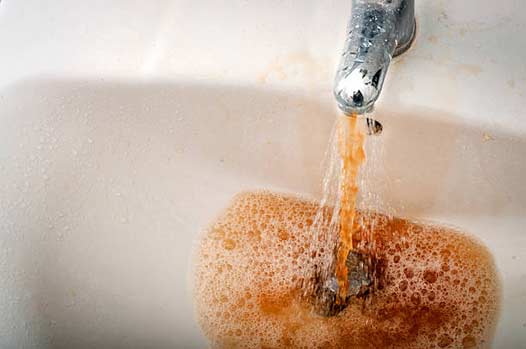
a sink shooting out rust colored water.

If you notice a brownish or reddish tint to your hot water, it could indicate corrosion inside the tank.

Discolored or Rusty Water

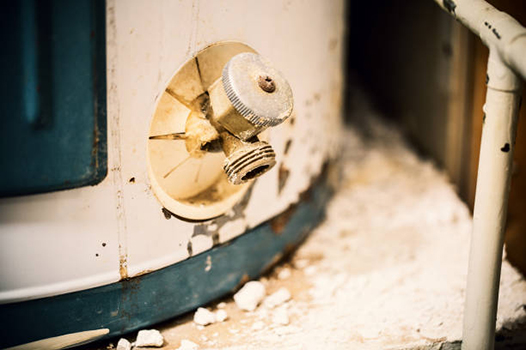
Another red flag to watch out for is discolored or rusty water coming out of your taps. If you notice a brownish or reddish tint to your hot water, it could indicate corrosion inside the tank. Over time, constant exposure to water can cause the tank to deteriorate, leading to leaks and other issues. Discolored water can also be a sign of a failing anode rod, which is responsible for protecting the tank from corrosion. If you encounter this issue, it is crucial to have your water heater inspected by a professional.

Water Leaks

Water leaks are a clear indication that something is wrong with your water heater. Even a small leak around the unit should not be ignored, as it could be a warning sign of a larger problem. Leaks can occur due to a variety of reasons, such as a faulty pressure valve, a cracked tank, or loose connections. Ignoring leaks can lead to extensive water damage and even pose a safety risk. If you notice any signs of leakage, it is vital to shut off the water supply to the heater immediately and contact a professional plumber.

Age of the Water Heater

While not a direct red flag, the age of your water heater can be a good indicator of its condition. On average, a water heater has a lifespan of around 8 to 12 years. If your unit is approaching or has exceeded this age range, it is more susceptible to deterioration and issues. Regular maintenance becomes even more crucial for older water heaters to ensure their longevity and efficient operation.

Conclusion

Recognizing the red flags of a deteriorating water heater is essential for every homeowner. By staying vigilant and addressing these warning signs promptly, you can prevent costly repairs, damage to your property, and the inconvenience of having no hot water. Remember to speak with a professional plumber for proper diagnosis and possibility of replacing your water heater entirely, as they have the knowledge and expertise to handle water heater issues effectively.

Investing in regular maintenance and periodic inspections can significantly extend the lifespan of your water heater, ensuring a continuous supply of hot water for your everyday needs. Don’t wait for a complete system failure – be proactive in monitoring your water heater and take necessary actions to keep it in optimal condition.

Essential Water Heater Maintenance Tips for Lowering Utility Expenses

a plumber performing water heater maintenance.

Maintaining your water heater is not only important for its longevity but also for reducing energy consumption and saving money on your monthly utility bills. Here we will cover various maintenance tasks and precautions that will help you optimize the efficiency of your water heater and ultimately lower your utility expenses.

Understanding the Importance of Water Heater Maintenance

Water heaters are one of the most essential appliances in our homes, providing hot water for various daily activities such as bathing, cooking, and cleaning. However, without proper maintenance, they can become less efficient over time, resulting in increased energy consumption and higher utility bills.

Maintaining your water heater ensures that it operates at peak performance, maximizing its energy efficiency and extending its lifespan. By implementing these essential maintenance tips, you can minimize energy waste, reduce the risk of breakdowns, and ultimately save money on your monthly expenses.

Determine the Type of Water Heater

Before diving into the maintenance tips, it’s crucial to identify the type of water heater you have. The most common types include:

  • Conventional storage tank water heaters
  • Tankless water heaters
  • Heat pump water heaters
  • Solar-powered water heaters

Each type may have specific maintenance requirements and considerations, so read your water heater’s manual or contact a local plumber if you are unsure about its particular needs.

Regularly Check the Temperature and Pressure Relief Valve

The temperature and pressure relief valve is a critical safety feature in your water heater. It prevents excessive pressure buildup and potential explosions. To ensure its proper functionality:

  • Check the valve annually for leakage or signs of corrosion.
  • Activate the valve a few times to make sure it is working correctly.
  • If you notice any issues, such as leaks or faulty operation, contact a professional plumber to repair or replace the valve.
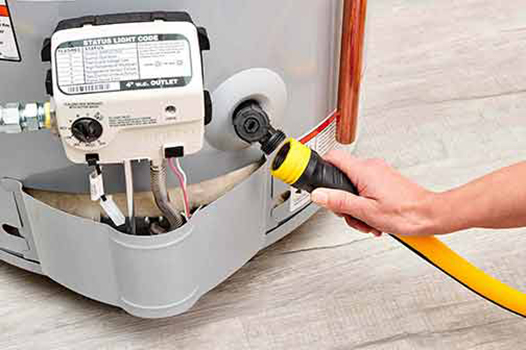
a plumber flushing a water heater.

Flushing and draining the tank at least once a year helps minimize sediment accumulation and prolongs the lifespan of your water heater.

Flush and Drain the Tank Regularly

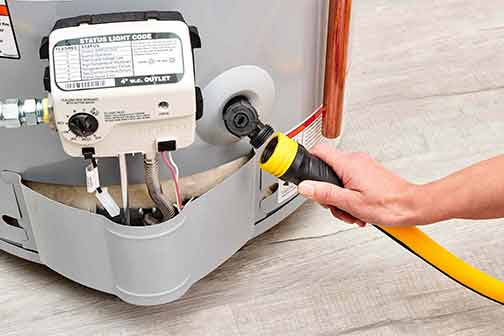
Sediment and mineral buildup in the tank can negatively impact your water heater’s efficiency, leading to higher energy consumption. Flushing and draining the tank at least once a year helps minimize sediment accumulation and prolongs the lifespan of your water heater. Here’s how to do it:

  • Turn off the power supply to the water heater.
  • Attach a hose to the drain valve located at the bottom of the tank.
  • Place the other end of the hose in a suitable drainage area.
  • Open the drain valve and allow the tank to empty fully.
  • Once the tank is empty, close the drain valve and remove the hose.
  • Turn on the cold water supply to the tank to flush out any remaining sediment.
  • Close the water supply valve and refill the tank.

By regularly flushing and draining your water heater, you can prevent sediment buildup and improve its energy efficiency.

Insulate Your Water Heater

Insulating your water heater is an effective way to reduce heat loss and improve energy efficiency. Older water heaters or those located in colder areas can benefit greatly from insulation. Follow these steps to insulate your water heater:

  • Measure the height, circumference, and area of your water heater.
  • Purchase an insulation blanket or jacket suitable for your water heater’s dimensions.
  • Carefully wrap the insulation material around the tank, avoiding the thermostat and other control areas.
  • Secure the blanket or jacket with tape or straps, ensuring a snug fit.

Insulation helps retain the heat within the tank, reducing standby heat loss and saving energy.

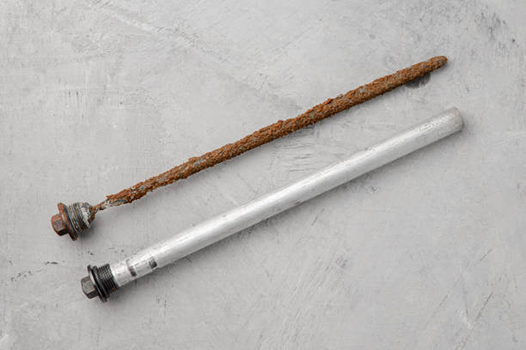
anode rod replacement.

Regularly inspecting and replacing the anode rod helps prevent corrosion, maintaining the efficiency and lifespan of your water heater.

Check and Replace the Anode Rod

The anode rod plays a crucial role in preventing the corrosion of your water heater’s interior lining. Over time, the anode rod deteriorates and should be checked regularly, especially in areas with hard water. Here’s how to inspect and replace the anode rod:

  • Locate the anode rod’s access point, usually on top of the water heater.
  • Using a suitable tool, such as a socket wrench, unscrew the anode rod and carefully remove it.
  • Check the condition of the rod. If it is heavily corroded or less than 0.5 inches thick, it should be replaced.
  • Purchase a new anode rod of the appropriate size and material (magnesium or aluminum/zinc alloy).
  • Apply plumber’s tape on the threaded end of the new anode rod to prevent leaks.
  • Screw the new anode rod into place and ensure it is tightened securely.

Regularly inspecting and replacing the anode rod helps prevent corrosion, maintaining the efficiency and lifespan of your water heater.

Check for Leaks

Water leaks can cause significant damage and increase your utility expenses. Regularly inspect your water heater and the surrounding area for any signs of leakage. Check for water puddles, dampness, or corrosion on pipes and fittings. If you detect a leak, address it promptly by tightening loose connections or contacting a plumber for water heater repairs.

Maintain a Suitable Temperature Setting

Adjusting your water heater’s temperature setting can lead to notable energy savings. While the ideal temperature may vary depending on your needs, most households find a temperature between 120°F (49°C) and 140°F (60°C) comfortable.

However, avoid setting the temperature too high, as it can scald and waste energy unnecessarily. Finding the right balance ensures you have hot water while minimizing energy usage.

Regularly Inspect the Exhaust Vent

If you have a gas-powered water heater, inspecting the exhaust vent is crucial for safety and efficiency reasons. A blocked or poorly functioning exhaust vent can cause the release of harmful gases, such as carbon monoxide, into your home.

Regularly check the vent pipe for any obstructions, such as debris or bird nests. Ensure that it is connected securely and that the joints are properly sealed. If you suspect any issues, contact a licensed professional to inspect, clean, or repair the exhaust vent.

Conclusion

Proper water heater maintenance is essential for lowering your utility expenses and ensuring reliable hot water supply. By following the tips outlined in this article, you can optimize your water heater’s efficiency, extend its lifespan, and reduce energy consumption.

Remember, if you are unsure about any maintenance tasks or encounter significant issues with your water heater, it is always recommended to seek the assistance of a professional plumber or HVAC technician. Investing time and effort into regular maintenance will ultimately save you money and provide peace of mind.

Troubleshooting Water Heater Leaks: Identifying the Source and Fixing the Problem

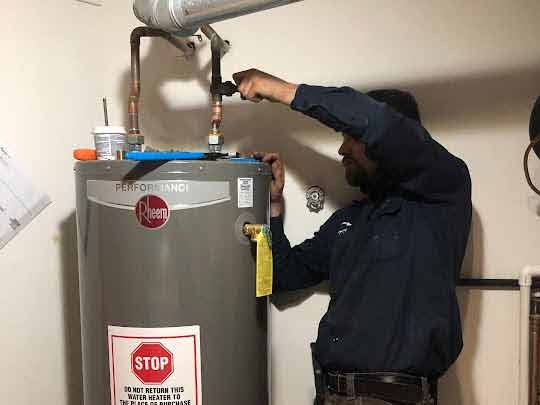
the best way to fix water heater leaks is by calling a plumber.

Water heater leaks can be a frustrating and potentially damaging problem for homeowners. Not only can leaks lead to wasted water and higher utility bills, but they can also cause water damage to surrounding areas and even lead to mold growth if left unaddressed. In this article, we will discuss the importance of promptly identifying the source of water heater leaks and provide some troubleshooting steps to help homeowners fix the problem.

Understanding Water Heater Leaks

Before diving into the troubleshooting process, it’s important to have a basic understanding of how water heaters work and what causes leaks to occur. A typical residential water heater consists of a tank that holds and heats the water, along with various components such as inlet/outlet pipes, temperature and pressure relief valves, drain valves, and heating elements.

The most common types of water heater leaks occur from the following sources:

  • Leaking tank
  • Leaking inlet/outlet connections
  • Leaking temperature and pressure relief valve
  • Leaking drain valve

Identifying the Source of the Leak

When faced with a water heater leak, the first step is to identify the source of the problem. This can be done by following these steps:

Step 1: Inspect the Tank

Start by visually inspecting the water heater tank for any signs of leakage. Look for dripping water, puddles underneath the unit, or any visible corrosion or rust. If you notice any of these signs, there’s a good chance that the tank itself is leaking and may need to be replaced.

Step 2: Check the Inlet/Outlet Connections

Next, examine the inlet and outlet connections located at the top of the water heater. These connections are typically made using threaded fittings or soldered joints. Inspect the connections for any signs of water leakage or loose fittings. Tighten any loose connections and consider using Teflon tape or pipe joint compound to create a better seal.

Step 3: Inspect the Temperature and Pressure Relief Valve

The temperature and pressure relief valve is a crucial safety component of a water heater. It is designed to release excess pressure and prevent the tank from exploding. However, over time, these valves can become faulty and start to leak. Carefully inspect the valve for any signs of water leakage or mineral deposits. If you notice any issues, it’s recommended to replace the valve to ensure proper functioning.

Step 4: Check the Drain Valve

The drain valve is located near the bottom of the water heater and is used for periodic flushing of sediment buildup. It is not uncommon for the drain valve to develop a leak due to a faulty or loose connection. Examine the valve for any signs of leakage and tighten any loose fittings. If the valve itself is damaged, it may need to be replaced.

fixing water heater leaks is of utmost importance to prevent flooding.

Use a wrench to securely tighten the connections, but be careful not to overtighten and risk damaging the pipes or fittings.

Fixing the Water Heater Leak

Once you have identified the source of the water heater leak, you can take appropriate measures to fix the problem. The following steps will guide you through the process:

Step 1: Repairing Leaking Connections

If the leak is coming from the inlet/outlet connections, it is often a simple matter of tightening the fittings. Use a wrench to securely tighten the connections, but be careful not to overtighten and risk damaging the pipes or fittings. Apply Teflon tape or pipe joint compound to create a better seal if necessary.

Step 2: Replacing Faulty Valves

If the temperature and pressure relief valve or the drain valve is leaking, it’s best to replace the faulty valve with a new one. Turn off the power supply to the water heater and shut off the water supply before starting the replacement process. Follow the manufacturer’s instructions for proper installation and ensure that the new valve is compatible with your specific water heater model.

Step 3: Addressing Tank Leaks

If the water heater tank itself is leaking, unfortunately, repairing the leak may not be feasible. Water heater tanks are typically made of steel, which can corrode over time and develop leaks. In this case, the best course of action is to replace the entire water heater. Call a professional plumber who can help with selecting a suitable replacement and ensure proper installation.

Preventive Measures

While it’s not always possible to prevent water heater leaks, certain preventive measures can help minimize the risk. Consider implementing the following practices to keep your water heater in good working condition:

  • Perform regular maintenance, including flushing the tank to remove sediment buildup.
  • Monitor the pressure and temperature settings of your water heater and ensure they are within the recommended range.
  • Check for signs of corrosion or rust on the tank and promptly address any issues.
  • Periodically inspect the inlet/outlet connections, temperature and pressure relief valve, and drain valve for any signs of leakage.
  • Consider installing a drip pan underneath the water heater to catch any potential leaks and prevent water damage.

Conclusion

Water heater leaks are a common problem that homeowners may encounter. By promptly identifying the source of the leak and taking appropriate measures to fix the problem, you can prevent further damage and ensure the efficient functioning of your water heater. Regular maintenance and preventive measures can also help minimize the risk of future leaks. If you are unsure about troubleshooting or repairing your water heater, it is always recommended to seek the assistance of a professional plumber.

What to Do When Your Hot Water Heater Breaks

hot water heater breaks.

Having a hot water heater is essential for a comfortable and convenient lifestyle. It allows us to enjoy warm showers and clean dishes effectively. However, when your hot water heater breaks down, it can be a major inconvenience. Not only does it disrupt your daily routines, but it also leaves you without access to hot water.

In this article, we will explore the necessary steps to take when your hot water heater breaks down. By following these guidelines, you can minimize the inconvenience and get your hot water supply restored quickly.

Assess the Situation

When you discover that your hot water heater is not functioning properly, the first thing to do is to assess the situation. Try to identify the specific problem, which will help you determine the appropriate course of action. Common issues with hot water heaters include:

  • No hot water
  • Inadequate hot water supply
  • Strange noises
  • Leaking
  • Pilot light not staying on

Understanding the problem will give you a clearer idea of whether it is something you can fix yourself or if professional assistance is required.

Troubleshoot the Problem

Depending on the issue you have identified, there are various troubleshooting steps you can take to potentially resolve the problem on your own:

No Hot Water

If there is no hot water at all, the first thing to check is the power supply. Ensure that the circuit breaker for the hot water heater is switched on. If it is already on, try resetting the breaker by turning it off and then back on again. Additionally, check if the pilot light is lit. If not, you may need to relight it following the manufacturer’s instructions.

Inadequate Hot Water Supply

If you are not getting enough hot water, the thermostat settings might be incorrect. Check the thermostat on the hot water heater and adjust it to a higher temperature if necessary. However, be cautious not to set it too high, as it can be a safety hazard.

Another potential cause for inadequate hot water supply is sediment buildup in the tank. Over time, minerals and debris can accumulate, reducing the efficiency of your hot water heater. Consider flushing the tank to remove any sediment. Refer to the manufacturer’s instructions or seek professional guidance if needed.

Strange Noises

If your hot water heater is making unusual noises, such as popping or cracking sounds, it could be an indication of mineral buildup or a broken heating element. Flushing the tank may help resolve the issue if it is due to sediment. However, if the noises persist, it is advisable to contact a professional plumber to inspect and repair or fully replace the water heater.

Leaking

A leaking hot water heater requires immediate attention as it can lead to water damage and higher utility bills. First, turn off the power supply to the hot water heater and shut off the water supply valve. Place a bucket under the leak to collect any dripping water. To prevent further damage and potential flooding, contact a professional plumber to assess the situation and repair the leak.

Pilot Light Not Staying On

If the pilot light on your hot water heater keeps going out, it may be due to a faulty thermocouple. The thermocouple is a safety device that detects if the pilot light is functioning correctly. If it is not, the gas supply to the burner will be shut off. In this case, it is recommended to consult a professional technician who can replace the thermocouple for you.

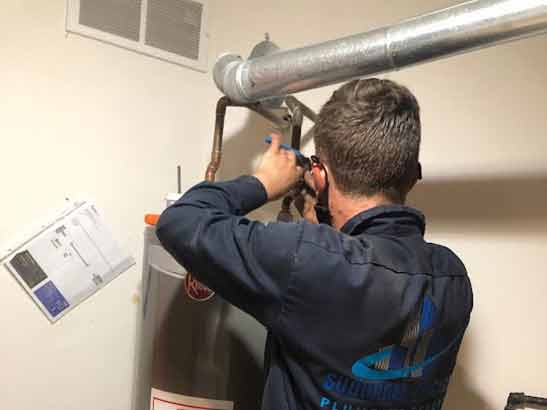
a professional plumber repairing a water heater.

Professional plumbers and technicians have the expertise, tools, and knowledge to diagnose and repair complex problems with hot water heaters.

Seek Professional Help

While troubleshooting the problem yourself can be effective for minor issues, there are situations where professional assistance is necessary. If you encounter any of the following scenarios, it is advisable to contact a licensed plumber or technician:

  • Gas leaks or smell of gas
  • Major leaks or flooding
  • Electrical issues or malfunctions
  • Problems with the gas burner or heating element
  • Faulty or damaged components

Professional plumbers and technicians have the expertise, tools, and knowledge to diagnose and repair complex problems with hot water heaters. They can ensure that the repair is performed safely and effectively, restoring your hot water supply in no time.

Consider Repair or Replacement

After assessing the situation and determining the cause of the problem, you need to consider whether to repair or replace your hot water heater. Factors to consider include:

  • The age of your hot water heater
  • The extent of the damage or malfunction
  • The cost of repair compared to the cost of a new unit
  • The energy efficiency of your current hot water heater

If your hot water heater is relatively new and the issue is minor, repairing it may be the most cost-effective choice. However, if the unit is old, experiencing frequent breakdowns, or has major issues, it may be more economical in the long run to replace it with a newer, more energy-efficient model.

Preventative Maintenance

Regular maintenance can help prolong the lifespan of your hot water heater and prevent unexpected breakdowns. Some essential maintenance tasks include:

  • Flushing the tank to remove sediment buildup
  • Inspecting and replacing the anode rod as needed
  • Testing the pressure relief valve
  • Checking and adjusting the thermostat settings
  • Removing debris from around the hot water heater

Furthermore, scheduling annual professional maintenance can ensure that your hot water heater is in optimal condition. A professional plumber nearby can inspect the unit, identify any potential issues, and perform necessary repairs or adjustments.

In Conclusion

Dealing with a broken hot water heater can be inconvenient, but by following the steps outlined in this article, you can minimize the disruption and quickly restore your hot water supply. Remember to assess the situation, troubleshoot the problem if possible, seek professional help from a plumber when needed, and consider repair or replacement options. Additionally, practicing preventative maintenance can reduce the likelihood of future breakdowns and extend the lifespan of your hot water heater. By taking proactive measures and addressing issues promptly, you can ensure a reliable hot water supply for your household.

What to Do When Your Water Heater Leaks

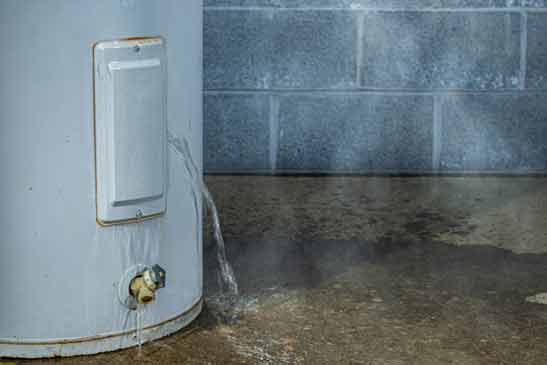
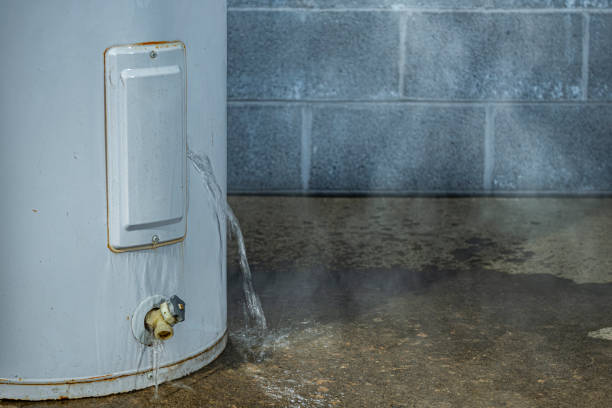
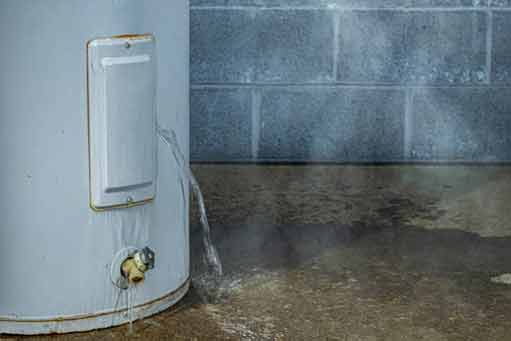
a leaking water heater in need of repair.

Water heaters are an essential appliance in any home, providing hot water for bathing, cooking, and cleaning. However, like any other appliance, they can develop problems over time. One of the most common issues that homeowners face with their water heaters is a leak. A leaking water heater can not only result in a significant amount of water wastage but can also cause damage to the surrounding area and even your home. If you discover that your water heater is leaking, it’s essential to take immediate action to prevent further damage and ensure the safety of your home and family.

Determine the Source of the Leak

The first step in dealing with a leaking water heater is to identify the source of the leak. This will help you understand the severity of the problem and determine if it’s something you can fix yourself or if you need to call a professional plumber. Here are some common areas where water heaters tend to leak:

  • Pressure Relief Valve: This valve is designed to release excess pressure in the tank. If it becomes faulty, it can cause water to leak.
  • Drain Valve: The drain valve is located at the bottom of the tank and is used to empty the tank for maintenance or repairs. If it’s loose or faulty, it can cause water to leak.
  • Corroded Tank: Over time, the tank can corrode, leading to small cracks or holes through which water can escape.
  • Connections: The fittings and connections around the water heater can become loose or damaged, resulting in leaks.

Shut Off the Power and Water Supply

Once you have identified the source of the leak, it’s crucial to shut off the power and water supply to the water heater to prevent any further damage. This will ensure your safety while you work to resolve the issue. Here’s how you can do it:

  • Electric Water Heater: Locate your electrical panel and turn off the circuit breaker that controls the water heater. If you have a gas water heater, turn the gas supply valve to the “off” position.
  • Water Supply Valve: Close the water supply valve located on the cold water inlet pipe. This will stop the flow of water into the tank.
turn off main water supply.

It’s crucial to shut off the power and water supply to the water heater to prevent any further damage

Addressing the Leaks

Depending on the source of the leak, you can take different approaches to address and fix the problem. Here are some steps you can take:

  • Pressure Relief Valve Leak: If the pressure relief valve is leaking, it may indicate that the pressure in the tank is too high. You can try releasing some water from the valve to see if it stops the leak. However, if the problem persists, you may need to replace the valve.
  • Drain Valve Leak: If the drain valve is leaking, check if it’s loose. You can try tightening it with a wrench. If that doesn’t solve the issue, you may need to replace the valve.
  • Corroded Tank: If the tank is corroded and causing leaks, it’s likely that you will need to replace the water heater entirely. Corrosion is a sign of significant damage, and repairing it may not be a long-term solution.
  • Connections: If the connections around the water heater are leaking, you can try tightening them with a wrench. However, if the leakage continues, it’s best to call a local plumber to examine the fittings and make any necessary repairs.

Preventive Measures

To avoid water heater leaks in the future, there are a few preventive measures you can take:

  • Regular Maintenance: Schedule yearly inspections with a professional who can check for any signs of wear and tear and perform necessary maintenance tasks.
  • Temperature and Pressure Monitoring: Keep an eye on the temperature and pressure settings of your water heater. Excessive pressure can lead to leaks, so ensure they are within the recommended range.
  • Replace Anode Rods: Anode rods are sacrificial rods that attract corrosive elements and protect the tank from rust. Over time, these rods can deteriorate, so it’s important to have them replaced as needed.
  • Consider a Water Softener: If you live in an area with hard water, the minerals in the water can contribute to the corrosion of your water heater. Installing a water softener can help minimize the impact of these minerals.
plumber replacing a water heater in chicago.

When in doubt, always seek the guidance of a professional plumber to ensure the safety and efficiency of your water heater.

When to Call a Professional

While you may be able to address some minor water heater leaks on your own, it’s crucial to know when to call a professional plumber. Here are some situations where professional assistance is recommended:

  • Major Leaks: If the leak is substantial or causes water to accumulate rapidly, it’s best to turn off the water supply and seek professional help immediately.
  • Gas Water Heater: If you have a gas water heater and you suspect a gas leak along with the water leak, evacuate your home and call a professional immediately.
  • No Hot Water: If your water heater is leaking and you’re experiencing a lack of hot water, it may be an indication of a more significant underlying issue that requires professional attention.
  • Not Comfortable Fixing It Yourself: If you don’t have the necessary tools, knowledge, or confidence to fix the issue yourself, it’s always better to rely on a plumber who can repair your water heater.

In Conclusion

Discovering a water heater leak can be a stressful situation, but by following the appropriate steps, you can effectively address the issue and minimize damage. Remember to shut off the power and water supply, determine the source of the leak, and take the necessary actions to fix the problem. Regular maintenance and preventive measures can also help prevent water heater leaks in the future. And, when in doubt, always seek the guidance of a professional plumber to ensure the safety and efficiency of your water heater.

What’s Wrong With My Water Heater?

a plumber fixing a broken water heater.

In every household, a water heater plays a crucial role in providing hot water for various needs such as showers, dishwashing, and laundry. However, when our water heater starts to malfunction, it can lead to inconveniences and disrupt our daily routines. Understanding the common problems that may arise with water heaters can help you diagnose the issue and determine the appropriate course of action. In this article, we will explore some of the most frequent issues encountered with water heaters and discuss possible solutions.

Lack of Hot Water

If you find yourself getting only cold water from your water heater, it indicates a problem that needs to be addressed. Several factors can lead to a lack of hot water:

  • The pilot light might be extinguished: Check if the pilot light is on. If it’s not, relight it following the manufacturer’s instructions.
  • A faulty thermocouple: The thermocouple is responsible for sensing if the pilot light is ignited. If it’s defective, it may shut off the gas supply. Consider replacing it.
  • A broken heating element or a malfunctioning thermostat: Electric water heaters use heating elements to warm the water. If they are damaged, they need to be replaced. Faulty thermostats can also prevent water from heating properly.

Strange Noises Coming from the Water Heater

If you hear unusual sounds coming from your water heater, it’s an indication that something is amiss:

  • Sediment buildup: Over time, minerals and sediments can accumulate inside the tank, causing rumbling or popping noises. Flushing the tank periodically can help prevent this issue.
  • A loose heating element: If you have an electric water heater, a loose heating element could create a humming or vibrating sound. Tightening or replacing the element may solve the problem.
  • A faulty expansion valve: The expansion valve is responsible for controlling the pressure inside the tank. A malfunctioning valve can result in a high-pitched whistling or hissing noise. Replacing the valve may be necessary.
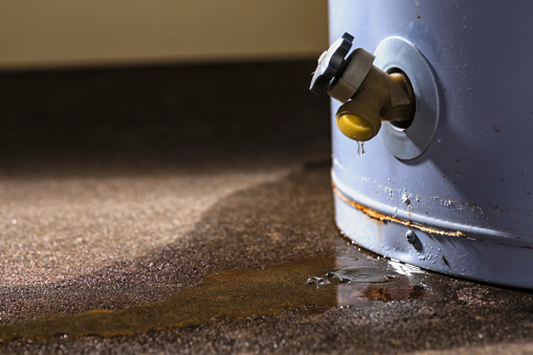
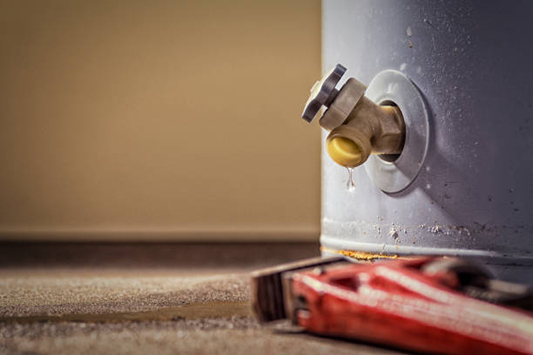
a leaking water heater.

he drain valve at the bottom of the tank is used for emptying or flushing. If it becomes loose or has a faulty seal, it can cause water to leak.

Water Leakage

Water leakage is a common issue in water heaters that requires prompt attention. The causes of leakage can include:

  • A faulty temperature and pressure relief valve: If this valve malfunctions, excess pressure can build up inside the tank, leading to leakage. Replacing the valve can resolve the problem.
  • A leaking drain valve: The drain valve at the bottom of the tank is used for emptying or flushing. If it becomes loose or has a faulty seal, it can cause water to leak. Tightening or replacing the valve may be necessary.
  • A crack or corrosion in the tank: In certain cases, the water heater tank itself may develop a crack or corrosion, resulting in leakage. Unfortunately, in such instances, replacing the entire water heater might be the only solution.

Discolored or Foul-Smelling Water

If you notice that the water coming from your water heater is discolored or has an unpleasant odor, you should address the issue immediately:

  • Sediment buildup: A high concentration of minerals and sediment in the water can cause discoloration. Flushing the tank can help resolve this problem.
  • Anode rod corrosion: The sacrificial anode rod in the water heater is designed to attract corrosive elements that would otherwise damage the tank. If the rod is fully depleted, the tank can begin to corrode, leading to foul-smelling water. Replacing the anode rod can fix this issue.
  • Bacterial growth: Sometimes, certain bacteria can thrive in the warm environment of a water heater, resulting in a musty or rotten egg smell. Flushing the tank with a hydrogen peroxide solution can help eliminate the bacteria.
a person experiencing low water pressure.

Accumulated sediment can clog the water lines, affecting the water pressure.

Inadequate Water Pressure

If your water heater isn’t providing sufficient water pressure, consider the following possibilities:

  • A restricting valve: Some water heaters have a valve that controls the flow of hot water. If it isn’t fully opened, it can affect the water pressure. Make sure the valve is completely open.
  • Sediment buildup: Accumulated sediment can clog the water lines, affecting the water pressure. Flushing the tank may help remove the sediment and improve the pressure.
  • A malfunctioning pressure regulator: If your home has a pressure regulator, it could be faulty, leading to low water pressure. Contact a plumber near you to inspect and replace the regulator if necessary.

Conclusion

Water heater problems can cause significant inconvenience, but many issues can be resolved with proper troubleshooting and maintenance. Regularly inspecting your water heater, performing maintenance tasks, such as flushing the tank, and promptly addressing any problems can help ensure the efficient and reliable operation of your water heater. However, if you are uncertain about the cause of the issue or feel uncomfortable performing repairs, it is always advisable to seek professional assistance from a local plumber.

Repair or Replace? Chicago Plumbing Experts’ Guide to Fixing Faulty Water Heaters

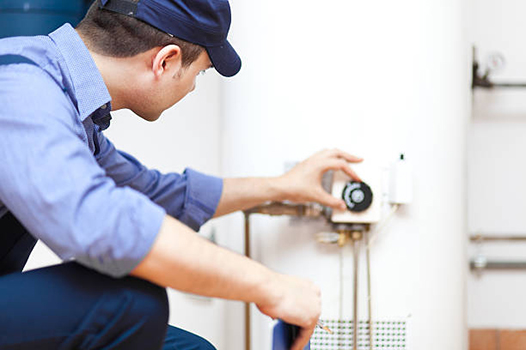
a plumber working on a water heater repair.

As a homeowner in Chicago, there are various plumbing issues you may face, one of which is a faulty water heater. A water heater is a critical appliance in your home that provides hot water for various uses, including bathing, laundry, and washing dishes, among others. When your water heater is not functioning correctly, you need to decide whether to repair it or replace it. In this plumbing expert guide, we explore the factors to consider when making the repair or replace decision for your water heater.

Assessing the Situation

Before deciding whether to repair or replace your water heater, you need to assess the situation accurately. Some of the essential factors to consider include the age and condition of the water heater, the extent of the damage, and the cost of repair compared to replacement.

Age and Condition of the Water Heater

As a rule of thumb, a typical water heater lasts for about ten years. However, the lifespan of your water heater may vary depending on various factors such as frequency of use, maintenance, and the quality of the water in your area. If your water heater is over ten years old, it may be time to replace it regardless of its current condition. In some cases, a well-maintained water heater can last beyond the ten-year mark, but it’s essential to have a local plumber assess its condition to determine whether it’s worth repairing or replacing.

Extent of the Damage

The extent of the damage on your water heater is another critical factor to consider when deciding whether to repair or replace it. Some issues may be minor and easily fixable, while others may require a complete replacement of the water heater. If the damage is minor, you may be able to repair it for an affordable cost. However, if the damage is severe, such as a leaking tank, you may need to replace the unit entirely.

plumber replacing a water heater in chicago.

If your water heater is not producing hot water, the issue may be due to a faulty heating element, thermostat, or gas valve. A plumber can diagnose the issue and determine whether repairing or replacing these components is necessary.

Cost of Repair vs. Replacement

The cost of repair versus replacement is another important consideration when deciding whether to repair or replace your water heater. In some cases, repairing your water heater may cost less than replacing it. However, if the repairs are costly or the unit is old and likely to fail again soon, a replacement may be a better option in the long run.

Common Water Heater Issues

To help you make an informed decision, it’s essential to know the common issues that cause your water heater to fail. Here are some of the most common problems you may encounter:

1. Lack of Hot Water

If your water heater is not producing hot water, the issue may be due to a faulty heating element, thermostat, or gas valve. A plumber can diagnose the issue and determine whether repairing or replacing these components is necessary.

2. Leakages

Leaks from your water heater can be due to various issues such as cracks, corrosion, or faulty fittings. If the leak is minor, a plumber may be able to repair the leak. However, if the damage is extensive, a replacement of the entire tank may be necessary.

3. Strange Noises

If your water heater makes strange noises such as popping or rumbling, it may be due to sediment buildup in the tank. A plumber can flush the tank to remove the sediment and prevent further damage to your water heater.

4. Inconsistent Water Temperature

Inconsistent water temperature can be a sign of a malfunctioning thermostat. A plumber can diagnose the issue and determine whether repairing or replacing the thermostat is necessary.

5. Discolored Water

If your hot water has a distinctive discoloration such as a rusty brown or yellow tint, it may be due to corrosion in your tank. A plumber can assess the situation and determine whether you need to replace your water heater tank altogether.

Conclusion

In conclusion, when faced with a faulty water heater, you need to assess the situation accurately before deciding whether to repair or replace it. Consider factors such as the age and condition of the water heater, extent of the damage, and cost of repair versus replacement. By knowing the common issues that cause water heaters to fail, you can make an informed decision that will ensure you have reliable hot water in your home. Remember to speak with a plumbing expert in Chicago whenever you encounter water heater problems to ensure the best solutions to any issue.

Can a Water Heater Tank Really Explode?

a plumber performing a water heater repair.

Water heaters are a common household appliance that most people take for granted. They provide hot water for cooking, cleaning, and bathing, among other things. However, they can be a source of danger if they are not properly maintained. One question that many people ask is whether their water heater tank can explode.

What Causes Water Heater Tanks to Explode?

Water heater tanks are designed to hold and heat water. They are made of heavy duty materials, such as steel or reinforced fiberglass, to withstand the high pressure and temperature of the water inside. However, over time, these tanks can develop cracks or other weaknesses that can lead to catastrophic failure.

One of the most common causes of water heater tank explosions is overheating. This can happen when the water temperature inside the tank rises above the maximum safe level. If the pressure relief valve fails to open and release the excess pressure, the tank can rupture.

Another potential cause of water heater tank explosions is sediment buildup. Over time, minerals and other debris can accumulate at the bottom of the tank. This can cause the tank to overheat and weaken, leading to a catastrophic failure.

How to Prevent Water Heater Tank Explosions

Fortunately, there are several steps you can take to prevent water heater tank explosions.

1. Regular Maintenance: One of the most important things you can do to prevent water heater tank explosions is to schedule regular maintenance. This includes flushing the tank to remove sediment buildup and checking the pressure relief valve to make sure it is functioning properly.

2. Temperature Control: It’s essential to control the temperature of the water inside the tank. Most water heaters have a thermostat that allows you to set the temperature. The recommended setting is usually around 120 degrees Fahrenheit.

3. Pressure Relief Valve: Make sure to test the pressure relief valve regularly to ensure that it is working correctly. This valve is designed to release excess pressure in the tank before it causes a catastrophic failure.

4. Professional Installation: It’s crucial to have your water heater installed by a licensed professional from the get go. They will be able to install the water heater correctly and ensure that it is up to code.

a professional plumber.

What to Do if Your Water Heater Tank Explodes

If your water heater tank does explode, it’s important to take immediate action to protect yourself and your home.

1. Turn Off the Water Supply: The first thing you should do is turn off the water supply to the tank. This will prevent the tank from continuing to fill with water and potentially causing additional damage.

2. Turn Off the Power Supply: If your water heater is electric, turn off the power supply at your circuit breaker. If it’s gas, turn off the gas supply valve.

3. Ventilate the Area: It’s essential to ventilate the area to prevent the buildup of hazardous gases. Open windows and doors if possible.

4. Call for Help: Call a licensed professional to assess the damage and determine what steps need to be taken to repair or replace your water heater.

Conclusion

In conclusion, while water heater tank explosions are rare, they can be very dangerous. The good news is that they can be prevented with proper maintenance and installation. Regular maintenance, temperature control, and testing the pressure relief valve are all essential steps to ensure that your water heater is functioning correctly. If your water heater does explode, take immediate action to protect yourself and your home. Turn off the water and power supply, ventilate the area, and call an emergency plumber for help.

Water Heater Flushing And Repairs – Why You Should Leave It To Plumbing Experts

a flushing of a water heater.

Water heaters are often taken for granted when it comes to home maintenance. You use them daily and they tend to work fine with little maintenance. However, it’s important to not ignore potential problems. If left unchecked, water heater repair issues will only get worse, resulting in a more expensive repair or even having to replace the water heater tank.

A professional water heater repair service can help you determine what issue you are having and have it fixed quickly and properly. Signs that your water heater needs maintenance include leaks around the base, a decrease in hot water due to a higher temperature setting than necessary, rust-colored water coming out of the tap, or a screeching sound coming from the heater. All of these signs could mean that you need to flush your water heater or even replace it.

Regular maintenance like water heater flushing is essential to ensure your water heater is running properly. An experienced technician can flush your water heater by using a garden hose to remove any sediment build-up from the bottom of the heater. This is recommended every few years, or sooner if you notice sediment build-up inside your tank.

When it comes to more detailed repairs, like replacing the heater’s control panel, venting system, or anode rod, an experienced technician with the proper tools and know-how can help make sure these repairs are done correctly. An experienced local plumber will also know exactly how to adjust or replace the temperature and pressure relief valve to meet local code requirements.

DIY Water Heater Repair

Although it may be tempting to try to repair your water heater yourself, there are numerous reasons that a home-owner should leave it to the professionals.

Water heaters can be complicated to repair and if not done correctly, DIY repairs could make the problem worse or cause more damage. Not having the right tools or knowledge can result in costly repairs down the line or worse, injury or electrocution. Fixing the water heater on your own could also void the warranty and cost you more in the long run.

If you do decide to try repair it yourself, make sure you are well-informed before beginning any repair or maintenance. Check the manufacturer’s website and make sure you have the right tools and parts to make the repair. It’s always best to turn off the power to the heater before completing any repair and take all necessary safety precautions.

Water Heater Flushing

Water Heater flushing is an important water heater maintenance task that should be done regularly. If left unchecked, sediment and minerals can build-up in the tank and reduce its efficiency. It can also damage the heater over time and make repairs more costly.

Flushing a water heater is relatively simple and can be done with a garden hose. However, if you notice an increase in sediment or mineral build-up, then it’s best to call in a professional. An experienced plumber can flush the system and help diagnose any other maintenance issues you might be having.

Regular water heater maintenance, including flushing and cleaning, can help prevent costly repairs or replacements down the line and keep your water heater running optimally.

In conclusion, water heaters require regular maintenance and repairs to ensure they are running correctly and efficiently. Flushing and cleaning should be done regularly and any potential issues should be addressed right away to avoid more costly repairs. If you have questions or need professional help, it’s best to call a plumber as they are experienced with all aspects of water heater repair and maintenance.