 `
`
Discovering a leak in your water heater can be a cause for concern, but don’t panic. Below we will provide you with clear and concise instructions to help you address the issue and potentially prevent further damage. Whether you are a seasoned DIY enthusiast or a first time homeowner, our guide is designed to assist you in resolving this common household problem.
Understanding the Problem
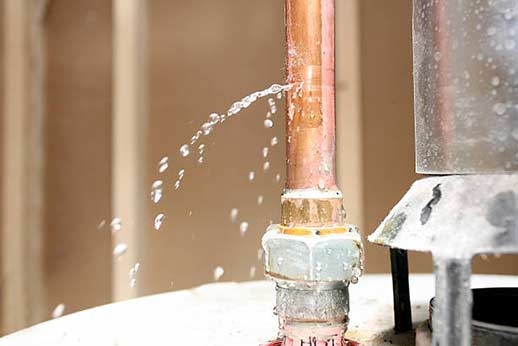
Before we get into into the steps, let’s take a moment to understand why your water heater may be leaking from the top. The top of a water heater is typically the location where the hot water exit pipe and the cold water inlet pipe are connected to the unit. A leak in this area can indicate a few potential issues:
- Pressure Relief Valve: The pressure relief valve may be malfunctioning or experiencing excess pressure, causing it to leak.
- Temperature and Pressure Relief Valve: The temperature and pressure relief valve (T&P valve) could be releasing water due to high temperatures or pressure within the water heater.
- Loose Connections: The connections between pipes and the top of the water heater may have become loose over time, resulting in a leak.
- Corrosion: Corrosion can weaken the top of the water heater, leading to leaks.
Step 1: Turn off the Power
The first step when dealing with any issue related to your water heater is to turn off the power supply. This is crucial for your safety and to prevent any potential accidents. Locate the circuit breaker or switch that controls the electricity to the water heater and switch it off. If your water heater is gas-powered, turn off the gas supply.
Step 2: Shut off the Cold Water Supply
Once the power is turned off, locate the cold water supply valve connected to your water heater. This valve should be located on the top or side of the unit. Turn the valve clockwise (to the right) to shut off the water supply.
Step 3: Release Pressure From the Temperature and Pressure Relief Valve
The next step is to relieve the pressure from the temperature and pressure relief valve (T&P valve). This valve is usually located on the side or top of the water heater. Place a bucket or a container beneath the T&P valve to catch any water that may be released. Carefully lift the valve’s lever to open it and allow the pressure to release. If water flows out continuously or doesn’t stop after releasing the lever, it is advisable to contact a professional plumber.
Step 4: Inspect and Tighten Loose Connections
After relieving the pressure, inspect the connections at the top of your water heater. Check for any visible signs of leaks and make sure all connections are secure. If you notice any loose connections, use a wrench or pliers to tighten them. Be cautious not to overtighten, as it may lead to further damage or leaks.
Step 5: Check the Pressure Relief Valve
If you suspect that the pressure relief valve is the source of the leak, it may need to be replaced. However, before replacing it, it is worth testing it to ensure it is functioning correctly. Consult your water heater’s manual for instructions specific to your model. In general, testing the pressure relief valve involves the following steps:
- Place a bucket or container beneath the valve to catch any water that may be released.
- Lift the valve’s lever partially to allow some water to flow out and relieve pressure.
- If water continues to flow once you release the lever or the valve doesn’t seal properly afterward, it is recommended to replace the pressure relief valve.
Step 6: Assess for Corrosion
If all previous steps have been completed and the leak persists, it is possible that corrosion has caused the issue. Carefully inspect the top of your water heater for signs of rust or corrosion. If corrosion is present and causing the leak, it may be necessary to reach out to a professional plumber to evaluate the extent of the damage and recommend appropriate solutions.
Step 7: Contact a Professional Plumber
If you have followed all the steps in this guide and the leak from the top of your water heater continues, it is advisable to contact a local plumber. They have the knowledge, skills, and equipment to diagnose the problem accurately and provide the most effective and long-lasting solution.
Preventative Measures
To avoid potential leaks and prolong the lifespan of your water heater, consider the following preventative measures:
- Regular Maintenance: Schedule annual maintenance for your water heater, including inspections, flushing, and testing of pressure relief valves.
- Temperature and Pressure Monitoring: Keep an eye on the temperature and pressure gauge of your water heater. If they consistently exceed recommended levels, it may indicate an underlying issue.
- Water Quality: Ensure your water heater is filled with good quality water. Consider installing a water softener or filter if your water supply has high mineral content.
Summing it Up
Dealing with a leaking water heater can be a stressful situation, but with the right knowledge and steps, you can address the issue effectively. Remember to prioritize your safety, turn off the power and water supply, and assess the potential causes of the leak. While certain problems can be resolved through DIY methods, don’t hesitate to seek help from a plumber if a water heater replacement is needed. By following our step-by-step guide and implementing preventative measures, you can minimize the chances of future leaks and maintain the efficiency of your water heater for years to come.