Tag Archives: toilet repair

How to Fix a Leaking Toilet in Chicago: A Step-by-Step Guide

a leaking toilet in chicago.

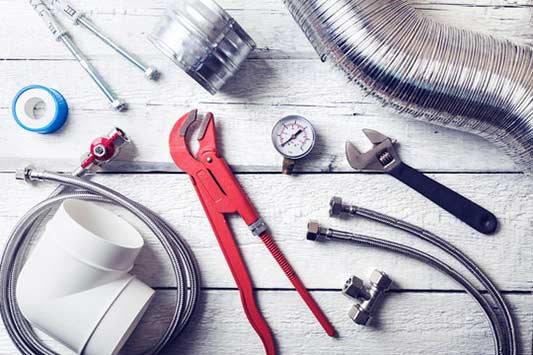
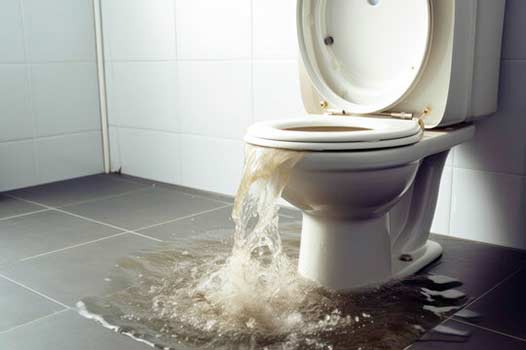
Dealing with a leaking toilet can be quite frustrating, but with the right tools and guidance, you can tackle this issue effectively. Whether you are a homeowner in Chicago or a tenant, this guide will provide you with the necessary instructions to resolve the problem and prevent further damage.

Step 1: Identify the Source of the Leak

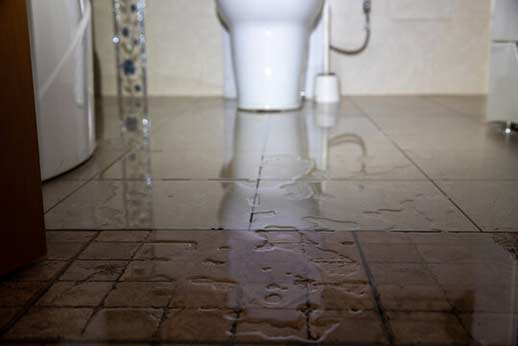
The first step in fixing a leaking toilet is to identify the source of the leak. Leaks can occur from various areas of the toilet, such as the base, the tank, or the supply line. It is crucial to pinpoint the exact location of the leak before proceeding with the repair.

Step 2: Shut Off the Water Supply

Before attempting any repairs, it is essential to turn off the water supply to the toilet. Locate the shut-off valve, typically located behind the toilet or near the bathroom pipes. Rotate the valve clockwise until the water stops running. This will prevent water from flowing into the toilet during the repair process.

Step 3: Drain the Toilet Tank

Once the water supply is turned off, you need to drain the toilet tank. Flush the toilet to remove as much water as possible from the tank. To eliminate any remaining water, use a sponge or a towel to soak up the excess moisture.

Step 4: Inspect and Replace the Flapper

The flapper is a rubber valve located at the bottom of the toilet tank. A faulty flapper is a common cause of leaks. Carefully inspect the flapper for any signs of damage or wear. If it appears worn out or is not sealing properly, it needs to be replaced. To replace the flapper:

  1. Turn off the water supply to the toilet.
  2. Remove the chain from the flush lever.
  3. Detach the old flapper from the flush valve.
  4. Install the new flapper by attaching it securely to the flush valve.
  5. Reconnect the chain to the flush lever.
  6. Turn on the water supply and test the toilet for leaks.
toilet wax ring replacement in chicago.

Replacing the wax ring can help create a watertight seal between the toilet and the sewer pipe.

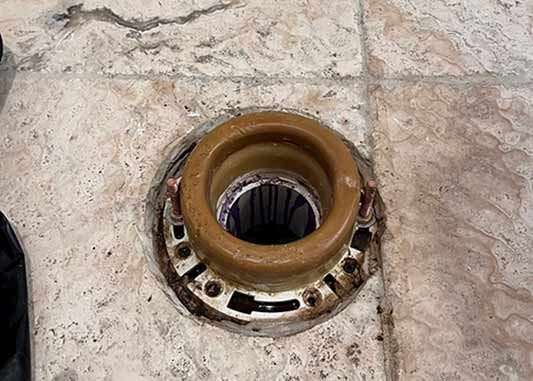
Step 5: Check and Replace the Wax Ring

If the leak is coming from the base of the toilet, the wax ring may be damaged or worn out. Replacing the wax ring can help create a watertight seal between the toilet and the sewer pipe. Follow these steps to replace the wax ring:

  1. Turn off the water supply to the toilet.
  2. Drain the toilet tank as described in Step 3.
  3. Disconnect the water supply line from the bottom of the toilet tank.
  4. Remove the nuts securing the toilet to the floor.
  5. Lift the toilet carefully and set it aside.
  6. Scrape off the old wax ring from the toilet flange and inspect it for any signs of damage.
  7. Place a new wax ring on the flange, ensuring it is centered.
  8. Lower the toilet back onto the wax ring, aligning the bolts with the holes in the base.
  9. Tighten the nuts onto the bolts to secure the toilet in place.
  10. Reconnect the water supply line to the bottom of the toilet tank.
  11. Turn on the water supply and check for leaks.

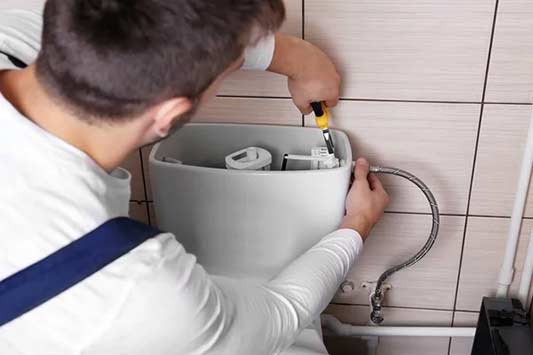
Step 6: Examine and Repair the Supply Line

If the leak is originating from the supply line, it may require examination and repair. Follow these steps to address any issues with the supply line:

  1. Turn off the water supply to the toilet.
  2. Drain the toilet tank as described in Step 3.
  3. Inspect the supply line for any visible leaks or damages.
  4. If there is a leak in the supply line, it needs to be replaced.
  5. Disconnect the old supply line from both the toilet tank and the shut-off valve.
  6. Install a new supply line by connecting it firmly to the shut-off valve and the toilet tank.
  7. Turn on the water supply and check for leaks.
toilet water supply line.

If the leak is originating from the supply line, it may require examination and repair.

Step 7: Test for Leaks

After completing the necessary repairs, it is essential to test the toilet for any remaining leaks. Turn on the water supply and observe the toilet for any signs of water leakage. Inspect the base, the tank, and the supply line thoroughly. If any leaks persist, review the previous steps to ensure all repairs were performed correctly.

Summing it Up

Fixing a leaking toilet in Chicago requires a systematic approach to identify and resolve the issue. By following the step-by-step guide provided above, you can effectively fix the leak and prevent further damage to your toilet and property. Remember to exercise caution during the repair process and seek professional plumbing assistance if needed. With proper maintenance and prompt repairs, you can ensure the longevity and functionality of your toilet in Chicago.

How to Fix a Leaking Shut-Off Valve on Your Toilet

a person fixing a leaking shut off valve on their toilet.

Having a leaking shut-off valve on your toilet can be quite a nuisance. Not only does it waste water, but it can also cause damage to your bathroom floor if left unattended. Fortunately, fixing a leaking shut-off valve on your toilet is a relatively simple task that can be done by most homeowners. In this article, we will guide you through the step-by-step process of fixing a leaking shut-off valve on your toilet, ensuring that you can tackle this common plumbing issue with ease.

Understanding the Shut-Off Valve

Before we delve into the steps for fixing a leaking shut-off valve on your toilet, it’s important to understand what a shut-off valve is and how it works. A shut-off valve is typically located near the base of the toilet and is used to control the flow of water to the tank. When the valve is in the open position, water flows freely into the tank, allowing the toilet to flush. When the valve is closed, water flow is stopped, preventing water from entering the tank.

When a shut-off valve leaks, it means that water is seeping through the valve even when it is closed. This can be caused by a variety of factors, including worn-out washers, loose connections, or a faulty valve body. By following the steps outlined below, you will be able to identify and fix the cause of the leak, ensuring that your shut-off valve functions properly.

Gather the Necessary Tools and Materials

Before you start working on fixing the leaking shut-off valve on your toilet, it’s important to gather all the necessary tools and materials. These may include:

  • Adjustable wrench
  • Slip-joint pliers
  • Replacement washers
  • Teflon tape
  • Bucket or towel

Make sure to have these items readily available before you begin the repair process. This will save you time and prevent any potential frustration of having to search for tools or materials midway through the project.

plumbing tools for repairing a toilet shut off valve.

Before you start working on fixing the leaking shut-off valve on your toilet, it’s important to gather all the necessary tools and materials.

Step 1: Turn off the Water Supply

The first step in fixing a leaking shut-off valve is to turn off the water supply to your toilet. Look for the main water shut-off valve located near your water meter and turn it clockwise until it is fully closed. This will stop the flow of water to your toilet and prevent any water from leaking during the repair process.

Step 2: Empty the Toilet Tank

Once you have turned off the water supply, flush your toilet to empty the tank and remove any remaining water. This will allow you to work on the shut-off valve without the risk of water spilling or causing any further damage.

Step 3: Inspect the Shut-Off Valve

With the water supply turned off and the toilet tank emptied, you can now inspect the shut-off valve for any visible signs of damage or wear. Check for any loose connections, cracks, or corrosion that may be causing the leak. If you notice any severe damage, it may be necessary to replace the entire shut-off valve.

Step 4: Tighten Loose Connections

If the shut-off valve appears to be in good condition, but you still notice a leak, it is possible that the leak is being caused by loose connections. Use an adjustable wrench or slip-joint pliers to tighten any loose nuts or connections. Be careful not to overtighten, as this can cause further damage.

Step 5: Replace the Washer

If tightening the connections does not resolve the leak, it is likely that the washer inside the shut-off valve is worn out or damaged. To replace the washer, follow these steps:

  • Using an adjustable wrench, hold the shut-off valve body steady.
  • Using slip-joint pliers, unscrew the packing nut located just below the handle of the shut-off valve.
  • Once the packing nut is removed, you will be able to access the washer inside the valve.
  • Remove the old washer and replace it with a new one of the same size.
  • Reassemble the shut-off valve by screwing the packing nut back in place.

Step 6: Apply Teflon Tape

To ensure a watertight seal, apply Teflon tape to the threads of the shut-off valve where it connects to the toilet tank. This will help prevent any potential leaks in the future. Wrap the Teflon tape clockwise around the threads several times, ensuring a snug fit.

Step 7: Test for Leaks

Once you have completed the repair process, it’s important to test the shut-off valve for any remaining leaks. Turn the water supply back on and observe the shut-off valve for any signs of water seepage. If you notice any leaks, repeat the steps above to identify and fix the issue.

To Wrap It Up

Fixing a leaking shut-off valve on your toilet is a relatively straightforward process that can be done by most homeowners. By following the step-by-step guide outlined in this article, you will be able to identify the cause of the leak and repair it effectively. Remember to always turn off the water supply before starting any repair work, and gather all the necessary tools and materials beforehand to ensure a smooth and hassle-free experience. With a properly functioning shut-off valve, you can rest assured that your toilet will operate efficiently and without any leaks.

How Do I Stop My Toilet From Overflowing?

an overflowing toilet in need of repair.

Dealing with a toilet that is overflowing can be a stressful situation. Not only is it messy and unpleasant, but it can also cause damage to your bathroom and potentially lead to water damage in your home. Knowing how to stop a toilet from overflowing and taking immediate action can help prevent further damage. Below we will discuss the common causes of toilet overflow and provide step-by-step instructions on how to stop it.

Understanding the Causes

Before we dive into the solutions, it’s essential to understand the common causes of toilet overflow. By identifying the root cause, you can better address the issue and prevent it from happening in the future.

  • Clogged Toilet: The most common reason for a toilet overflow is a clog. When waste and toilet paper accumulate in the pipes, it can cause a blockage that prevents the water from draining properly. As a result, the bowl may overflow when flushed.
  • Malfunctioning Float: The float is a device inside the toilet tank that regulates the water level. If it is not functioning correctly, it may allow the tank to fill excessively, leading to an overflow.
  • Sewer Line Issues: Another possible cause of a toilet overflow is a problem with the main sewer line. If the sewer line is blocked or damaged, it can cause water to back up into your toilet and overflow.

Steps to Stop a Toilet From Overflowing

Now that we have a better understanding of the causes, let’s explore the step-by-step process to stop a toilet from overflowing. Following these instructions can help mitigate the issue quickly and effectively.

Step 1: Turn Off the Water Supply

The first step is to prevent more water from entering the toilet bowl. Locate the water supply valve behind the toilet or beneath the tank. Turn the valve clockwise to shut off the water supply. This will help minimize the amount of water that can overflow.

Step 2: Remove the Tank Lid

Next, remove the lid from the toilet tank. You may need to lift it straight up or unscrew it, depending on the type of toilet you have. Set the lid aside in a safe place to avoid any accidental damage.

Step 3: Check the Float

Inspect the float inside the toilet tank. Ensure that it is functioning correctly and not sticking in the upward position. Gently press the float down to see if it moves freely. If it is faulty or stuck, it may need to be adjusted or replaced. Calling a professional plumber nearby might be necessary to fix this issue.

Step 4: Clear the Clog

If you suspect that a clog is causing the overflow, you’ll need to clear it. There are a few methods you can try to remove the blockage:

  • Plunger: Use a toilet plunger to create suction and dislodge the clog. Place the plunger over the drain hole and push down firmly. Then, vigorously pump the plunger up and down to create suction. Repeat this process several times until the water starts to drain.
  • Plumbing Snake: If the plunger fails to clear the clog, you can try using a plumbing snake. Insert the snake into the toilet drain and twist it while pushing it forward. This can help break up and remove the obstruction.
  • Enzyme-based Cleaner: Alternatively, you may use an enzyme-based cleaner specifically designed for clearing toilet clogs. Follow the instructions on the product for the best results.

Step 5: Clean Up the Excess Water

If the toilet has overflowed, it’s crucial to clean up the excess water promptly. Use towels or a mop to soak up the water from the floor. Wearing protective gloves is recommended to avoid any potential contact with bacteria.

Step 6: Test the Toilet

After the water is cleaned up and any clogs are cleared, turn the water supply back on by turning the valve counterclockwise. Allow the tank to refill, and then flush the toilet to test if the issue has been resolved. If the toilet flushes normally without overflowing, you have successfully stopped the overflow.

bathroom garbage bin.

Provide a garbage bin in your bathroom for disposing of non-flushable items properly.

Preventing Toilet Overflows

While it’s essential to know how to stop a toilet from overflowing, taking preventative measures can help avoid such situations altogether. Here are some tips to prevent future toilet overflows:

  • Watch What You Flush: Only flush toilet paper and waste down the toilet. Avoid flushing items such as facial tissues, wet wipes, or feminine hygiene products, as they can easily cause clogs.
  • Maintain the Plumbing: Regularly inspect and maintain your plumbing system. Address any leaks, clogs, or malfunctioning components promptly to prevent major issues.
  • Use a Garbage Bin: Provide a garbage bin in your bathroom for disposing of non-flushable items properly.

In Summary

Dealing with a toilet overflow can be a frustrating experience, but by following the steps outlined in this article, you can effectively stop the overflow and prevent further damage. Remember, the key is to act quickly to minimize water damage and attend to any issues that may have caused the overflow. By understanding the common causes and taking preventative measures, you can maintain a functioning and trouble-free toilet system in your home.

How to Fix a Leaking Toilet Base: A Complete Guide

fix leaking toilet base.

Toilets are an essential part of every household, providing convenience and hygiene. However, a leaking toilet base can be a frustrating and potentially costly problem. Ignoring a leaking toilet can lead to water damage, mold growth, and increased water bills. In this comprehensive guide, we will walk you through step-by-step on how to fix a leaking toilet base.

1. Identify the Source of the Leak

The first step in fixing a leaking toilet base is to identify the source of the leak. There are several potential causes, including:

  • Wax ring deterioration
  • Loose or damaged toilet bolts
  • Cracked toilet base
  • Incorrect toilet installation

To determine the cause, carefully inspect the area around the toilet base for any signs of water pooling or dampness. Additionally, check for any cracks or looseness in the toilet itself.

2. Turn Off the Water Supply

Before attempting any repairs, it is crucial to turn off the water supply to the toilet. Locate the shut-off valve, usually located near the base of the toilet or on the wall behind it, and turn it clockwise until it is fully closed. Flush the toilet to drain any remaining water from the tank and bowl.

3. Remove the Toilet

In order to access and repair the leaking toilet base, you will need to remove the toilet. Follow these steps:

  • Disconnect the water supply line from the bottom of the toilet tank.
  • Remove the nuts from the toilet bolts securing the toilet base to the floor.
  • Gently rock the toilet back and forth to break the wax seal and lift it off the floor.
  • Place the toilet on a towel or old newspaper to prevent any water or debris from spreading.
a toilet wax ring replacement.

A common cause of a leaking toilet base is a deteriorated wax ring. The wax ring creates a watertight seal between the toilet base and the floor.

4. Replace the Wax Ring

A common cause of a leaking toilet base is a deteriorated wax ring. The wax ring creates a watertight seal between the toilet base and the floor. To replace the wax ring:

  • Remove the old wax ring from both the toilet base and the flange on the floor.
  • Clean the flange and the toilet base thoroughly.
  • Place the new wax ring onto the flange, ensuring a snug fit.
  • Carefully lower the toilet onto the wax ring, aligning the toilet bolts with the mounting holes.
  • Press down firmly to compress the wax ring and create a proper seal.
  • Tighten the toilet bolts, being careful not to overtighten and crack the toilet.

5. Inspect and Repair Toilet Bolts and Base

Examine the toilet bolts and the base itself for any signs of damage or looseness. If the bolts are loose or damaged, replace them with new ones. If the toilet base is cracked or damaged, it may need to be replaced. Consult a nearby plumber if necessary.

6. Reinstall the Toilet

Once you have replaced the wax ring and addressed any issues with the toilet bolts or base, it is time to reinstall the toilet.

  • Lower the toilet back onto the flange, aligning the bolts with the mounting holes.
  • Apply downward pressure to compress the wax ring and create a tight seal.
  • Replace the nuts onto the toilet bolts and tighten them until snug.
  • Reconnect the water supply line to the bottom of the toilet tank.
  • Turn on the water supply and allow the tank to refill.
a plumber testing for any toilet leaks.

Once you have replaced the wax ring and addressed any issues with the toilet bolts or base, it is time to reinstall the toilet.

7. Test for Leaks

After reinstalling the toilet, it is essential to test for any remaining leaks. Flush the toilet and carefully inspect the area around the base for any signs of water seeping out. If you notice any leaks, repeat the necessary steps to ensure a proper seal.

Conclusion

Fixing a leaking toilet base is a manageable task with the right tools and guidance. By following the steps outlined in this complete guide, you can successfully repair a leaking toilet base, preventing further damage and ensuring the continued functionality of your bathroom. However, if you encounter any difficulties or are unsure about any step, it is recommended to seek the assistance of a local plumber for expert advice and assistance.

How Often Should a Wax Ring Be Replaced on Your Toilet?

toilet wax ring replacement.

Hello there homeowners of the world, today we are going to tackle an important and perhaps less-glamorous topic when it comes to maintaining our home – how often should a wax ring be replaced on your toilet?

Yes, we know the thought of replacing a wax ring can be daunting, but we promise to keep it light and informative. So, buckle up and let’s get started.

What is a Wax Ring?

Before we dive into the timeline of when to replace a wax ring, let’s first understand what a wax ring is. A wax ring is a round piece of wax or a wax-like material that is installed between the base of your toilet and the flange on your bathroom floor.

Wax rings help create an airtight and watertight seal, preventing any unpleasant odors and potential water damage from seeping through and ruining your floor. So you see, a wax ring is like the superhero for your bathroom.

How Often Should a Wax Ring Be Replaced?

Now, the million-dollar question, how often should a wax ring be replaced? Well, there are a few things to consider when answering this question.

First, you should consider the age of your current wax ring. If you just moved into a new home, it’s always a good idea to check the age of the wax ring to see if it’s due for a replacement.

Second, you should consider the frequency of use of the toilet. If you have a large family with frequent guests, your toilet may be getting more use than the average household. In that case, you may need to replace the wax ring more frequently than others.

Lastly, you should consider any signs of wear and tear on the current wax ring. If you notice any water damage, odors, or simply a loose toilet, it may be time to replace the wax ring.

As a general rule of thumb, it’s recommended to replace the wax ring every 3-5 years. This ensures that the seal remains tight and helps prevent any unexpected leaks or water damage.

replace wax ring on toilet.

Replacing a wax ring may sound daunting, but it’s actually a simple process that can be done with a few basic tools.

How to Replace a Wax Ring?

Replacing a wax ring may sound daunting, but it’s actually a simple process that can be done with a few basic tools. Here’s a step-by-step guide to help you out:

1. Turn off the water supply to the toilet and flush the toilet to empty out any remaining water in the bowl and tank.

2. Remove the nuts and bolts that secure the toilet to the floor.

3. Gently rock the toilet to break the seal of the old wax ring.

4. Lift the toilet and set it down on its side on a towel or paper.

5. Use a scraper to remove any remaining wax from the flange and the base of the toilet.

6. Place the new wax ring onto the flange, making sure it is centered.

7. Carefully lower the toilet onto the wax ring, lining up the bolts with the holes in the flange.

8. Tighten the nuts and bolts, making sure not to over-tighten and crack the base of the toilet.

9. Reconnect the water supply and turn on the water.

10. Flush the toilet to ensure there are no leaks.

Voila! You have successfully changed the wax ring on your toilet.

In Conclusion

Well, there you have it, folks. A comprehensive guide to understanding how often a wax ring should be replaced on your toilet. Remember, a small amount of prevention is always better than repairing or resolving the issue later on.

If you’re feeling a bit hesitant about replacing the wax ring yourself, don’t be afraid to call in a local plumber. Trust us, your bathroom will thank you in the long run.

In any case, we hope you found this article informative and perhaps even entertaining. Until next time, happy flushing!

Reasons Why Your Toilet Keeps Clogging

Reasons Why Your Toilet Keeps Clogging

The bathroom is a high-traffic area in any establishment. If there are issues with your bathroom plumbing system, it can affect the whole functionality and comfort of the room. 

A toilet isn’t just an amenity; it’s a necessity. When the bathroom is experiencing problems, it’s essential to find the cause and repair it as quickly as possible. If no amount of flushing clears the issue, then there might be a more significant issue. It’s also possible that your routine is interfering with the functionality of your toilet.  

A recurring toilet issue may be caused by flushing foreign objects, the toilet, or the plumbing system. If you have chronic problems with your toilet, it may be due to one of the following issues:  

Older Low Flow Toilets   

Many older products do not perform as well in modern times. To address this need, manufacturing companies continue to innovate by producing new designs or adding features to their existing lineup. Whether designing a new high-efficiency toilet or adding new features to roof hatches, the manufacturing world continues to adapt to the changing needs of the modern world. 

If your building still has early model low-flow toilets, this may be the problem. Older low-flow toilets do not have enough pressure to push through the trap and drain. Weak flushing pressure can leave some material behind, which causes clogs. Sometimes, you need to fully open the supply valve so that there is enough water in the toilet tank, and the pressure can then clear the bowl. Check for leaks in the waterline and cracks in the fill valve and replace these if you notice they are worn. 

 To fix this, replacing your old low-flow toilet with a new model with high flush pressure is a sure-fire way to eliminate constant clogs. In the meantime, decrease the amount of toilet paper that’s flushed. 

Flushing Non-Flushable Items  

Using the toilet to dispose of non-flushable items is also a leading cause of clogs. You should never flush baby wipes, cotton balls, diapers, or other hygiene products down the toilet. Otherwise, drain clogs will form, and you will need to call a local plumber to deal with the situation. 

Excessive Use of Toilet Paper

Although it is safe to flush away toilet paper, using too much will clog the drain. Excess toilet paper or some two or three-ply varieties won’t dissolve and will stick in the pipes.  

Clogged Sewer Line  

In some cases, there is no issue with your plumbing fixtures or individual drain lines; instead, the problem is with the main sewer line. Clogs in the sewer line are a hassle because they can impact the drainage and plumbing system’s ability to move waste, causing problems across your entire property. When this happens, you will need to call a plumbing or drain cleaning service plumber to address outside factors, such as tree root penetrations, sewer line infiltrations, or breaks in the sewer line.

 By following these simple suggestions, you can keep your toilets and plumbing systems in good working order, so you don’t have to keep calling your plumber for repairs.