Tag Archives: sump pump maintenance

How to Extend the Life of your Sump Pump

How to Extend the Life of your Sump Pump

Wondering how to extend the life of your sump pump? Sump pumps are a lifesaver for homes where flooding is an ever-present threat. According to Howzer Management they relieve the homeowner of the need to constantly watch their home to protect it from flooding and water damage. That is because sump pumps do their work without requiring any form of action by the owner.

Yet despite this, it is not uncommon for homeowners to wake up in the middle of the night and find themselves standing in inches of floodwater in their basement due to sump pump failure. Incidents like this happen when a sump pump somehow malfunctions, but the owner is unaware of it until flooding occurs.

Even though they have a self-starting mechanism that allows them automatically detect water in the home’s basement and remove it, sump pumps still need to be cared for. The homeowner’s failure to recognize this fact often results in unpleasant surprises with a sump pump.

Sump pump failures are an entirely avoidable problem. The steps needed to keep the sump pump in your home operational do not take time or cost more money. Proper sump pump maintenance will save you money by prolonging the life of your sump pump.

How to extend the life of your sump pump

Correct installation of the sump pump

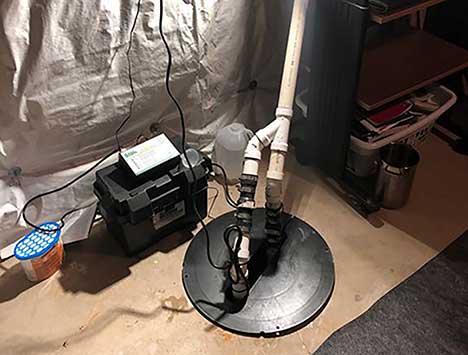
From the outset, the longevity and overall efficiency of your sump pump are predetermined by the expertise of the person who installed it. A sump pump system depends on a variety of factors to work properly. Some of the components of the system include a sump basin, discharge pipe with valves, vent systems and the pump itself. Errors in the installation of the individual components can impair the function of the sump pump and shorten its life.

a plumber adjusting proper voltage.

Use the right working voltage

The sump pump is more likely to fail if the working voltage is unstable or outside its specified range. All sump pumps have a rated voltage with an allowance of plus or minus 10% of that working range. If a pump is connected to voltage outside the recommended range, it will not work optimally and may even burn. That is particularly important when using generators with a sump pump.

Cleaning the sump pump

Before it enters the sump pump system, floodwater often flows over bare soil, picking up so much debris. The result is that the water is loaded with sediments and other impurities when it finally reaches the sump basin. These materials are either deposited at the bottom of the sump basin or inside the sump pump itself. If you do not clean the basin and pump, this dirt will impede the sump pump’s function or even cause it to break down.

Make sure the pump is level

Another common reason for premature sump pump failure is when a pump is off-kilter. The first reason why this happens is when the sump pit is not level, perhaps because the basin was not constructed by an expert. The second reason is when the pump is moved out of place by its vibrations. If the sump pump doesn’t sit level, its float arm may not work as it should. Always maintain your sump pump level to keep the float arm from getting jammed.

Avoid overloading the sump pump

The capacity of a sump pump should be carefully matched to the volume of water that typically enters the basement. If the motor is forced to pump more water than it is designed to, especially during the wet season when floods are heavy and frequent, it can overwork and break down. If the flooding issues in a basement are severe, more than one pump may be needed.

a sump pump after having discharge line cleaned.

Clean the discharge lines

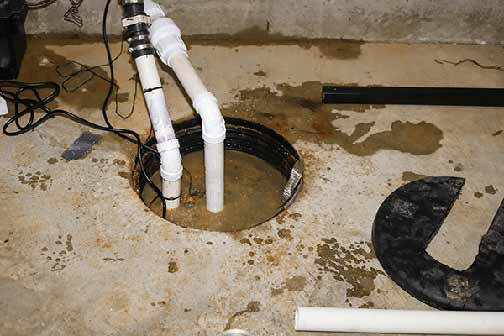
A sump pump is effective to the extent that its discharge lines are clear. If the discharge lines are clogged or frozen, the water coming from the sump pump will have nowhere to go. To protect your sump pump, it is vital to make sure rodents do not make their home inside the pipes. Remove any debris inside the discharge line. In winter, the pipes should not be allowed to freeze as it may cause a burst pipe emergency.

Test the pump

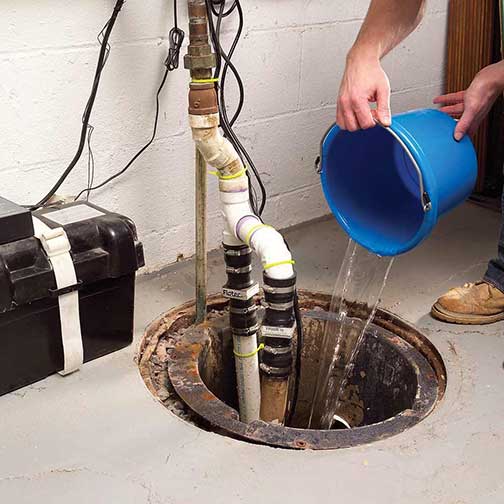
Testing a sump pump is very easy. All that’s needed is to pour so much water into the sump basin until the float rises and activates the pump. When doing this, watch the float to ensure its movement is unimpeded. Listen to the sound of the motor to see that it is working smoothly. Also, check the discharge valve to be sure there is no backflow.

Finally, to tie the above tips together, you need to inspect or replace your sump pump on a schedule. This simple step will let you catch budding problems before they become emergencies. If unsure how to inspect the sump pump, you may want to hire a local plumber.

Using a Sump Pump to Keep Your Basement Dry

Using a Sump Pump to Keep Your Basement Dry

Basements are typically the most neglected areas of the home. Unfortunately, if you don’t take proactive measures to mitigate moisture, your basement can become a breeding ground for mold, mildew, and other undesirable consequences. Installing a sump pump is one of the best ways to keep your basement dry and free from water damage.

Basement Moisture Control

Basement moisture control is a must for any home. Moisture can seep into your basement from the ground, from rain or snow, or from plumbing leaks. A sump pump can help prevent water from entering your basement and causing damage.

The sump pump works by collecting water and pumping it away from the foundation of your home. It is installed in a sump pit, which is a hole dug in the floor of the basement. The hole is filled with gravel and is designed to collect any water that may enter the basement.

Once the sump pit is filled with water, the sump pump will activate and begin pumping the water out of the basement and away from the foundation of your home. This will help keep your basement dry and free from water damage.

Basement Drainage

Basement drainage systems are also important for keeping your basement dry. The sump pump is connected to a drainage system that runs along the perimeter of your basement. The system collects water from the sump pump and drains it away from the foundation of your home.

The drainage system can also be connected to a dehumidifier, which helps remove any excess moisture from the air in your basement. This will help keep the air in your basement dry and free from mold, mildew, and other undesirable consequences.

Flood Prevention

The sump pump can also help protect your home from flooding. The pump is designed to automatically activate when the  pit is filled with water. This will help prevent flooding and help keep your basement and home safe from any kind of water damage.

In addition to a sump pump, there are other important steps you can take to prevent flooding in your home. Make sure your gutters and downspouts are regularly cleared and free of debris. Check the grade of your yard to make sure it slopes away from your home and doesn’t collect water. And make sure your home is equipped with a reliable backflow preventer to keep water from entering your home from the sewer.

Summing It Up

Using a sump pump is one of the best ways to keep your basement dry, period. It’s an important part of any home’s flood control system, and it can help protect your home from flooding and damage. Keep your basement dry and safe by having a sump pump professionally installed today!

Tips for Making Sure your Sump Pump is Ready in the Spring

Tips For Making Sure Your Sump Pump Is Ready In The Spring

The spring rains are coming; fields will flourish, flowers will bloom, and all the little birds will find a reason to sing. Our days will get longer, the weather will warm up, and the season of renewal will bring us all-around cheerfulness.

Springtime is when nature comes alive, yet springtime can also be a season of tears. That’s because as the snow melts and it starts to rain, something else also begins. Heavy rains become heavy floods that can cause serious damage to homes, warns East Bay Management.

But if you have a sump pump in your home, you do not need to worry about springtime floods, do you? Whether your sump pump is in the basement, crawlspace, or backyard, it should be able to protect your home from flooding, right? Sadly, this is only sometimes the case.

Your home can still get flooded even when you have a sump pump. Remember that your sump pump has been frozen through winter and might not just be ready for spring. To protect your home, you should take these steps to ensure your sump pump is ready for spring.

Tips for getting your sump pump ready for spring

In the winter, there isn’t much water flowing into your sump basin, and the sump pump won’t have anything to do throughout the season. In that time, however, many things can go wrong with the sump pump, but you will not know it until your basement becomes flooded.

To keep this from happening, do these:

Check the power

There are two kinds of electrical connections you will find on sump pumps. Some sump pumps have two electrical cords: a float cord and a sump cord. The sump cord plugs into the back of the float cord plug. To test a sump pump with two plugs, follow these steps:

Unplug both cords and plug the pump cord into the wall outlet. When you turn the power on, you should hear your pump activate (it will make a humming sound). If this happens, the electrical connections are fine; connect the two cords back as they were.

If your sump pump has only one cord, inspect it for signs of damage and do step two below to ensure the electrical connections are okay. Remember to secure the sump pump cords with tape or zip ties to keep them from getting tangled with the float.

Check the float system

Whether the sump pump float is a flappy ball that swings out as the water rises or a single pull float that goes up and down, they both operate on the same principle. The float should automatically kick-start the motor as the water level in the basin rises.

If the float is stuck, your sump pump will not activate when the basin fills with water (even if the motor is in good condition). You can test the float by pouring a few gallons of water into the basin until the water is high enough for the float to activate the pump.

After the pump powers on, wait till the pit is emptied, and the motor turns off; repeat the process. If the sump pump fails to activate, you may have a bad switch, the float could be stuck, the pump might not get power, or the motor is faulty. In some cases a replacement of the sump pump may be your only option.

Test the check valve

The check valve may be positioned inside the pit or on the wall. Its location doesn’t matter if it performs its function. The check valve keeps water being pumped out of the pit from flowing back into the pump and running the impeller backward.

To test the check valve, pour water into the sump pit once again until the pump powers up. Wait until the water is removed from the pit and the motor switches off. Now listen to see if you can hear water flowing inside the pipe. If it is, your check valve needs to be fixed.

A faulty rubber seat often causes a bad check valve. The problem can be solved by replacing the check valve. Check valves are easy to replace; anyone could do it. But if you need help with how to do this, it is best to contact a plumber.

Clean the sump basin and inlet screen

Some mud and debris may be at the bottom of the sump basin. You want to clear these away to reduce the chances of your sump pump getting jammed. Clean the basin by scooping out the dirt with a scooper.

If the inlet screen of your sump pump is blocked with debris, it will impair the pump’s efficiency. To clean the inlet screen, gently remove it from the pump and rinse it in water until it is clean. Replace it as carefully as you removed it.

7 Essential Sump Pump Maintenance Tips

Essential Sump Pump Maintenance Tips

A sump pump is a vital piece of equipment in your home if runoff from rain or snowmelt sometimes finds its way into the basement or crawlspace. A sump pump protects your house by preventing flooding inside the basement. Sump pumps are also necessary if your home has drainage issues or a faulty foundation that lets water into the basement or crawlspace.

Sump pumps are designed to work without help from their owner. When it detects water, the pump automatically powers up and switches off when it has been pumped out. But because the sump pumps may sit idle for months – especially during the drier periods of the year – it is easy for your pump to malfunction without you knowing it, warns Real Property Group.

This is why it is essential to maintain your sump pump and have it in good condition before the rains begin or winter arrives. The last thing you want is for your basement or crawlspace to get flooded simply because your sump pump failed when you needed it most. What are the essential tips you need to maintain a sump pump? Read on to find the answer.

7 essential tips for maintaining your sump pump

Make sure you have a good basin

Because sump pumps handle dirty water, it is easy for them to get logged. Exposure to excessive dirt shortens the life of your sump pump. This is why you should only install a sump pump with a basin. Make sure the sump pump is housed in a suitable basin. The basin helps to keep mud, sludge, and debris out of the pump. This protects the pump, helps it last longer, and ensures good performance throughout its lifetime.

Install and maintain the check valve

A check valve keeps water from flowing backward in the outlet pipes, back into the basin, and onwards to the sump pump. Without a check valve, your sump pump will cycle continuously, working continuously without actually removing water from the basin. If you already have a check valve installed, you should inspect it every 3-4 months.

Battery backup system

It is common for the power to get cut off during thunderstorms or a flood. This is usually when you need your sump pump most. But with the power cut-off, you are denied the benefit of a sump pump even when you have one installed. A battery backup sump pump installation allows you to switch your sump pump from AC to DC and keep it running during a blackout.

Install an alarm system

Sump pump failures are often only detected when you need the sump pump and, it fails to work. You need a warning system to ensure the sump pump functions correctly and leaves you without a safeguard against basement flooding. There are different warning systems in the market, and they are helpful because they will alert you when your sump pump stops working.

Inspect and maintain the sump pump on a schedule

It is essential to maintain your sump pump at least twice every year. This usually means dismantling the pump components and cleaning them. Unless the sump pump has stopped working, you can do this yourself. 

To clean the sump pump, disconnect the power, take the pump out of the basin, clean the exterior of the pump, along with the inlet screen and check the valve. If necessary, oil or grease the pump bearings before returning them to the pit and reconnecting the power. 

Install a relief hole to prevent air locking

Air locking is familiar with bottom intake pumps. This is when air is trapped inside the pump, preventing water from going through it. An air-locked sump pump will not pump water out of the basin even when the motor runs.  

A blockage causes air locking in the relief hole of the impeller casing; you can solve the problem by cleaning the spot. A permanent way to deal with this issue is to install a relief hole in the discharge piping above the impeller casing and below the check valve.

Test your sump pump periodically

As already stated, there is only one way to tell if your sump pump has stopped working once it fails to come on during a flood. You should test your sump pump often to ensure you aren’t in this unfortunate situation. 

Testing a sump pump is easy. These are the steps; fill a five-gallon bucket with water and pour the water into the sump pit slowly. This should raise the float switch until the pump comes on. Listen for strange noises when the pump is running and wait to see if it goes off after emptying the pit. Even if an alarm system is installed, you must test your sump pump periodically.

They may not get much attention, but sump pumps do a lot to keep your home safe. They aren’t as expensive as a furnace or as frequently used as a fridge, but they’re still crucial to your home’s safety and comfort level when preventing water damage. Therefore, the sump pump needs to be checked as part of your standard house maintenance.

Tips to Make Sure Your Sump Pump is Ready for Fall and Winter

Tips to Make Sure Your Sump Pump is Ready for Fall and Winter

If your home has a sump pump, you probably know how valuable it is for protecting your home from a flood. The sump pump is your first line of defense against flooding in the basement. Without it, you would live in perpetual fear of flooding your basement.

But beyond this, the sump pump also protects the foundation by keeping water out of the base of your building. This helps to preserve the structural integrity of your house, explains Best Rental Services. Because of the critical role of the sump pump, it is vital to know how to maintain it.

Sump pumps are not always in operation; your home may go for months or an entire year without the sump pump ever being called into action. But the sump pump may be needed in early spring when there is snowmelt or in summer when there is heavy rainfall.

When the sump pump is needed, you want to be sure that it stands ready to serve. A lot of the flooding in homes could have been avoided if the homeowner had taken steps to ensure that their sump pump was working.

The presence of a sump pump in your basement does not mean your home is protected from flooding. You must check to see if the system is working as it should. This step will save you from stress and help prevent unnecessary damage to your home.

Tips to keep your sump pump ready

A typical sump pump has the following features:

  • A sump pit where the components of the sump pump sit. The sump is simply a tank for holding water. The sides and bottom of the sump pits are made of concrete, and on top is a plastic layer to make the sump waterproof.
  • A submersible water pump that is driven electrically. This will have an electric cord connecting it to a power outlet on the wall. You want to make sure this electric circuit is protected with a ground fault circuit interrupter (GCFI) to prevent electrocution.
  • A drainpipe through which the water outside the home enters the sump pit. The drainpipe collects moisture from the footing drains around the house and sends it to the sump, keeping water from building up and finding its way into the home.
  • A discharge pipe goes from the sump pit to the roof or wall of the basement and exits outside the house.  It is connected to another line that opens to the city sewers or a location on the property where water can be discharged safely.
  • Inside the discharge pipe is a check valve that only allows water to move upwards. The check valve contains a flap that closes when water tries to flow backward. It keeps the water trapped inside the discharge pipe out of the sump.

Here are the steps for testing your sump pump and keeping it ready:

  • Before testing the sump pump, make sure you clean your sump pit. Debris can get into the pit from the drainpipe or the sump pump cover. If debris is left in the pit, it can clog the pump or interfere with the operation of the float and switch.
  • Pour water into the sump pit using a garden hose or a 5-gallon bucket. Whichever method you use, you want to pour the water slowly so that you can observe the movement of the float. Ensure the water goes directly to the bottom of the pit and not to the pump.
  • Watch as the water level goes up to ensure the float rises smoothly. The float should rise steadily until it is high enough to push the switch, and the pump should come on without faltering. Many sump pump failures and sump pump repairs happen because of failed controls.
  • When the switch trips and the pump come on, listen to the operation of the pump. There should be no squealing or unusual sounds from the pump. If your pump does not operate smoothly or does not turn on at all, you may need to repair or replace the sump pump entirely.
  • Keep listening to the pump until it shuts off. The pump should shut itself off when the water level falls low enough. You have a problem if the pump does not turn off after the water level is low and the float is not pushing against the switch.
  • Finally, as the pump shuts off and the water inside the discharge pipe attempts to flow backward, you should hear the check valve closing inside the discharge pipe. If you don’t hear this sound, you may see water trickling back into the pit.
  • Repeat the steps above to be sure you did not miss anything and that your sump pump is okay.

How to Clean Your Sump Pump

How to Clean Your Sump Pump

Having a basement or crawlspace in your home has numerous benefits. However, your basement may be prone to flooding or wetness. Natural water can migrate from the soil into your basement, or water may flood your basement from the drain.

Studies from the American society of home inspectors show that over 60% of properties experience moisture in their basements. A wet basement has several setbacks. It may:

But that should not stop you from owning a property that has a basement. That is because sump pumps help prevent your basement from flooding. They send water from your basement into a dry well, municipal storm drain, or other places where it wouldn’t harm your property.

The sump pump may have a pressure sensor or float activator arm if it is automatic. In that case, it will turn on automatically to evacuate water from your basement. If situations demand, you can activate the automatic sump pump manually.

Sump pumps require regular cleaning and maintenance because of their benefits. We recommend that you clean your sump pump and sump pit at least once a year. Remove the sump pump and wash it. Use that opportunity to inspect your sump pit for debris and water. Clear the check valve and conduct other regular sump pump maintenance

If you are wondering how to clean your sump pump, follow the tips below.

Things you will need for sump pump cleaning

You will need specific tools that will aid in cleaning your sub pump. They include:

  • A garden hose
  • A wet/dry rag
  • A tarp or plastic sheeting
  • A large bucket
  • A plastic scraper
  • Protective gloves

Precautions

Below are certain precautions you should take before cleaning the sump pump:

  • Ensure that it is not raining when you are performing the cleaning.
  • Water should not be flowing into the sump basin from appliances connected to it.
  • Wear protective gloves during the cleaning.

Steps on cleaning the sump pump

Disconnect and unplug the sump pump

Before cleaning the sump pump, you need to unplug it and turn off the power supply on the circuit breaker. Also, disconnect the sump pump from the discharge pipe. Sometimes, you may use a screwdriver to loosen the sleeve and pull it from the pipe.

Remove the pump from the basin

After disconnecting the sump pump, allow it to drain into the pit. When it is no longer dripping, put it into a bucket or cover it with a plastic tarp or sheeting to prevent spills and take it outside for the cleaning.

Clean the sump pump

With the help of a garden hose, rinse off the dirt from the sump pump. Inspect for grime and use a plastic scraper to scrape off the dirt. Clean the outer surface of the pump using a rag. Spray water on the pump again with a garden hose and leave it to dry.

Drain the check valve

Disassemble the check valve, rinse, dry, and reassemble it. Ensure that your bucket is nearby when draining the check valve. 

Drain the sump pit

If there is any standing water in your sump pit, drain it. You can do this with a bucket or wet-dry vacuum. Clean the basin and remove any gravel, stone, or dirt. Doing this will prevent the risk of sump pump clogging or failure.

Clean the grate

It is essential to clean the grate if you have it in your sump pit. Remove the grate from the sump pump basin. Rinse it using a garden hose and wipe it off with a rag.

Clean the sump pump basin

With the help of a scraper and rag, clean the walls of your sump pump basin. Remove all dirt and grime. Ensure that nothing is clogging the drain holes. When your sump pump pit is clean, you will not notice any terrible smell.

Replace the sump pump

After cleaning and drying the sump pump, you can put it back. Ensure that the pump is at the appropriate level and position to enable its function. Check to ensure that the float arm can move freely without touching the basin walls.

Reconnect the pump

Reconnect your sump pump to the discharge pipe and tighten the sleeve. Ensure that there will be no leakage. However, avoid over-tightening it. Plug it back into the power supply and turn on the breaker.

Test the pump

This step is necessary to ensure that everything is functional after the cleaning. To do this, pour water into the basin until the sump pump activates. Inspect the sump pump as it is running to see if there is any fault.

The bottom line

Your sump pump also requires regular monthly maintenance aside from the annual cleaning. The monthly inspection and maintenance will ensure that your pump is functional whenever the need arises. If your pump fails, invite a local plumber to assess and advise accordingly.