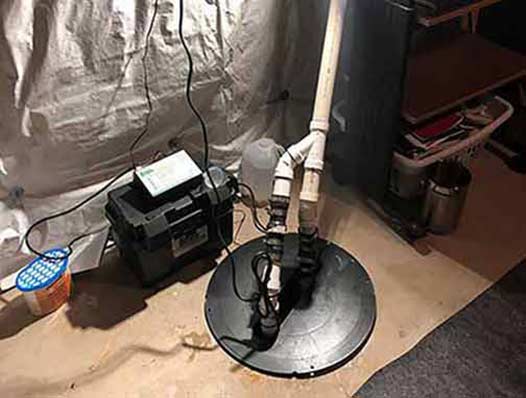
Understanding the Importance of Sump Pumps in Spring: Safeguarding Your Home Against Seasonal Flooding
As winter recedes and spring emerges, the transition brings with it a heightened risk of basement flooding. Melting snow and increased rainfall can lead to water accumulation around your home’s foundation, posing a significant threat to your property. Sump pumps are pivotal in mitigating this risk by effectively channeling excess water away from your home. Understanding the critical role that sump pumps play during the spring season is essential for homeowners who are determined to protect their properties from the devastating effects of flooding.
Sump pumps act as a first line of defense against water intrusion. By automatically pumping out accumulated water, they prevent potential damage to your basement and foundation. This not only preserves the structural integrity of your home but also safeguards your belongings stored in the basement. Moreover, preventing water damage can save you from costly repairs and insurance claims, making sump pumps a wise investment for any homeowner.
Choosing the Right Sump Pump for Your Home: Factors to Consider for Optimal Protection
Selecting the appropriate sump pump for your home involves careful consideration of several factors. The size of your basement, the volume of water it needs to handle, and the specific type of sump pump that aligns with your needs are all critical considerations. There are two primary types of sump pumps: submersible and pedestal.
Submersible pumps are installed below the water line, offering quieter operation and greater efficiency. They are ideal for homes where noise reduction is a priority and where the pump will be submerged in water. On the other hand, pedestal pumps are positioned above the water line, making them easier to access and maintain. They are suitable for basements with less water accumulation and where ease of maintenance is a priority.
When choosing a sump pump, it’s important to evaluate the pump’s horsepower, capacity, and durability. A pump with higher horsepower can handle larger volumes of water, while a durable construction ensures longevity. Additionally, considering additional features such as alarms for high water levels and battery backups can enhance the pump’s reliability during power outages.
Installation and Maintenance Tips for Optimal Performance: Ensuring Your Sump Pump is Always Ready
Proper installation and regular maintenance are crucial to ensuring your sump pump performs optimally when needed. During installation, it’s essential to place the pump in the lowest part of the basement where water naturally collects. This strategic placement maximizes the pump’s efficiency in removing water.
Regular maintenance involves several key steps. First, check the pump for debris and clean it regularly to prevent clogs that could impede its operation. Testing the float switch is also important, as it triggers the pump to activate when water levels rise. Ensuring the discharge line is clear and free from obstructions is vital for effective water removal.
Additionally, having a backup power source, such as a sump pump battery backup system, is essential to prevent pump failure during power outages. This ensures that your sump pump remains operational even when electricity is unavailable, providing continuous protection against flooding.
Recognizing the Signs of a Failing Sump Pump: Early Detection to Prevent Disaster
Being able to recognize the warning signs of a failing sump pump can save you from potential water damage. Common indicators of a malfunctioning pump include unusual noises, frequent cycling on and off, and visible rust or physical damage. If you notice any of these signs, it’s crucial to address them promptly to prevent flooding.
Regular inspections of your sump pump system can help identify issues before they escalate into serious problems. Checking for leaks, testing the pump’s functionality, and ensuring all components are in good working order are essential steps in maintaining your sump pump’s reliability.

Having a backup power source, such as a sump pump battery backup system, is essential to prevent pump failure during power outages.
Innovative Technologies in Sump Pump Systems: Embracing Modern Solutions for Enhanced Protection
Advancements in technology have led to innovative features in modern sump pump systems, offering homeowners enhanced protection and peace of mind. Smart sump pumps equipped with Wi-Fi connectivity allow homeowners to monitor their systems remotely. These pumps can send alerts to your smartphone if the pump fails or if water levels rise dangerously, enabling you to take immediate action.
Additionally, energy-efficient models help reduce electricity consumption while maintaining high performance. These pumps are designed to operate efficiently, minimizing energy costs while providing reliable flood protection. Exploring these technological advancements can significantly enhance the reliability and efficiency of your sump pump system.
The Role of Plumbers in Sump Pump Maintenance: Leveraging Expertise for Optimal Care
While some homeowners may choose to maintain their sump pumps themselves, plumbers offer expertise and experience that can be invaluable. Professional plumbers can perform thorough inspections, identify potential issues, and provide sump pump repairs or replacements. Engaging a licensed plumber ensures your sump pump system is well-maintained and ready for the challenges of spring flooding.
Plumbers can also offer routine maintenance packages, providing peace of mind that your sump pump is in optimal condition. These services can include cleaning, testing, and calibrating the pump to ensure it operates at peak efficiency.
To Sum It Up
Protecting your home from spring flooding requires a proactive and informed approach. By understanding the importance of sump pumps, choosing the right system, ensuring proper installation and maintenance, and staying informed about technological advancements, homeowners can confidently safeguard their properties. Taking bold steps today will ensure your home remains safe and dry throughout the spring season and beyond.
Embrace the knowledge and tools available to you, and take action to fortify your home against the challenges of spring flooding. With the right preparation and a reliable sump pump system, you can face the season with confidence and peace of mind.


