Tag Archives: how to repair a water heater

Water Heater Repair 101: DIY Steps and When to Hire a Plumber

water heater repair 101

Your water heater will act up at some point; this is guaranteed to happen, says First Providence Management team. When your water heater malfunctions, what should you do? Does it make sense to call an expert for every water heater problem in your home? Or are there water issues that you should deal with yourself?

As with all appliances and systems in your home, it is essential to know the basic steps for maintaining your water heater. This knowledge will not just save you money and the time you would have wasted waiting for a professional, it can help you avert water heater emergencies.

However, it is also important to know the limits of your DIY abilities. Incorrectly applied DIY skills become a problem. Instead of helping you save money, wrongly applied DIY skills will cost you money by complicating rather than solving your water heater problems.

What water heater issues in your home should you fix yourself and which ones should you hire a professional plumber to fix? In this post, you will find an easy-to-understand list of water heater issues that should be DIY-ed and those that should be left to a professional.

You may DIY these water heater problems

Maintaining proper airflow and clearance

Your water heater needs at least two feet of space all around it. This ensures proper ventilation and easy access to the unit during emergencies. A crowded water heater is likely to overheat and pose a fire hazard. It is also harder to spot leaks when the water heater is crowded.

Flush the water heater tank

This is an essential step for the optimal functioning and longevity of your water heater. Despite how essential this task is, it is a job you can do yourself. Flushing a water heater tank is easy and safe, as long as you follow the right steps.

Test the Temperature and Pressure Relief (TPR) valve

The TPR valve is a safety feature on the water heater tank. If pressure and temperature levels inside the tank get too high the TPR valve opens to release some excess. The TPR valve keeps your water heater tank from exploding. Knowing how to test it is essential.

Check the Anode Rod

The anode rod is a feature inside that tank that protects it from corrosion. It draws corrosive ions away from the tank by attracting them to itself. Eventually, the anode valve will corrode and the water heater tank will become exposed. The anode rod should be checked to see if it needs to be replaced.

Adjust the temperature settings

You want to understand the temperature control settings of your water heater. Setting the temperature too high (up to 140 degrees) is often unnecessary. At 120 degrees your water will be warm enough without any risk of scalding and you will save on energy. Every ten degrees of lower temperature equals 5% energy savings.

Insulate your water heater

Insulating the water heater and its connecting pipes will improve efficiency by reducing heat loss from the system. A fiberglass jacket is the best way to insulate the tank, but you should be careful. This step helps a lot if you have an older water heater.

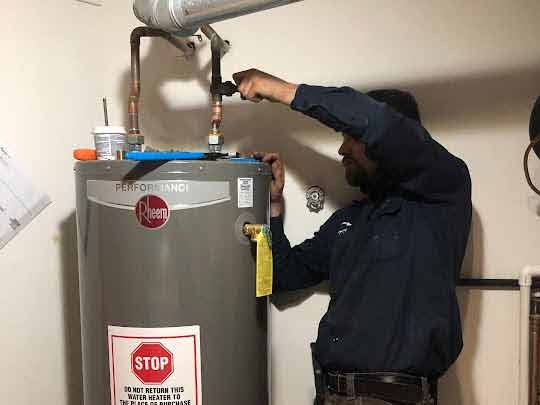
a plumber repairing a water heater.

If your water heater is leaking, shut off the power or gas and call a professional plumber.

Do NOT DIY these water heater problems

Strange sounds from your water heater

Rumbling, creaking and popping sounds from your water heater signify excessive sediment buildup inside the tank. If you flush the water heater regularly, as recommended above, you will not have this problem. If the unit makes strange sounds, it could crack and leak when you try to flush it. A noisy water heater may need to be replaced; an expert can help you make the right decision.

Leaks

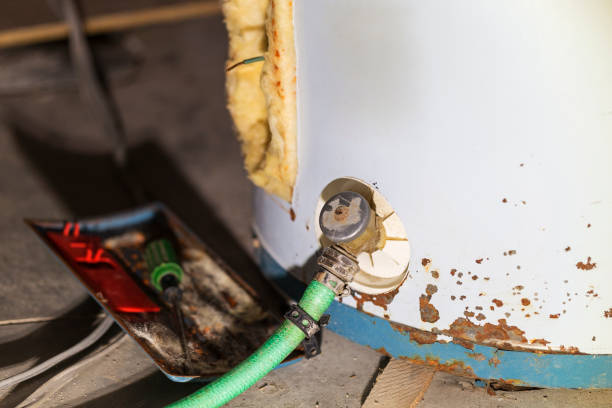
Leaks in the connecting pipes of the water heater and the unit itself should be left to an expert. Dealing with water heater leaks comes with the risk of burns and electrocution. If your water heater is leaking, shut off the power or gas and call a professional plumber.

Discolored water from your water heater

This is a sign of severe rust in your water pipes or inside the water heater tank. It could also mean that your main water line has burst and is admitting soil into your water supply. Odd-smelling, metallic-tasting or discolored water is bad for your health. You need an expert to fix this problem.

Troubleshooting your water heater

If your water heater is acting up and you don’t know the problem, you need an expert to troubleshoot the system. For instance, the water temperature is unpredictable (too hot or too cold) or the water heater is not producing any hot water at all or enough hot water.

Lastly, as a rule, you want to leave all water heater repair and water heater replacement services to the experts. Expert advice is also necessary when buying a new water heater. An experienced plumber will ensure the new system is right for your home’s hot water needs.

DIY Tips for Water Heater Replacement

DIY Tips for Water Heater Replacement

Water Heater Replacement Tips

Replacing a water heater can be a daunting task for many homeowners. However, with the right knowledge and tools, it is possible to perform this task yourself and save a significant amount of money on professional installation. Here we will provide you with some valuable DIY tips for water heater replacement, ensuring a successful and cost-effective project.

Understanding Your Water Heater

Before you embark on the process of replacing your water heater, it is essential to have a good understanding of the different types and models available in the market. The most common types include tankless, storage tank, heat pump, and solar water heaters. Each type has its own pros and cons, and it is crucial to choose the one that best suits your needs.

Additionally, you should also determine the capacity and energy efficiency requirements of your household. This will help you select the right size and model of water heater, ensuring optimal performance and energy savings.

Gathering the Necessary Tools and Materials

Once you have chosen the right water heater for your needs, it’s time to gather the necessary tools and materials for the replacement process. Here are some essential items you will need:

  • Adjustable wrench
  • Pipe wrench
  • Screwdrivers (both flathead and Phillips)
  • Teflon tape
  • Pipe cutter
  • Flexible hoses
  • Pipe fittings
  • Plumber’s putty
  • Voltage tester

Having all the required tools and materials ready beforehand will make the replacement process smoother and more efficient.

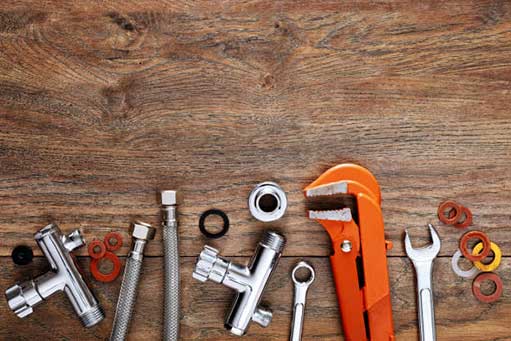
diy plumbing tools.

Once you have chosen the right water heater for your needs, it’s time to gather the necessary tools and materials for the replacement process.

Ensuring Safety First

Before you begin replacing your water heater, it is crucial to prioritize your safety. Here are some important safety precautions to keep in mind:

  • Turn off the power supply to the water heater at the circuit breaker.
  • Shut off the gas supply if you have a gas-powered water heater.
  • Allow the water heater to cool down completely before starting the replacement process.
  • Wear safety gloves and goggles to protect yourself from any potential hazards.

By following these safety measures, you can ensure a secure and accident-free water heater replacement.

Step-by-Step Water Heater Replacement Guide

Now that you have gathered the necessary tools, materials, and taken the required safety precautions, it’s time to begin the water heater replacement process. Follow these step-by-step instructions:

Step 1: Drain and Disconnect the Old Water Heater

Start by turning off the cold water supply to the water heater. Next, connect a garden hose to the drain valve located at the bottom of the tank. Run the other end of the hose to a suitable draining location, such as a floor drain or outside your home. Open the drain valve and allow all the water to completely drain from the tank.

Once the tank is empty, disconnect the water supply line and the gas line (if applicable) from the water heater. Use an adjustable wrench or a pipe wrench for this task.

Step 2: Remove the Old Water Heater

After disconnecting all the necessary connections, it’s time to remove the old water heater. Enlist the help of a friend or family member to assist with the lifting. Carefully maneuver the old water heater out of its location and dispose of it properly according to your local regulations.

Step 3: Install the New Water Heater

Position the new water heater in the desired location. Ensure that it is level and stable. If necessary, use shims or a platform to achieve the right positioning. Connect the water supply line to the cold water inlet on the new water heater using a flexible hose and appropriate fittings. Use Teflon tape to ensure a tight and leak-free connection.

If you have a gas-powered water heater, reconnect the gas line using a pipe wrench and apply a coat of plumber’s putty on the fittings for a secure seal. Make sure to follow gas supplier guidelines and regulations when handling gas connections.

For electric water heaters, make sure to connect the wiring properly according to the manufacturer’s instructions. Use a voltage tester to ensure the power supply is off before making any electrical connections.

Step 4: Fill and Test the New Water Heater

With all the connections in place, open a hot water faucet in your home to allow air to escape from the system. Once a steady stream of water flows from the faucet, close it. Turn on the cold water supply to the new water heater and allow it to fill completely. Check all the connections for any leaks and tighten them if necessary.

Finally, turn on the power supply to the water heater (if applicable) and follow the manufacturer’s instructions to set the desired temperature. Your new water heater is now ready for use!

flushing a water heater annually is a good maintenance practice.

Flush the water heater annually to remove sediment buildup.

Maintaining Your New Water Heater

Now that you have successfully replaced your water heater, it’s important to perform regular maintenance to ensure its longevity and efficiency. Here are some tips to keep in mind:

  • Check the pressure relief valve periodically and replace if necessary.
  • Insulate the hot water pipes to reduce heat loss.
  • Monitor the temperature settings to prevent scalding or excessive energy consumption.

By following these maintenance tips, you can prolong the lifespan of your new water heater and maintain its optimal performance over the years.

Replacing a water heater may seem like a daunting task, but with the right knowledge and DIY tips, you can accomplish it successfully and save money in the process. By understanding the different types of water heaters, gathering the necessary tools and materials, ensuring safety precautions, and following a step-by-step guide, you can confidently replace your old water heater with a new one.

Remember to prioritize safety, take your time, and seek help from a local plumber if needed. With proper maintenance, your new water heater will provide you with reliable hot water for many years to come.

Repair or Replace? Chicago Plumbing Experts’ Guide to Fixing Faulty Water Heaters

Fixing Faulty Water Heaters

As a homeowner in Chicago, there are various plumbing issues you may face, one of which is a faulty water heater. A water heater is a critical appliance in your home that provides hot water for various uses, including bathing, laundry, and washing dishes, among others. When your water heater is not functioning correctly, you need to decide whether to repair it or replace it. In this plumbing expert guide, we explore the factors to consider when making the repair or replace decision for your water heater.

Assessing the Situation

Before deciding whether to repair or replace your water heater, you need to assess the situation accurately. Some of the essential factors to consider include the age and condition of the water heater, the extent of the damage, and the cost of repair compared to replacement.

Age and Condition of the Water Heater

As a rule of thumb, a typical water heater lasts for about ten years. However, the lifespan of your water heater may vary depending on various factors such as frequency of use, maintenance, and the quality of the water in your area. If your water heater is over ten years old, it may be time to replace it regardless of its current condition. In some cases, a well-maintained water heater can last beyond the ten-year mark, but it’s essential to have a local plumber in Chicago assess its condition to determine whether it’s worth repairing or replacing.

Extent of the Damage

The extent of the damage on your water heater is another critical factor to consider when deciding whether to repair or replace it. Some issues may be minor and easily fixable, while others may require a complete replacement of the water heater. If the damage is minor, you may be able to repair it for an affordable cost. However, if the damage is severe, such as a leaking tank, you may need to replace the unit entirely.

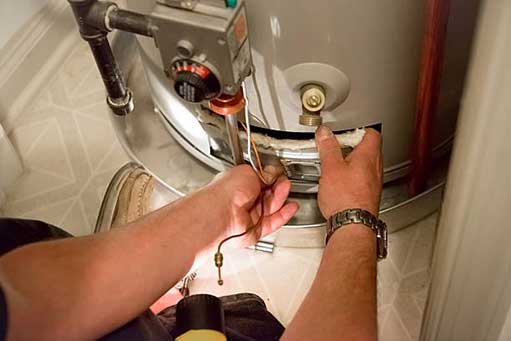
plumber replacing a water heater in chicago.

If your water heater is not producing hot water, the issue may be due to a faulty heating element, thermostat, or gas valve. A plumber can diagnose the issue and determine whether repairing or replacing these components is necessary.

Cost of Repair vs. Replacement

The cost of repair versus replacement is another important consideration when deciding whether to repair or replace your water heater. In some cases, repairing your water heater may cost less than replacing it. However, if the repairs are costly or the unit is old and likely to fail again soon, a replacement may be a better option in the long run.

Common Water Heater Issues

To help you make an informed decision, it’s essential to know the common issues that cause your water heater to fail. Here are some of the most common problems you may encounter:

Lack of Hot Water

If your water heater is not producing hot water, the issue may be due to a faulty heating element, thermostat, or gas valve. A plumber can diagnose the issue and determine whether repairing or replacing these components is necessary.

Leakages

Leaks from your water heater can be due to various issues such as cracks, corrosion, or faulty fittings. If the leak is minor, a plumber may be able to repair the leak. However, if the damage is extensive, a replacement of the entire tank may be necessary.

Strange Noises

If your water heater makes strange noises such as popping or rumbling, it may be due to sediment buildup in the tank. A plumber can flush the tank to remove the sediment and prevent further damage to your water heater.

Inconsistent Water Temperature

Inconsistent water temperature can be a sign of a malfunctioning thermostat. A plumber can diagnose the issue and determine whether repairing or replacing the thermostat is necessary.

Discolored Water

If your hot water has a distinctive discoloration such as a rusty brown or yellow tint, it may be due to corrosion in your tank. A plumber can assess the situation and determine whether you need to replace your water heater altogether.

Conclusion

In conclusion, when faced with a faulty water heater, you need to assess the situation accurately before deciding whether to repair or replace it. Consider factors such as the age and condition of the water heater, extent of the damage, and cost of repair versus replacement. By knowing the common issues that cause water heaters to fail, you can make an informed decision that will ensure you have reliable hot water in your home. Remember to speak with a plumbing expert in Chicago whenever you encounter water heater problems to ensure the best solutions to any issue.