Tag Archives: how to maintain a sump pump

7 Essential Sump Pump Maintenance Tips

Essential Sump Pump Maintenance Tips

A sump pump is a vital piece of equipment in your home if runoff from rain or snowmelt sometimes finds its way into the basement or crawlspace. A sump pump protects your house by preventing flooding inside the basement. Sump pumps are also necessary if your home has drainage issues or a faulty foundation that lets water into the basement or crawlspace.

Sump pumps are designed to work without help from their owner. When it detects water, the pump automatically powers up and switches off when it has been pumped out. But because the sump pumps may sit idle for months – especially during the drier periods of the year – it is easy for your pump to malfunction without you knowing it, warns Real Property Group.

This is why it is essential to maintain your sump pump and have it in good condition before the rains begin or winter arrives. The last thing you want is for your basement or crawlspace to get flooded simply because your sump pump failed when you needed it most. What are the essential tips you need to maintain a sump pump? Read on to find the answer.

7 essential tips for maintaining your sump pump

Make sure you have a good basin

Because sump pumps handle dirty water, it is easy for them to get logged. Exposure to excessive dirt shortens the life of your sump pump. This is why you should only install a sump pump with a basin. Make sure the sump pump is housed in a suitable basin. The basin helps to keep mud, sludge, and debris out of the pump. This protects the pump, helps it last longer, and ensures good performance throughout its lifetime.

Install and maintain the check valve

A check valve keeps water from flowing backward in the outlet pipes, back into the basin, and onwards to the sump pump. Without a check valve, your sump pump will cycle continuously, working continuously without actually removing water from the basin. If you already have a check valve installed, you should inspect it every 3-4 months.

Battery backup system

It is common for the power to get cut off during thunderstorms or a flood. This is usually when you need your sump pump most. But with the power cut-off, you are denied the benefit of a sump pump even when you have one installed. A battery backup sump pump installation allows you to switch your sump pump from AC to DC and keep it running during a blackout.

Install an alarm system

Sump pump failures are often only detected when you need the sump pump and, it fails to work. You need a warning system to ensure the sump pump functions correctly and leaves you without a safeguard against basement flooding. There are different warning systems in the market, and they are helpful because they will alert you when your sump pump stops working.

Inspect and maintain the sump pump on a schedule

It is essential to maintain your sump pump at least twice every year. This usually means dismantling the pump components and cleaning them. Unless the sump pump has stopped working, you can do this yourself. 

To clean the sump pump, disconnect the power, take the pump out of the basin, clean the exterior of the pump, along with the inlet screen and check the valve. If necessary, oil or grease the pump bearings before returning them to the pit and reconnecting the power. 

Install a relief hole to prevent air locking

Air locking is familiar with bottom intake pumps. This is when air is trapped inside the pump, preventing water from going through it. An air-locked sump pump will not pump water out of the basin even when the motor runs.  

A blockage causes air locking in the relief hole of the impeller casing; you can solve the problem by cleaning the spot. A permanent way to deal with this issue is to install a relief hole in the discharge piping above the impeller casing and below the check valve.

Test your sump pump periodically

As already stated, there is only one way to tell if your sump pump has stopped working once it fails to come on during a flood. You should test your sump pump often to ensure you aren’t in this unfortunate situation. 

Testing a sump pump is easy. These are the steps; fill a five-gallon bucket with water and pour the water into the sump pit slowly. This should raise the float switch until the pump comes on. Listen for strange noises when the pump is running and wait to see if it goes off after emptying the pit. Even if an alarm system is installed, you must test your sump pump periodically.

They may not get much attention, but sump pumps do a lot to keep your home safe. They aren’t as expensive as a furnace or as frequently used as a fridge, but they’re still crucial to your home’s safety and comfort level when preventing water damage. Therefore, the sump pump needs to be checked as part of your standard house maintenance.
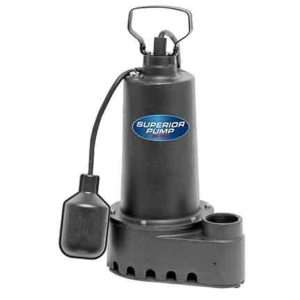
Tips to Make Sure Your Sump Pump is Ready for Fall and Winter

Tips to Make Sure Your Sump Pump is Ready for Fall and Winter

If your home has a sump pump, you probably know how valuable it is for protecting your home from a flood. The sump pump is your first line of defense against flooding in the basement. Without it, you would live in perpetual fear of flooding your basement.

But beyond this, the sump pump also protects the foundation by keeping water out of the base of your building. This helps to preserve the structural integrity of your house, explains Best Rental Services. Because of the critical role of the sump pump, it is vital to know how to maintain it.

Sump pumps are not always in operation; your home may go for months or an entire year without the sump pump ever being called into action. But the sump pump may be needed in early spring when there is snowmelt or in summer when there is heavy rainfall.

When the sump pump is needed, you want to be sure that it stands ready to serve. A lot of the flooding in homes could have been avoided if the homeowner had taken steps to ensure that their sump pump was working.

The presence of a sump pump in your basement does not mean your home is protected from flooding. You must check to see if the system is working as it should. This step will save you from stress and help prevent unnecessary damage to your home.

Tips to keep your sump pump ready

A typical sump pump has the following features:

  • A sump pit where the components of the sump pump sit. The sump is simply a tank for holding water. The sides and bottom of the sump pits are made of concrete, and on top is a plastic layer to make the sump waterproof.
  • A submersible water pump that is driven electrically. This will have an electric cord connecting it to a power outlet on the wall. You want to make sure this electric circuit is protected with a ground fault circuit interrupter (GCFI) to prevent electrocution.
  • A drainpipe through which the water outside the home enters the sump pit. The drainpipe collects moisture from the footing drains around the house and sends it to the sump, keeping water from building up and finding its way into the home.
  • A discharge pipe goes from the sump pit to the roof or wall of the basement and exits outside the house.  It is connected to another line that opens to the city sewers or a location on the property where water can be discharged safely.
  • Inside the discharge pipe is a check valve that only allows water to move upwards. The check valve contains a flap that closes when water tries to flow backward. It keeps the water trapped inside the discharge pipe out of the sump.

Here are the steps for testing your sump pump and keeping it ready:

  • Before testing the sump pump, make sure you clean your sump pit. Debris can get into the pit from the drainpipe or the sump pump cover. If debris is left in the pit, it can clog the pump or interfere with the operation of the float and switch.
  • Pour water into the sump pit using a garden hose or a 5-gallon bucket. Whichever method you use, you want to pour the water slowly so that you can observe the movement of the float. Ensure the water goes directly to the bottom of the pit and not to the pump.
  • Watch as the water level goes up to ensure the float rises smoothly. The float should rise steadily until it is high enough to push the switch, and the pump should come on without faltering. Many sump pump failures and sump pump repairs happen because of failed controls.
  • When the switch trips and the pump come on, listen to the operation of the pump. There should be no squealing or unusual sounds from the pump. If your pump does not operate smoothly or does not turn on at all, you may need to repair or replace the sump pump entirely.
  • Keep listening to the pump until it shuts off. The pump should shut itself off when the water level falls low enough. You have a problem if the pump does not turn off after the water level is low and the float is not pushing against the switch.
  • Finally, as the pump shuts off and the water inside the discharge pipe attempts to flow backward, you should hear the check valve closing inside the discharge pipe. If you don’t hear this sound, you may see water trickling back into the pit.
  • Repeat the steps above to be sure you did not miss anything and that your sump pump is okay.

A Guide to Sump Pump Repair and Maintenance

A Guide to Sump Pump Repair and MaintenanceA basement sump pump is one of those equipment’s you don’t get to use often. For most of the year, you may have no reason to think about the sump pump. But when the occasion arises for its use, you want your sump pump to be up to anything nature throws at it. One of the worst home emergencies to have is a sump pump failure.

Sump pumps protect your home from water intrusion but as Alliance Property Management team explains, since they are out of sight in the basement, it is easy to neglect this essential equipment. The wake-up is usually when you go down to the basement and accidentally step into ankle-deep ice-cold water. But you’re lucky if this is all that happens; you could make the discovery in worse circumstances.

Like any other component of your home, the sump pump needs maintenance. Sump pumps are hardy pieces of equipment but even the hardiest device can break down unexpectedly, especially if it is not getting the required care. There are several things that can cause your sump pump to fail but most of them can be prevented with timely maintenance of the equipment.

Common causes of sump pump failure

The most frequent issues you will have with a sump pump are:

  • Mechanical problems: Issues with the pressure sensor or float activator arm. The float arm is the on/off switch for the pump. If it is out of order, the pump will not kick in when there is water in the sump pit.
  • Electrical problems: Power outages during a severe storm will cut off the power supply to the equipment. Power surges could also damage its electrical components.
  • Blocked/frozen discharge lines: If debris or small animals gets into the pipe, it could get blocked. Pipes may also be blocked by ice or snow.

Sump pump maintenance routine

replace-sump-pump-chicago

To keep the sump pump from getting problems, you should run the equipment periodically and also check the function of its various components. Looking after your basement sump pump is not difficult. You just need to create a schedule for sump pump maintenance. You should also know the important tasks to do during maintenance.

Test the float 

The float is the part of the sump pump most likely to suffer damage. The pump will not work if the float is damaged because the float triggers the pump. To check if the float is working, slowly pour water into the sump pit until the float rises and the pump activates. If the pump activates, it should also shut off after the water is removed. If this happens, the float is fine. 

Clean the sump pit 

sump-pit-installation-chicago

Debris – mostly soil materials – will usually find its way into the pit along with water. Debris inside the sump pit can give you a lot of problems. Solid materials in the pit can interfere with the function of the float. Sometimes when you think you have a float issue, it could actually be the debris in the pit that is the real problem. Before attempting to deal with float issues, first clean out the debris and do it regularly.

Test the check valve 

If, when you pour water into the pit to check the float, the pump is triggered but the water, instead of being removed returns to the pit, you have a problem with the check valve. Another sign that the check valve may be damaged is when water stays longer in the pit than it should. Diagnosing check valve issues is a bit complex; it is best to have an expert look at the sump pump.

Clean the impeller 

This is another problem that could be caused by debris. Normally, any debris that enters the sump pump should be captured by the screen. However, if this does not happen, dirt can accumulate on the impeller and jam it. This is a common cause of sump pump damage, but it is easily solved. 

Simply unplug the pump, disconnect its piping to remove it from the pit, and then disassemble it to remove the screen and impeller. Clean the impeller and return it to its place inside the pump.

Check the power supply

sump-pump-battery-backup

Faulty electrical connections can damage the sump pump or cut-off electricity supply to the equipment. When you test the pump as described in the section on checking the float, if the sump pump does not trigger, check the electricity supply before trying anything else. The pump may not be properly plugged in or there could be a problem with the circuit breaker. 

Install an alarm

This step is more of a precautionary measure; it does not deal directly with maintaining the sump pump. A sump pump alarm will alert you when your sump pump has stopped working.  Some alarms can be configured to send an SMS or email when there is a problem. Installing an alarm will eliminate any chances that you will be caught off-guard by a sump pump failure that requires repair.