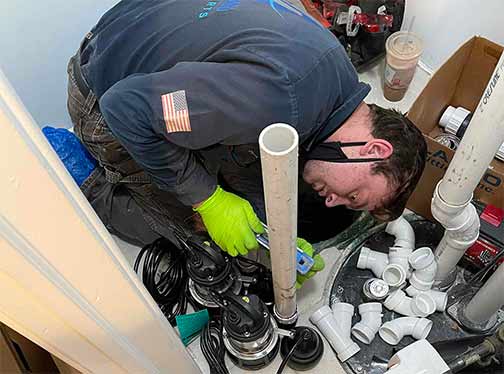
Tag Archives: how to install a sump pump

The Complete Guide to Installing a New Sump Pump System

The Complete Guide to Installing a New Sump Pump System

If you are looking to protect your basement from flooding and water damage, a sump pump is an essential tool. Whether you’re a DIY enthusiast or a homeowner looking to learn more, this article will provide you with all the information you need to successfully install a new sump pump system.

Why Do You Need a Sump Pump?

Before we dive into the installation process, let’s first understand why a sump pump is important for your home. A sump pump is designed to prevent water from flooding your basement, especially during heavy rainstorms or in areas with high water tables. By collecting excess water in a sump pit and then pumping it out and away from your home, a sump pump can help protect your foundation, walls, and belongings from water damage.

Assessing Your Needs

Prior to purchasing a new sump pump system, it’s important to assess your specific needs. Here are some factors to consider:

  • Your basement size: The size of your basement will determine the capacity of the sump pump you’ll need.
  • Water table level: If your area has a high water table, you may need a more powerful sump pump.
  • Additional features: Some sump pumps come with additional features such as alarms or Wi-Fi connectivity. Determine if these are necessary for your situation.
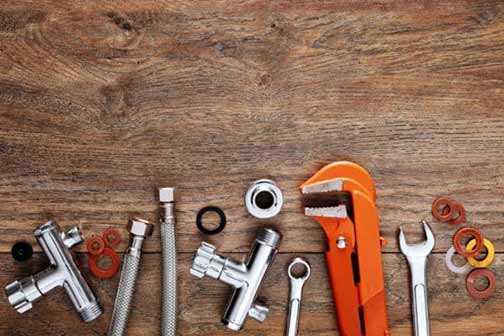
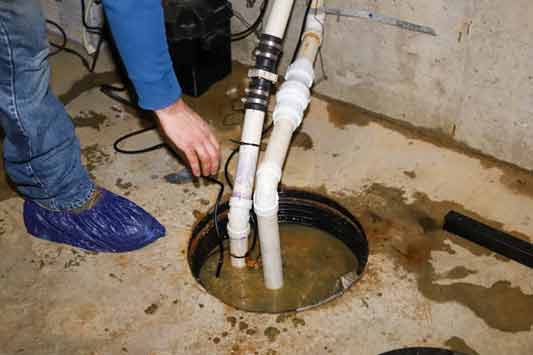
some of the tools you will need for installing a sump pump.

Gathering the Necessary Tools and Materials

Before you begin the installation process, it’s important to gather all the necessary tools and materials. Here is a list of common items you’ll need:

  • Sump pump
  • Sump pit or basin
  • PVC pipes and fittings
  • PVC primer and cement
  • Tape measure
  • Hacksaw
  • Screwdriver
  • Adjustable wrench
  • Drill
  • Check valve
  • Gravel
  • Waterproof sealant

Installing the Sump Pump System

Now that you have all the necessary tools and materials, it’s time to install your new sump pump system. Follow these steps:

Step 1: Selecting the Installation Location

Choose a location in your basement where the sump pump will be installed. It’s best to select a spot closest to where water tends to accumulate. Ensure that there are no obstructions and enough space for the sump pit or basin.

Step 2: Digging the Sump Pit

Using a shovel, dig a hole for the sump pit. The size of the hole should allow for the sump pit to fit snugly, with a few additional inches of clearance on all sides. Make sure the bottom of the pit is level.

Step 3: Installing the Sump Pit

Place the sump pit or basin in the hole you dug, ensuring that it sits level. Use gravel to create a stable base and fill any gaps around the pit. This will help prevent the pit from shifting or floating when water accumulates.

Step 4: Installing the Sump Pump

Place the sump pump inside the sump pit. Connect the check valve to the pump’s discharge port. Use PVC pipes and fittings to connect the check valve to the desired discharge location, such as a storm drain or a dry well.

Step 5: Securing the Sump Pump

Ensure that the sump pump is securely positioned inside the pit. Use bricks or blocks to stabilize the pump and prevent it from tipping over. This will help maintain proper functioning and prevent unnecessary vibration or noise.

Step 6: Testing the Sump Pump

Fill the sump pit with water to test the pump. Ensure that the pump activates and effectively removes the water from the pit. Verify that the water flows freely through the discharge pipe and out of your home. If everything is working correctly, you’re ready to move on to the final step.

Step 7: Sealing Gaps and Insulating

Use waterproof sealant to seal any gaps or openings around the sump pump system. This will prevent water from entering and ensure that the system operates efficiently. Additionally, consider insulating the discharge pipe to prevent freezing during cold weather.

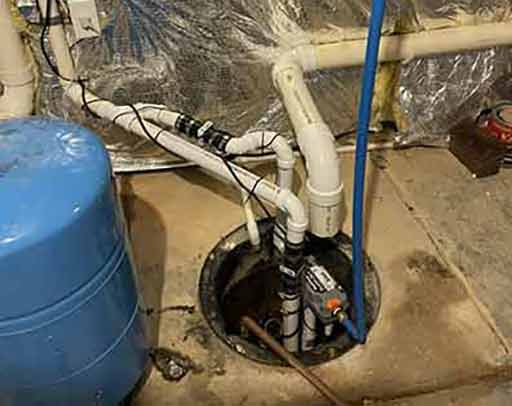
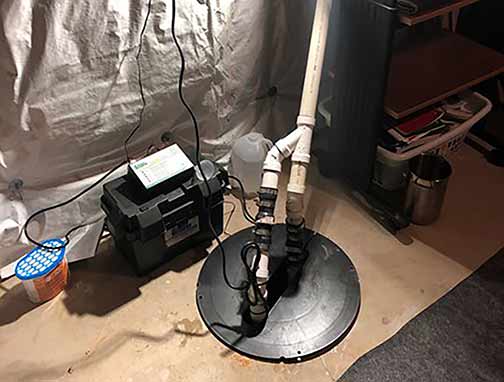
a freshly completed sump pump installation.

Maintaining Your Sump Pump System

Installing a new sump pump system is just the beginning. To ensure it continues to work effectively, regular maintenance is crucial. Here are some maintenance tips to keep in mind:

  • Test the sump pump regularly by pouring water into the pit. Check if the pump activates and removes the water properly.
  • Inspect the discharge pipe for any clogs or obstructions that may hinder water flow.
  • Check the pump’s power source and battery backup system (if applicable) to ensure they are functioning correctly.
  • Replace the sump pump as recommended by the manufacturer or if it shows signs of wear and tear.

By following the steps outlined in this article and performing regular maintenance, you can safeguard your basement from potential water damage and enjoy peace of mind during heavy rainfall. Remember, if you are not confident in your DIY abilities, it’s always best to contact a professional to install your sump pump system.
DIY vs Professional Sump Pump Installation In Chicago: What’s Right for You?

DIY vs Professional Sump Pump Installation In Chicago

With its vast urban sprawl and unpredictable weather patterns, Chicago often finds its residents grappling with water-related challenges. In such a scenario, the sump pump emerges not as a mere accessory but an essential household fixture. But here lies the problem: when considering sump pump installation in Chicago, should homeowners take the reins and embark on a DIY journey, or should they trust seasoned professionals? Here we get into both avenues, offering insights to help you make an informed choice.

Understanding Sump Pumps

At its core, a sump pump is a guardian of your home, tirelessly working to prevent water damage. This device’s primary function is to expel excess water that gathers in a sump basin, safeguarding the structural integrity of your home. Today’s market is flooded with many sump pump models, each with its distinct features, capacities, and price points. As such, the initial step in a sump pump installation journey is to discern which model aligns seamlessly with your requirements.

The DIY Approach

With its promise of hands-on involvement and potential cost savings, the DIY route holds a certain charm for many homeowners. Embarking on this path means you can handpick your materials, tools, and even the sump pump design that resonates with your aesthetic. However, the DIY approach is not devoid of hurdles. It can be a time-intensive endeavor; without the requisite expertise, there’s a tangible risk of errors. Moreover, Chicago’s building codes, intricate and specific, can pose a challenge for those unfamiliar. Prioritizing safety is non-negotiable, necessitating anyone considering the DIY route to arm themselves with ample research and preparation.

sump pit water flow.

Armed with specialized tools and a deep reservoir of knowledge, professionals can expedite the process, minimizing disruptions to your daily routine.

Hiring a Professional

Contrastingly, entrusting the task to professionals offers a different set of advantages. Professionals come equipped with a wealth of experience, ensuring the installation process is smooth and efficient. One undeniable perk of this route is the swift installation. Armed with specialized tools and a deep reservoir of knowledge, professionals can expedite the process, minimizing disruptions to your daily routine. Many also offer extended warranties and robust post-installation support, granting homeowners an added layer of security. The primary trade-off, however, is the potential for a heftier upfront cost. When scouting for a professional, it’s imperative to vet their credentials meticulously, solicit references, especially from local clients, and demand transparent, itemized pricing. For those facing unforeseen plumbing predicaments, a same-day plumbing service can be a godsend.

Cost Comparison

Budgeting is a cornerstone of any home improvement project. At first glance, the DIY method might appear more wallet-friendly. However, it’s crucial to account for ancillary expenses—tools, materials, and the possibility of future repairs stemming from installation errors. On the other hand, while professionals might command a premium, their fees are often all-encompassing, covering warranties and ensuring that any subsequent issues are addressed without incurring additional charges.

Preparation is Key: Safeguarding Home Systems

In the bustling city of Chicago, as homeowners juggle the demands of daily life, many are also navigating the complexities of relocating. Amidst the packing boxes and logistics, a golden piece of advice often emerges from those in the know. A well-regarded moving company, Moving Experts US, known for their meticulous attention to detail, often shares a unique tip with their clients: before making the big move, always double-check the functionality of essential home installations, especially systems like sump pumps. This wisdom, rooted in their vast experience, reminds them of the importance of ensuring a seamless transition to a new residence.

Safety and Longevity

The overarching goal, irrespective of the chosen installation method, is to ensure the sump pump’s safety and longevity. A meticulously installed sump pump fortifies your home against potential water damage and extends the equipment’s operational life. Furthermore, a proactive approach, underscored by understanding preventable plumbing problems, can be transformative, averting costly repairs and ensuring the system’s optimal functioning.

Making the Decision: Questions to Ask Yourself

The decision between a DIY and professional installation is multifaceted, hinging on several personal factors. Homeowners must introspect: How adept am I with hands-on projects? Do I possess the tools and skills essential for the task? How much weight do I accord to professional warranties? And, of course, what financial outlay am I comfortable with? These candid and thorough reflections will illuminate the path forward, ensuring the decision aligns with one’s unique circumstances.

Water Flow into the Sump Pit

Monitoring and ensuring the unimpeded water flow into the sump pit is key post-installation. This step is pivotal in averting overflows and potential subsequent water damage. Regardless of whether you’ve chosen the DIY or professional route, this facet of the installation demands unwavering attention and regular monitoring.

The Interplay of Home Maintenance and Urban Living

With its iconic skyline and vibrant neighborhoods, Chicago offers a unique blend of urban living and seasonal challenges. As residents revel in the city’s cultural offerings, they’re also acutely aware of the importance of home maintenance. From vintage brownstones to modern condos, the health of foundational systems, like sump pumps, plays a pivotal role in ensuring a comfortable living environment. This balance of enjoying city life while staying vigilant about home care defines the true Chicagoan spirit, making it a city of both resilience and celebration.

A City’s Pulse and its Underbelly

Beneath the rhythmic cadence of Chicago’s bustling streets lies a network of systems working silently. Among them, the importance of professional plumbers in Chicago cannot be overstated. These unseen heroes, from drainage solutions to sump pumps, are the unsung guardians of urban homes. Their seamless operation ensures that the city’s heartbeat continues uninterrupted, allowing residents to focus on the joys of Windy City living.

Conclusion on the Right Way of Sump Pump Installation in Chicago 

The realm of sump pump installation in Chicago can initially seem labyrinthine. However, the path becomes clearer with the right information and a clear understanding of one’s individual needs and capabilities. Whether you’re a DIY enthusiast, eager to immerse yourself in every step of the process, or someone who values the assurance of professional expertise, the endgame remains consistent: safeguarding your home and ensuring its longevity.

Sump Pump Installation Made Simple: Step-by-Step Guide to Safeguarding Your Basement from Water Damage

Sump Pump Installation Made Simple

Welcome to our comprehensive guide on sump pump installation! Your basement is a valuable space that provides numerous benefits, from extra living area to storage space. However, water damage can quickly turn your basement into a nightmare. It is crucial to safeguard your basement from potential water damage, and one of the most effective ways to do so is by installing a sump pump.

In this step-by-step guide, we will walk you through the process of installing a sump pump in your basement, ensuring that you have all the information you need to protect your home and belongings from water damage.

Understanding the Importance of a Sump Pump

Before we dive into the installation process, let’s first understand why a sump pump is crucial for your basement’s protection. A sump pump is a device that helps prevent water from infiltrating your basement by collecting excessive groundwater and directing it away from your home’s foundation.

During heavy rainfalls or when the water table rises, groundwater can seep into your basement through cracks in the foundation or basement walls. If left unchecked, this water can lead to a host of problems, including mold growth, structural damage, and damage to your belongings.

A sump pump is installed in a specially constructed pit, known as a sump pit, in your basement. It collects water that enters the pit and pumps it away from your home, typically to a drainage system or a storm sewer.

Gathering the Necessary Tools and Materials

Before you begin the installation process, it is important to gather all the necessary tools and materials. Here is a list of items you will need:

  • Sump pump
  • Sump pit
  • Check valve
  • PVC pipes (with appropriate diameter)
  • PVC cement
  • Tape measure
  • Hacksaw or PVC pipe cutter
  • Screwdriver
  • Adjustable wrench
  • Teflon tape
  • Bucket
  • Gloves
  • Safety goggles
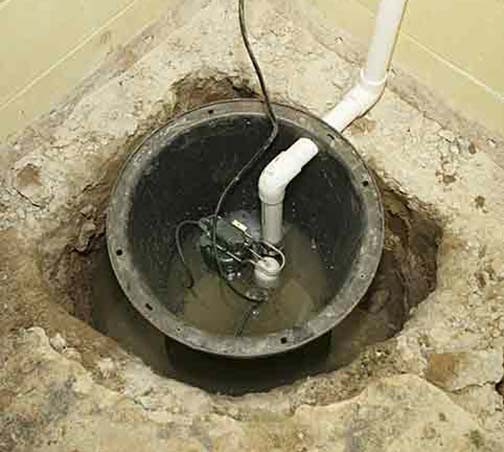
installation of a sump pit.

The first step in the installation process is to choose the right location for the sump pit.

Step 1: Choosing the Right Location for the Sump Pit

The first step in the installation process is to choose the right location for the sump pit. Here are some factors to consider when selecting the location:

  • Identify the lowest point in your basement: The sump pit should be placed in the lowest point of your basement where water is most likely to accumulate.
  • Keep the sump pit away from obstacles: Ensure that the location you choose is free from any obstacles, such as utility lines or water pipes.
  • Accessibility: It is important to choose a location that allows easy access for maintenance and repairs.

Step 2: Digging the Sump Pit

Once you have determined the location for your sump pit, it’s time to start digging. Follow these steps to dig the pit:

  • Using the tape measure, mark the dimensions of the sump pit on the basement floor.
  • Put on your gloves and safety goggles for protection.
  • Using a shovel or a digging tool, carefully dig the pit according to the marked dimensions. The depth of the pit should be approximately two feet.
  • Remove any debris or loose dirt from the pit using a bucket.

Step 3: Installing the Sump Pit

Once the pit is dug, it’s time to install the sump pit. Follow these steps:

  • Place the sump pit in the center of the hole you dug.
  • Ensure that the pit is level and stable.

Step 4: Installing the Sump Pump

Now that the sump pit is in place, it’s time to install the sump pump. Here’s how:

  • Remove the cover from the sump pit.
  • Place the sump pump inside the pit.
  • Position the pump in a way that the float switch is unobstructed and can move freely.
  • Attach the check valve to the pump’s discharge pipe, ensuring that it is securely tightened.
  • Connect the PVC pipe to the check valve and extend it to the desired location for water discharge.
  • Secure the PVC pipe using PVC cement.
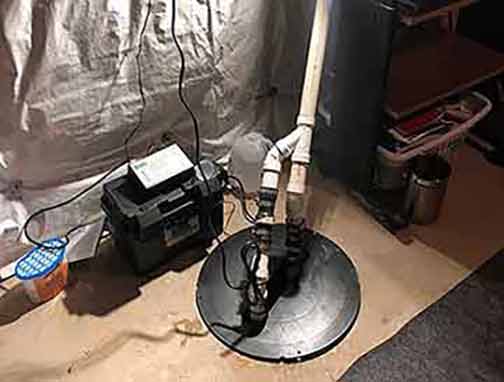
a newly installed sump pump.

With the sump pump successfully installed, it is important to test its functionality and perform regular maintenance to ensure it continues to operate effectively.

Step 5: Testing and Maintenance

With the sump pump successfully installed, it is important to test its functionality and perform regular maintenance to ensure it continues to operate effectively. Here are some essential steps:

  • Fill the sump pit with water until the float switch is activated.
  • Observe the pump as it starts pumping water out of the pit.
  • Check for any leaks in the discharge pipe or the connections.
  • Remove any debris or sediment that may accumulate in the pit.
  • Test the sump pump periodically to ensure it is in proper working condition.

Conclusion

Congratulations! You have successfully installed a sump pump in your basement, providing an essential layer of protection against flooding and water damage. By following this step-by-step guide, you have taken a significant step towards safeguarding your basement and preserving the value of your home.

Remember, proper installation and regular maintenance are key to ensuring your sump pump operates effectively. If you encounter any issues or feel unsure at any point during the installation process, it is always recommended to seek assistance from a local plumber.

Now that you have the knowledge and tools, take action to protect your basement from water damage and enjoy peace of mind, knowing that your valuable space is safe and secure.