To effectively tackle plumbing leaks, it’s essential to first understand the basic components of your home plumbing system. A typical home plumbing setup includes a network of pipes, fixtures, and appliances that work together to supply water to your home and remove waste. The two primary systems are the water supply system, which brings fresh water into your home, and the drainage system, which removes wastewater.
The water supply system consists of pipes made of various materials like copper, PVC, or PEX, and it operates under pressure to deliver water to faucets, showers, and appliances. The drainage system, on the other hand, relies on gravity to move wastewater out of your home through larger pipes. Understanding these systems’ roles and how they interact is crucial for diagnosing and fixing leaks.
It’s important to note that each component of your plumbing system has a specific function, and any disruption in its operation can lead to leaks. For instance, the water supply system must maintain a consistent pressure to function efficiently, while the drainage system must remain free of obstructions to prevent backups. By gaining a thorough understanding of these systems, homeowners can better anticipate issues and address them before they escalate.
Identifying Common Causes of Plumbing Leaks: An In-depth Analysis
Plumbing leaks can occur for a variety of reasons, and identifying the root cause is the first step in resolving the issue. Common causes include:
- Corrosion: Over time, pipes can corrode due to chemical reactions with water and other substances, leading to leaks. This is particularly prevalent in older homes where plumbing systems may not have been updated.
- High Water Pressure: Excessive water pressure can stress pipes and fixtures, causing them to fail. It’s crucial to regulate water pressure to prevent damage and prolong the lifespan of your plumbing system.
- Temperature Changes: Extreme temperatures can cause pipes to expand and contract, leading to cracks and leaks. Insulating pipes can mitigate the effects of temperature fluctuations.
- Clogs: Blockages in pipes can increase pressure and result in leaks. Regular maintenance and cleaning can prevent clogs and ensure smooth water flow.
- Poor Installation: Incorrectly installed pipes and fixtures are prone to leaks. Ensuring proper installation by qualified professionals can prevent future issues.
Understanding these common causes allows homeowners to take proactive measures in preventing leaks. Regular inspections and maintenance can help detect potential problems early, saving time and money in the long run.
Tools and Materials Needed for Plumbing Repairs: Essential Equipment for Success
Having the right tools and materials on hand is essential for efficient plumbing repairs. Some basic tools include:
- Adjustable wrench
- Pipe wrench
- Plumber’s tape
- Pipe cutter
- Plunger
- Plumber’s putty
- Bucket
- Flashlight
In addition to tools, you may need materials such as replacement pipes, fittings, and sealants. Having these items readily available will make the repair process smoother and more efficient.
Investing in high-quality tools can make a significant difference in the ease and effectiveness of your repairs. Moreover, understanding the function of each tool and material is crucial for executing repairs correctly. For instance, plumber’s tape is used to seal pipe threads, while plumber’s putty can be used to create watertight seals around fixtures.

Step-by-Step Guide to Fixing a Leaking Faucet: Practical Solutions for Homeowners
Leaking faucets are a common issue in many households, and fixing them can save water and reduce utility bills. Follow these steps to repair a leaking faucet:
- Turn Off the Water Supply: Locate the shut-off valve under the sink and turn it off to prevent water flow.
- Remove the Faucet Handle: Use a screwdriver to remove the handle, exposing the valve stem.
- Inspect the Washer: Check the washer for wear and tear. If it’s damaged, replace it with a new one.
- Reassemble the Faucet: Reattach the handle and turn on the water supply to test for leaks.
Repairing a leaking faucet not only conserves water but also prevents potential damage to surrounding areas. It’s a straightforward process that homeowners can undertake with minimal tools and expertise. However, it’s important to ensure all components are reassembled correctly to prevent further leaks.
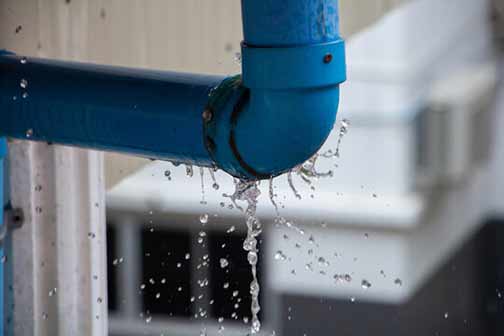
Repairing Leaking Pipes and Joints: Effective Techniques for Immediate Results
Leaking pipes and joints require prompt attention to prevent water damage. Here’s how to fix them:
- Identify the Leak: Locate the source of the leak by inspecting pipes and joints for moisture.
- Turn Off the Water Supply: Shut off the main water supply to stop water flow.
- Drain the Pipes: Open faucets to drain any remaining water from the pipes.
- Repair or Replace: Use a pipe cutter to remove the damaged section and replace it with a new pipe or fitting.
- Seal the Joint: Apply plumber’s tape or sealant to ensure a watertight connection.
Repairing leaking pipes and joints is critical to maintaining the integrity of your home’s plumbing system. Identifying the leak accurately is the first step, followed by careful execution of repairs. Utilizing appropriate sealants and ensuring tight connections can prevent future leaks.
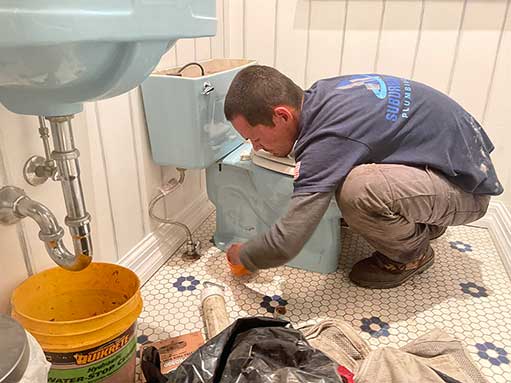
Addressing Toilet Leaks: Solutions for Efficient Water Usage
Toilet leaks can waste a significant amount of water and lead to higher bills. Here’s how to address them:
- Check the Flapper: Inspect the flapper for wear and replace it if necessary.
- Examine the Fill Valve: Ensure the fill valve is functioning correctly and adjust it if needed.
- Inspect the Wax Ring: If water is leaking from the base, the wax ring may need replacement.
Addressing toilet leaks promptly can prevent excessive water usage and reduce utility costs. Regular inspections and maintenance can help detect issues early and ensure efficient operation of your toilet.

Preventative Measures to Avoid Future Leaks: Strategies for Long-term Plumbing Health
Taking preventative measures can help avoid future plumbing leaks. Consider the following tips:
- Regularly inspect pipes and fixtures for signs of wear.
- Maintain a consistent water pressure level.
- Insulate pipes to protect them from temperature changes.
- Address clogs promptly to prevent pressure buildup.
Preventative measures are essential for ensuring the longevity and efficiency of your plumbing system. Regular inspections and maintenance can help identify potential problems early, allowing for timely repairs and preventing extensive damage.
When to Call a Professional Plumber: Recognizing Situations Beyond DIY Repair
While many plumbing issues can be resolved with DIY techniques, some situations require professional intervention. Call a plumber if:
- You cannot locate the source of a water leak.
- The leak is extensive and causing significant damage.
- You lack the necessary tools or expertise for a repair.
- Plumbing issues persist despite your efforts.
Recognizing when to call a professional plumber is crucial for ensuring the safety and integrity of your home’s plumbing system. Professionals have the expertise and tools necessary to address complex issues and prevent further damage.
To Conclude
By understanding the basics of your home’s plumbing system and learning how to address common leaks, you can save time and money while ensuring your home’s plumbing remains in good condition. Regular maintenance and timely repairs are key to preventing extensive damage and costly repairs. Remember, while DIY repairs can be effective, don’t hesitate to call a professional when needed to ensure the job is done correctly.
Empowering homeowners with plumbing knowledge not only enhances their ability to tackle leaks but also fosters a sense of confidence in maintaining their home’s plumbing system. With the right tools, techniques, and preventative measures, homeowners can ensure efficient operation and longevity of their plumbing systems.