Tag Archives: how to drain a water heater

Keep Your Water Heater Running Smoothly with Routine Draining

Keep Your Water Heater Running Smoothly with Routine Draining

A working water heater is one of the most indispensable appliances for the smooth running of your home. Water heaters make everyday activities like doing the laundry, washing dishes and taking a shower easier or even fun, says Nelson Management.

However, like other essential systems in the homes, most homeowners ignore their water heater until it malfunctions. Only when they turn a hot water faucet and get a blast of cold water do they attend to their water heater?

Yet water heaters are not hard to maintain; all you need is a good understanding of a few simple steps and a fixed schedule. If you do these two things, your water heater will serve you well and exceed its projected lifespan.

In this post, we discuss the most essential maintenance step for the smooth operation of a storage water heater. To get the full value from your water heater, you should drain it periodically. How do you drain a water heater?

Draining your water heater

This maintenance step helps remove crud or mineral deposits that have settled at the bottom of the water heater tank. It improves the appliance’s performance and prolongs its life. Draining a water heater is easy. Here is how to do it.

How to drain and flush a water heater

Required tools: Garden hose, bucket or drain and screwdriver

Cut the power or gas supply

Before doing any maintenance work on your water heater, always ensure the power or gas supply is off.

Let the water cool

To avoid burns, you may want to wait until the water inside the tank has cooled. This step is optional, but you must take proper care not to get burned.

Connect garden hose

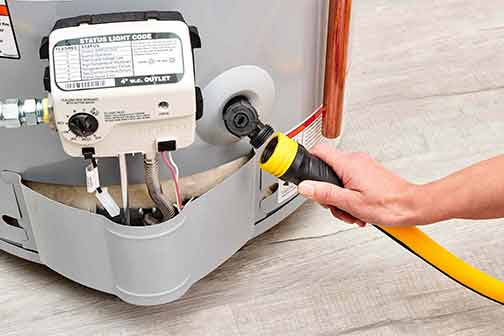
Look for the drain valve and connect a garden hose to it. The valve will be near the bottom of the water heater tank. Connect the other end of the hose to a bucket, flood drain or sump basin.

Close the cold water supply

You will see two water lines connected to the water heater. The cold water line should say “cold” or “in.” If it doesn’t, you may need to track the lines to see which goes to the water meter or pressure tank. That is the cold water supply; close it.

Open the TPR Valve

The TPR (temperature and pressure relief) valve can be found on the side of the tank, towards its top. Lift the flap to open the valve. That will allow air into the tank as water flows out of it. You may also open a hot water faucet on a floor above your water heater.

Open the drain valve

Open the drain valve at the bottom with the garden hose attached. If the water is still hot, avoid putting your hand or foot into it. Keep small children and pets out of the area. When the water stops flowing, the tank is empty.

Flush the water heater

Open the cold water supply with the drain valve still open. Cold water will flow into and out of the tank under pressure. This additional step ensures that any debris left inside the tank will be washed out. 

Repeat step 7

Close the drain valve and leave the cold water supply open until the tank is full. Open the drain valve and let the water flow out. That will ensure that the tank is clean.

Refill the tank

Close the drain valve and let cold water refill the tank.

Restore power or gas supply

Do not forget to reconnect your water heater to power or relight the gas. After this, wait until the water is heated to the desired temperature to ensure the water heater works.

How long does this process take, and how often should you do it?

On average, it should not take more than 30 minutes to drain a 50-gallon water heater. The actual amount of time it takes to drain your water heater will vary depending on:

  • Your home’s water pressure.
  • The amount of sediment inside the tank. If you have never drained the water heater, expect it to take longer.
  • How handy you are. A professional plumber will do it in less time than a homeowner.

How often you drain your water heater depends on the quality of the water entering your home. If your area’s water is hard or has a lot of sediments, you may have to do this step every six months. Otherwise, once a year is sufficient. A reputable plumber can help you make the right decision.
Taking Care of Your Water Heater: A Step-by-Step Guide to Draining and Flushing

how to flush and drain a water heater

As a homeowner, it is essential to maintain your water heater regularly to ensure it functions optimally and has a long lifespan. Over time, sediment and mineral buildup can accumulate inside the tank, reducing the efficiency and performance of your water heater. Draining and flushing your water heater is a crucial maintenance task that should be done annually or as recommended by the manufacturer. In this step-by-step guide, we will walk you through the process of draining and flushing your water heater, providing you with the knowledge and confidence to undertake this task.

Why Should You Drain and Flush Your Water Heater?

Before we dive into the steps of draining and flushing your water heater, let’s understand why this maintenance task is essential. Over time, sediment, minerals, and debris can settle at the bottom of the water heater tank. This sediment buildup can cause several problems, including:

  • Reduced Efficiency: Sediment acts as an insulating layer, making it harder for the burner or heating element to heat the water. This can lead to increased energy consumption and higher utility bills.
  • Poor Performance: Sediment accumulation can reduce the water heater’s ability to provide an adequate supply of hot water, leading to lukewarm or cold showers.
  • Increased Risk of Damage: Sediment buildup can cause overheating, which can damage the tank and other components of the water heater.
  • Shortened Lifespan: Neglecting to drain and flush your water heater regularly can significantly reduce its lifespan, leading to costly repairs or premature replacement.

By draining and flushing your water heater, you can remove the sediment and maintain its efficiency, performance, and longevity.

Gather the Necessary Tools and Materials

Before you start, ensure you have the following tools and materials:

  • A garden hose long enough to reach a suitable drain location outside your home.
  • A screwdriver or wrench to open the drain valve.
  • A bucket or large container to collect the drained water.
  • A pair of gloves and protective eyewear to keep yourself safe.

Once you have gathered all the necessary tools and materials, you are ready to proceed with the draining and flushing process.

Step 1: Turn Off the Power and Fuel Supply

Before performing any maintenance on your water heater, it is crucial to turn off the power or fuel supply to ensure your safety. Follow these steps:

  • For Electric Water Heaters: Locate the circuit breaker labeled for your water heater and switch it off.
  • For Gas Water Heaters: Locate the gas supply valve near the bottom of the water heater and turn it off.

By turning off the power or fuel supply, you eliminate the risk of accidents or injuries while working on your water heater.

Step 2: Allow the Water to Cool Down

Next, you need to allow the water inside the tank to cool down before you proceed with draining it. Hot water can cause burns or scalding, so it is essential to exercise caution. The cooling process may take several hours, so it is recommended to perform this maintenance task when you do not need hot water for an extended period.

Step 3: Locate the Drain Valve

The drain valve is usually located near the bottom of the water heater tank. It is a brass or plastic valve with a threaded outlet. Once you have identified the drain valve, follow the next steps to drain the water heater.

Step 4: Connect the Garden Hose

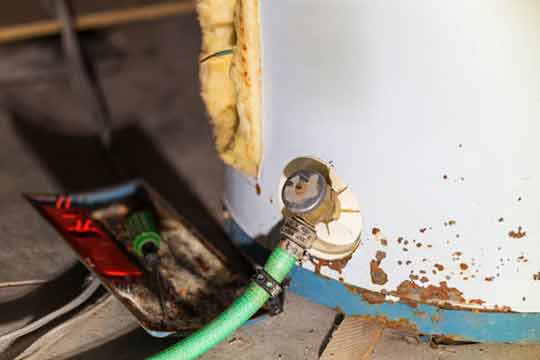
Take one end of the garden hose and connect it to the drain valve outlet. Ensure the connection is secure to prevent any leaks or spills during the draining process.

Step 5: Position the Other End of the Hose

Position the other end of the garden hose at a suitable drain location outside your home. The water expelled from the tank can be hot or contain sediment, so selecting an appropriate drain location is crucial.

Step 6: Open the Drain Valve

Using a screwdriver or wrench, slowly open the drain valve by turning it counterclockwise. Be prepared for water to start flowing into the garden hose and out into the drain. Ensure the bucket or large container is ready to collect the water initially.

Step 7: Drain the Tank

Allow the water inside the tank to drain completely. This process may take some time, depending on the size of your water heater. Be patient and ensure the water is flowing steadily before proceeding to the next step.

Step 8: Flush the Tank

Flushing the tank helps remove any remaining sediment or debris that may not have been expelled during the draining process. To flush the tank, follow these steps:

  • Close the drain valve by turning it clockwise, ensuring it is tightly closed.
  • Turn on the cold water supply to the water heater. The cold water will help flush out any remaining sediment.
  • Allow the water to run through the tank and out through the drain valve for several minutes. This will help flush out any buildup.
  • Once you are satisfied that the tank is thoroughly flushed, turn off the cold water supply.

Step 9: Close the Drain Valve

Using a screwdriver or wrench, close the drain valve by turning it clockwise until it is tightly closed. Ensure there are no leaks around the valve.

Step 10: Refill the Tank

Now that the draining and flushing process is complete, it’s time to refill the water heater tank. Follow these steps:

  • Close the drain valve securely if it is not already closed.
  • Disconnect the garden hose from the drain valve outlet and store it away.
  • Turn on the cold water supply to the water heater.
  • As the tank fills with water, open one or more hot water faucets in your home to release any trapped air.
  • Once you have a steady flow of water from the faucets, close them.

Step 11: Restore Power or Fuel Supply

Lastly, restore the power or fuel supply to your water heater:

  • For Electric Water Heaters: Turn on the circuit breaker labeled for your water heater.
  • For Gas Water Heaters: Turn on the gas supply valve near the bottom of the water heater.

Ensure the water heater is functioning correctly and wait for it to heat the water to the desired temperature before using hot water in your home.

in the middle of draining a water heater tank.

Draining and flushing your water heater is a crucial maintenance task that should be done annually or as recommended by the manufacturer.

Maintaining Your Water Heater for Longevity

Draining and flushing your water heater is just one aspect of its overall maintenance. To ensure your water heater operates efficiently and has a long lifespan, consider the following tips:

  • Adjust the Temperature: Set the temperature of your water heater to a suitable level (usually between 120 and 140 degrees Fahrenheit) to prevent overheating and reduce energy consumption.
  • Insulate the Pipes: Insulate the hot water pipes leading from the water heater to maximize energy efficiency and minimize heat loss.
  • Check the Anode Rod: Regularly inspect and replace the anode rod if necessary. The anode rod helps prevent corrosion inside the tank.
  • Test the Pressure Relief Valve: Annually test the pressure relief valve to ensure it is functioning correctly. This valve helps prevent excessive pressure buildup inside the tank.
  • Keep the Area Clean: Ensure the area surrounding the water heater is clean and free from debris to prevent potential fire hazards and allow proper ventilation.

By following these additional maintenance steps and being proactive about the care of your water heater, you can extend its lifespan and enjoy reliable hot water for years to come.

In Summary

Regularly draining and flushing your water heater is a crucial maintenance task that should not be overlooked. By removing sediment and debris from the tank, you can ensure your water heater operates efficiently, provides an adequate supply of hot water, and has a longer lifespan. The step-by-step guide provided in this article offers you the knowledge and guidance to undertake this essential maintenance task. Remember to always prioritize safety by turning off the power or fuel supply and allowing the water to cool before starting the draining process. With proper maintenance and care, your water heater will continue to serve you well for many years and avoid a premature need for a water heater replacement.

Water Heater Flushing And Repairs – Why You Should Leave It To Plumbing Experts

Water Heater Flushing And Repairs

Water heaters are often taken for granted when it comes to home maintenance. You use them daily and they tend to work fine with little maintenance. However, it’s important to not ignore potential problems. If left unchecked, water heater repair issues will only get worse, resulting in a more expensive repair or even having to replace the water heater heater.

A professional water heater repair service can help you determine what issue you are having and have it fixed quickly and properly. Signs that your water heater needs maintenance include leaks around the base, a decrease in hot water due to a higher temperature setting than necessary, rust-colored water coming out of the tap, or a screeching sound coming from the heater. All of these signs could mean that you need to flush your water heater or even replace it.

Regular maintenance like water heater flushing is essential to ensure your water heater is running properly. An experienced technician can flush your water heater by using a garden hose to remove any sediment build-up from the bottom of the heater. This is recommended every few years, or sooner if you notice sediment build-up inside your tank.

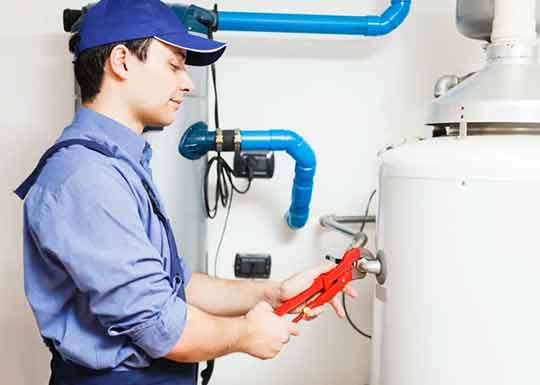
When it comes to more detailed repairs, like replacing the heater’s control panel, venting system, or anode rod, an experienced technician with the proper tools and know-how can help make sure these repairs are done correctly. An experienced local plumber will also know exactly how to adjust or replace the temperature and pressure relief valve to meet local code requirements.

DIY Water Heater Repair

Although it may be tempting to try to repair your water heater yourself, there are numerous reasons that a home-owner should leave it to the professionals.

Water heaters can be complicated to repair and if not done correctly, DIY repairs could make the problem worse or cause more damage. Not having the right tools or knowledge can result in costly repairs down the line or worse, injury or electrocution. Fixing the water heater on your own could also void the warranty and cost you more in the long run.

If you do decide to try repair it yourself, make sure you are well-informed before beginning any repair or maintenance. Check the manufacturer’s website and make sure you have the right tools and parts to make the repair. It’s always best to turn off the power to the heater before completing any repair and take all necessary safety precautions.

Water Heater Flushing

Water Heater flushing is an important water heater maintenance task that should be done regularly. If left unchecked, sediment and minerals can build-up in the tank and reduce its efficiency. It can also damage the heater over time and make repairs more costly.

Flushing a water heater is relatively simple and can be done with a garden hose. However, if you notice an increase in sediment or mineral build-up, then it’s best to call in a professional. An experienced plumber can flush the system and help diagnose any other maintenance issues you might be having.

Regular water heater maintenance, including flushing and cleaning, can help prevent costly repairs or replacements down the line and keep your water heater running optimally.

In conclusion, water heaters require regular maintenance and repairs to ensure they are running correctly and efficiently. Flushing and cleaning should be done regularly and any potential issues should be addressed right away to avoid more costly repairs. If you have questions or need professional help, it’s best to call a plumber as they are experienced with all aspects of water heater repair and maintenance.