Water heater leaks can be a frustrating and potentially damaging problem for homeowners. Not only can leaks lead to wasted water and higher utility bills, but they can also cause water damage to surrounding areas and even lead to mold growth if left unaddressed. Here we will discuss the importance of promptly identifying the source of water heater leaks and provide some troubleshooting steps to help homeowners fix the problem.
Understanding Water Heater Leaks
Before diving into the troubleshooting process, it’s important to have a basic understanding of how water heaters work and what causes leaks to occur. A typical residential water heater consists of a tank that holds and heats the water, along with various components such as inlet/outlet pipes, temperature and pressure relief valves, drain valves, and heating elements.
The most common types of water heater leaks occur from the following sources:
- Leaking tank
- Leaking inlet/outlet connections
- Leaking temperature and pressure relief valve
- Leaking drain valve
Identifying the Source of the Leak
When faced with a water heater leak, the first step is to identify the source of the problem. This can be done by following these steps:
Step 1: Inspect the Tank
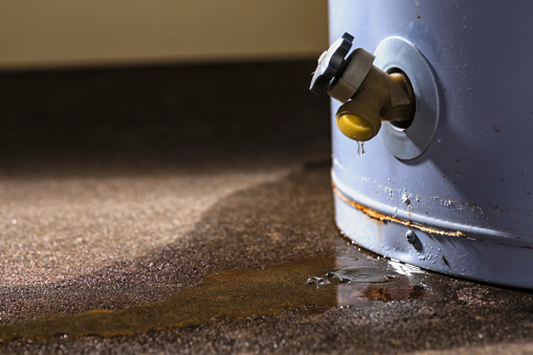
Start by visually inspecting the water heater tank for any signs of leakage. Look for dripping water, puddles underneath the unit, or any visible corrosion or rust. If you notice any of these signs, there’s a good chance that the tank itself is leaking and may need to be replaced.
Step 2: Check the Inlet/Outlet Connections
Next, examine the inlet and outlet connections located at the top of the water heater. These connections are typically made using threaded fittings or soldered joints. Inspect the connections for any signs of water leakage or loose fittings. Tighten any loose connections and consider using Teflon tape or pipe joint compound to create a better seal.
Step 3: Inspect the Temperature and Pressure Relief Valve
The temperature and pressure relief valve is a crucial safety component of a water heater. It is designed to release excess pressure and prevent the tank from exploding. However, over time, these valves can become faulty and start to leak. Carefully inspect the valve for any signs of water leakage or mineral deposits. If you notice any issues, it’s recommended to replace the valve to ensure proper functioning.
Step 4: Check the Drain Valve
The drain valve is located near the bottom of the water heater and is used for periodic flushing of sediment buildup. It is not uncommon for the drain valve to develop a leak due to a faulty or loose connection. Examine the valve for any signs of leakage and tighten any loose fittings. If the valve itself is damaged, it may need to be replaced.
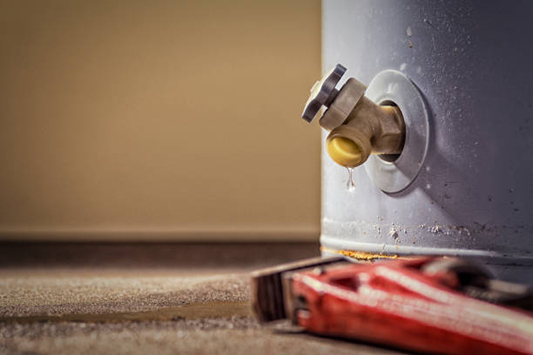
Use a wrench to securely tighten the connections, but be careful not to overtighten and risk damaging the pipes or fittings.
Fixing the Water Heater Leak
Once you have identified the source of the water heater leak, you can take appropriate measures to fix the problem. The following steps will guide you through the process:
Step 1: Repairing Leaking Connections
If the leak is coming from the inlet/outlet connections, it is often a simple matter of tightening the fittings. Use a wrench to securely tighten the connections, but be careful not to overtighten and risk damaging the pipes or fittings. Apply Teflon tape or pipe joint compound to create a better seal if necessary.
Step 2: Replacing Faulty Valves
If the temperature and pressure relief valve or the drain valve is leaking, it’s best to replace the faulty valve with a new one. Turn off the power supply to the water heater and shut off the water supply before starting the replacement process. Follow the manufacturer’s instructions for proper installation and ensure that the new valve is compatible with your specific water heater model.
Step 3: Addressing Tank Leaks
If the water heater tank itself is leaking, unfortunately, repairing the leak may not be feasible. Water heater tanks are typically made of steel, which can corrode over time and develop leaks. In this case, the best course of action is to replace the water heater. Call a professional plumber who can help with selecting a suitable replacement and ensure proper installation.
Preventive Measures
While it’s not always possible to prevent water heater leaks, certain preventive measures can help minimize the risk. Consider implementing the following practices to keep your water heater in good working condition:
- Perform regular maintenance, including flushing the tank to remove sediment buildup.
- Monitor the pressure and temperature settings of your water heater and ensure they are within the recommended range.
- Check for signs of corrosion or rust on the tank and promptly address any issues.
- Periodically inspect the inlet/outlet connections, temperature and pressure relief valve, and drain valve for any signs of leakage.
- Consider installing a drip pan underneath the water heater to catch any potential leaks and prevent water damage.
In Summary
Water heater leaks are a common problem that homeowners may encounter. By promptly identifying the source of the leak and taking appropriate measures to fix the problem, you can prevent further damage and ensure the efficient functioning of your water heater. Regular maintenance and preventive measures can also help minimize the risk of future leaks. If you are unsure about troubleshooting or repairing your water heater, it is always recommended to seek the assistance of a professional plumber.