Tag Archives: frozen pipe repair

Finishing Your Basement: Plumbing Guidelines and Tips

plumbing tips for finishing your basement

Before embarking on any basement finishing project, it is crucial to conduct a thorough assessment of your basement’s plumbing needs. This initial step involves evaluating the current state of your basement, identifying any existing plumbing issues, and determining the scope of work required. Start by inspecting the basement for signs of water damage, leaks, or mold, as these issues must be addressed before any plumbing work can begin. Additionally, consider the layout of your basement and how it will impact the placement of plumbing fixtures and systems.

Planning Your Basement Plumbing Layout

Once you have assessed your basement’s plumbing needs, the next step is to plan the plumbing layout. This involves deciding where to place essential fixtures such as sinks, toilets, showers, and laundry appliances. When planning the layout, consider factors such as the location of existing plumbing lines, the accessibility of water supply and drainage systems, and the overall flow and functionality of the space. It is also essential to ensure that the plumbing layout complies with local building codes and regulations.

Understanding Basement Plumbing Systems

Basement plumbing systems can be complex, as they often involve installing new plumbing lines and connecting them to the home’s existing plumbing infrastructure. Understanding the different components of a basement plumbing system is essential for a successful project. Key elements include water supply lines, drainage pipes, venting systems, and the installation of a sewage ejection pump system. Each of these components plays a critical role in ensuring the proper functioning of your basement plumbing.

Water Supply Lines: Ensuring Adequate Water Flow

Water supply lines are responsible for delivering fresh water to your basement fixtures. When installing water supply lines, it is essential to use high-quality materials such as copper or PEX piping to ensure durability and reliability. Additionally, ensure that the water supply lines are properly sized to provide adequate water flow to all fixtures. Proper insulation of water supply lines is also crucial to prevent freezing and maintain water temperature.

Drainage Pipes: Efficiently Removing Wastewater

Drainage pipes are responsible for removing wastewater from your basement fixtures and directing it to the main sewer line. Proper installation and sizing of drainage pipes are essential to prevent clogs and ensure efficient wastewater removal. Additionally, it is crucial to install drainage pipes with the correct slope to facilitate gravity flow and prevent water from backing up into the basement. Regular maintenance and inspection of drainage pipes can help prevent potential issues.

Venting Systems: Preventing Sewer Gas Buildup

Venting systems are an essential component of basement rough-in plumbing, as they prevent the buildup of sewer gases and ensure the proper functioning of drainage systems. Vent pipes allow air to enter the drainage system, which helps maintain proper pressure and facilitates the flow of wastewater. When installing venting systems, it is important to follow local building codes and ensure that vent pipes are properly sized and positioned to prevent any potential issues.

Sewage Ejection Systems: Managing Wastewater in Below-Grade Basements

In basements that are below the main sewer line, a sewage ejection system is necessary to manage wastewater. This system includes a sewage ejector pump that lifts wastewater from the basement and directs it to the main sewer line. When installing a sewage ejection system, it is essential to choose a pump with adequate capacity and ensure that it is properly vented and maintained. Regular inspection and maintenance of the sewage ejection system can help prevent potential issues and ensure reliable operation.

a sewage ejection pump system installation.

When installing a sewage ejection system, it is essential to choose a pump with adequate capacity and ensure that it is properly vented and maintained.

Installing Basement Plumbing Fixtures

Once the plumbing systems are in place, the next step is to install the basement plumbing fixtures. This includes sinks, toilets, showers, and laundry appliances. When installing fixtures, it is important to follow manufacturer instructions and ensure that all connections are properly sealed to prevent leaks. Additionally, consider the placement of fixtures to maximize space and functionality in the basement. Proper installation of fixtures is crucial for ensuring the overall success of the basement plumbing project.

Ensuring Compliance with Building Codes and Regulations

Compliance with local building codes and regulations is essential for any basement plumbing project. Building codes are in place to ensure the safety and functionality of plumbing systems, and failure to comply can result in fines and potential issues with the plumbing system. Before starting any work, familiarize yourself with the relevant building codes and obtain any necessary permits. Additionally, consider hiring a licensed plumber to ensure that all work is completed to code and meets the required standards.

Hiring a Professional Plumber: When to Seek Expert Help

While some basement plumbing projects can be completed by knowledgeable DIY enthusiasts, others may require the expertise of a professional plumber. Complex tasks such as installing sewage ejector pump systems, connecting to the main sewer line, and ensuring compliance with building codes are best left to professionals. Hiring a licensed plumber can provide peace of mind and ensure that the project is completed safely and efficiently. When choosing a plumber, consider their experience, reputation, and credentials.

Maintaining Your Basement Plumbing System

Proper maintenance is essential for the longevity and reliability of your basement plumbing system. Regularly inspect plumbing fixtures, pipes, and systems for signs of wear, leaks, or damage. Additionally, perform routine maintenance tasks such as cleaning drains, checking for clogs, and testing the sewage ejection pump. Addressing any issues promptly can prevent costly repairs and ensure the continued functionality of your basement plumbing system.

Energy Efficiency and Water Conservation

When planning and installing your basement plumbing system, consider incorporating energy-efficient and water-conserving fixtures and appliances. Low-flow toilets, faucets, and showerheads can significantly reduce water usage, while energy-efficient water heaters and appliances can lower energy consumption. Additionally, consider using insulation and other measures to improve the overall energy efficiency of your basement. These efforts not only benefit the environment but can also result in cost savings on utility bills.

Dealing with Common Basement Plumbing Issues

Basement plumbing systems can encounter a variety of issues, such as leaks, clogs, and sewage backups. Being prepared to address these common problems can help prevent major disruptions and damage. For leaks, promptly identify and repair the source to prevent water damage and mold growth. For clogs, use appropriate tools and methods to clear the blockage without damaging the pipes. In the case of a sewage backup emergency, it is essential to address the issue immediately and seek professional assistance if necessary.

Future-Proofing Your Basement Plumbing

When finishing your basement, it is important to consider future needs and potential changes. Future-proofing your basement plumbing involves planning for potential expansions, upgrades, or modifications. This may include installing additional plumbing lines, leaving access points for future connections, and using flexible piping materials. By considering future needs during the initial installation, you can save time and money on future renovations and ensure that your basement plumbing system remains adaptable and functional.

Conclusion: Achieving a Professional Finish

Finishing your basement with a well-planned and properly installed plumbing system is essential for creating a functional and comfortable living space. By following these guidelines and tips, you can ensure that your basement plumbing project is completed to a high standard, complies with building codes, and meets your needs. Whether you choose to undertake the project yourself or hire a professional plumber, careful planning, attention to detail, and regular maintenance are key to achieving a professional finish. With the right approach, your finished basement can become a valuable and enjoyable part of your home.

How to Properly Maintain Restaurant Kitchen Plumbing

How to Properly Maintain Restaurant Kitchen Plumbing

When it comes to running a successful restaurant, there are many factors to consider, from the quality of the food to the service provided. However, one aspect that is often overlooked is the maintenance of the restaurant kitchen plumbing. Properly maintaining the plumbing system in a restaurant is crucial for a number of reasons, including ensuring the health and safety of both customers and staff, maintaining a clean and hygienic environment, and avoiding costly and disruptive plumbing issues. Here we will explore the importance of properly maintaining restaurant kitchen plumbing and provide some useful tips on how to do so.

Why Proper Maintenance is Essential

Restaurant kitchen plumbing is subject to a lot of wear and tear due to the high volume of water usage, as well as the food particles and grease that can accumulate over time. This makes regular maintenance essential to prevent plumbing problems that can disrupt operations and lead to unsanitary conditions. By properly maintaining the plumbing in your restaurant’s kitchen, you can avoid the following issues:

  • Clogged drains: Food particles, grease, and other debris can accumulate in the drains, leading to clogs that can cause backups and unpleasant odors. Regular maintenance can help prevent these clogs and keep the water flowing smoothly.
  • Leaks: Leaking pipes can not only waste water but also cause damage to the surrounding areas. Promptly addressing any leaks can help prevent water damage and mold growth.
  • Foul odors: A kitchen with poor plumbing maintenance can often develop foul odors, which can be off-putting to both customers and staff. Regular cleaning and maintenance can help eliminate these odors and create a more pleasant environment.
  • Bacterial growth: Without proper maintenance, bacteria can thrive in the kitchen plumbing system, posing a risk to the health and safety of both customers and staff. Regular cleaning and maintenance can help prevent the growth of harmful bacteria.
a restaurant kitchen grease trap being cleaned out and maintained properly.

Make sure to install grease traps in the appropriate locations and clean them regularly to ensure they are functioning effectively.

Tips for Properly Maintaining Restaurant Kitchen Plumbing

Now that we understand the importance of proper maintenance, let’s explore some practical tips for keeping your restaurant kitchen plumbing in top shape:

Regularly clean the drains

Food particles, grease, and other debris can easily accumulate in the drains, leading to clogs and unpleasant odors. To prevent this, it’s important to regularly clean the drains using a drain cleaner or a mixture of baking soda, vinegar, and hot water. Be sure to follow any specific instructions provided by the manufacturer of the drain cleaner.

Install and maintain grease traps

Grease traps are essential for restaurants to prevent grease from entering the plumbing system and causing clogs. Make sure to install grease traps in the appropriate locations and have the grease traps cleaned regularly to ensure they are functioning effectively.

Educate staff on proper usage

Train your staff on the proper usage of the kitchen plumbing fixtures to prevent any unnecessary strain or damage. This includes teaching them how to properly dispose of food waste and grease, as well as using the garbage disposal correctly.

Schedule regular inspections

It’s important to schedule regular inspections of your restaurant kitchen plumbing system to catch any potential issues before they escalate. Hire a professional plumber to conduct thorough inspections and address any problems that may arise.

Promptly address leaks

If you notice any leaks in your restaurant kitchen plumbing, it’s crucial to address them promptly. Even small leaks can lead to significant water damage and mold growth if left untreated. Contact a plumber to fix the leaks as soon as possible.

Maintain proper ventilation

In addition to maintaining the plumbing fixtures, it’s also important to ensure proper ventilation in your restaurant kitchen. Adequate ventilation helps prevent the buildup of moisture and reduces the risk of mold growth.

Follow local regulations and guidelines

Every region may have specific regulations and guidelines regarding restaurant kitchen plumbing. Make sure to familiarize yourself with these regulations and ensure that your plumbing system complies with them.

Properly maintaining restaurant kitchen plumbing is essential for ensuring a safe, clean, and efficient working environment. By following the tips provided in this article, you can minimize the risk of plumbing issues and create a positive dining experience for your customers. Remember, regular maintenance and inspections are key to preventing costly and disruptive plumbing problems. Invest the time and effort into maintaining your restaurant kitchen plumbing, and you’ll reap the rewards in terms of improved efficiency, reduced downtime, and enhanced customer satisfaction.

Frozen Pipes Prevention and Repair: A Guide for Chicago Homeowners

Frozen Pipes Prevention and Repair in Chicago

As winter approaches, homeowners in Chicago face the dreaded threat of frozen pipes. Frozen pipes not only disrupt the daily routines of residents but can also lead to costly repairs and property damage. Therefore, it is crucial for Chicago homeowners to take preventive measures and know how to handle frozen pipes effectively.

The Dangers of Frozen Pipes

Frozen pipes can cause a multitude of problems for homeowners. When water freezes inside the pipes, it expands, putting pressure on the walls of the pipes. This pressure can lead to cracks or even bursts in the pipes, resulting in leaks and significant water damage once the water thaws and starts flowing again. The damage caused by frozen pipes can be extensive, requiring costly burst pipe emergency repairs and cleanup efforts.

Preventive Measures

Taking preventive measures is the best way to avoid the hassles and expenses of dealing with frozen pipes. Here are some steps that Chicago homeowners can take to prevent their pipes from freezing:

Insulate Exposed Pipes

One of the most effective ways to prevent pipes from freezing is insulating them properly. Pay special attention to pipes in unheated areas such as basements, garages, and crawl spaces. Use pipe insulation sleeves or heat tape to protect the pipes from extreme temperatures. Adequate insulation acts as a barrier, reducing the chances of encountering frozen pipes significantly.

Seal Air Leaks

Identify any drafts or air leaks near pipes and seal them. Cold air can easily enter through gaps and cracks, affecting the temperature of the pipes. Add weatherstripping or caulk around windows, doors, and crawl spaces to keep the cold air out and maintain a warmer environment around the pipes.

Let Faucets Drip

During extremely cold weather, allowing faucets to drip helps prevent pipes from freezing. Moving water is less likely to freeze compared to stagnant water. By letting the faucets drip slightly, you keep the water flowing, lowering the risk of frozen pipes.

Keep the Thermostat Set

Maintaining a consistent indoor temperature is crucial to preventing frozen pipes. During colder months, don’t set the thermostat too low or switch off the heating when you’re away from home. Instead, keep the temperature above 55°F (13°C) to ensure that the pipes stay warm enough, even in freezing conditions.

Open Cabinet Doors

If you have pipes located within kitchen or bathroom cabinets, open the doors to allow warm air to circulate around them. This technique is particularly useful for pipes that are against exterior walls, as they are more susceptible to freezing. By promoting air circulation, you effectively raise the temperature around the pipes and reduce the risk of freezing.

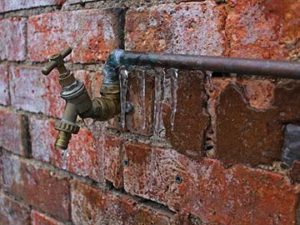
frozen pipes during wintertime in chicago.

Frozen pipes can wreak havoc on a home and cause significant damage if not addressed promptly.

What to Do If Your Pipes Freeze

Despite taking preventive measures, sometimes pipes can still freeze. If you find yourself with frozen pipes, it’s essential to know the proper steps to minimize damage and get the water flowing again. Here’s what you should do if your pipes freeze:

Keep the Faucets Open

When you suspect that your pipes have frozen, open the faucets connected to those pipes. This will relieve the pressure and give the water somewhere to go when it starts to thaw.

Apply Heat to the Frozen Pipe

Using a handheld hairdryer or a space heater, carefully apply heat to the frozen section of the pipe. Start by warming the pipe near the faucet and work your way towards the frozen area. Avoid using open flames or high temperatures that could damage the pipe. Once the pipe has thawed, keep the faucet open to allow the water to flow freely.

Call an Emergency Plumber

If you’re unable to thaw the pipe or if you suspect that it has burst, it’s essential to call an emergency plumber immediately. An experienced emergency plumber in Chicago has the expertise and specialized tools to handle frozen and burst pipes safely. They can assess the situation, make the necessary repairs, and help prevent future occurrences.

In Summary

Frozen pipes can wreak havoc on a home and cause significant damage if not addressed promptly. By taking preventive measures and knowing what to do in case of frozen pipes, Chicago homeowners can protect their properties and avoid costly repairs. Remember to insulate exposed pipes, seal air leaks, let faucets drip during extreme cold, and maintain a consistent indoor temperature. And if your pipes do freeze, keep the faucets open, apply gentle heat, and contact a professional plumber for assistance. With these precautions and actions, you’ll be well-prepared to tackle frozen pipes and ensure a smooth winter season for your home.

How to Thaw and Prevent Frozen Water Pipes

How to Thaw and Prevent Frozen Water Pipes

Frozen water pipes are a constant threat during winter. If the only issue with frozen pipes is the temporary disruption of water supply to parts of your home, the problem would be easier to endure. But frozen water in your pipes can leave you with damaged pipes and expensive repairs, warns Liberty Real Estate Services.

Water expands when it freezes and can exert pressures of over 2000 pounds per square inch. This is enough force to rupture your pipe or, at the very least, weaken them. Typically, you don’t even know this is happening until the ice thaws and your basement is suddenly flooded.

The result is damaged walls, ceilings, and floors that cost tens of thousands of dollars to repair.  This problem mostly happens to pipes that are connected to outside-facing walls, pipes in under-the-sink cabinets, unheated basements or crawlspaces, and outdoor faucets.

What can you do if a pipe in your home is frozen but not ruptured? Is there a way to thaw the frozen pipe without damaging it? Yes, you can thaw a frozen pipe without damaging it. Below are the steps to do this, depending on the location of the pipe inside your home.

Frozen pipes inside walls

Pipes embedded in the walls or ceilings of your home may become frozen. Unfreezing them is harder than thawing pipes that are exposed. If you find that one of the pipes inside the walls or ceilings of the house is frozen, here is what you can do:

Turn up the heat in your entire home – Ensure you leave the cabinet door open if the frozen pipe is in a wall inside your bathroom or beneath the base cabinet for your kitchen sink or vanity. This will let warm air in your home carry heat to the wall.

Open up the wall section –  If you cannot wait to let the heated air in your home defrost the pipe, maybe because you think a burst pipe is looming, use this solution. Cut the section of wall or ceiling directly above the pipe and use the same methods you would use to thaw an exposed pipe (explained in the next section).

Thawing exposed pipes that are frozen

If it is an exposed pipe, thawing it is easier since you can apply the steps above directly to the pipe. There are three ways to thaw exposed pipes. Regardless of the one you choose, always start by applying the heat from the faucet side of the pipe or the side closest to the water main and move forward to the frozen area.

Using a hair dryer – This method is the easiest and safest. The items you need are things you already have in the home. To help direct the heat to the backside of the pipe, place a cookie sheet behind the pipe. When defrosting a frozen pipe with a water heater, apply the heat using a sweeping motion across the frozen pipe section.

Use a portable heater – You may also thaw frozen pipes with a space heater. Turn the space heater to its highest setting and let it warm the air around the frozen pipe. Remember to open the doors of the cabinet if the pipe is in a cabinet under the kitchen sink or bathroom vanity.

Use an electrical heat tape – The third way to thaw frozen pipes is with a heat cable; a freeze protection cable you place directly on pipes to unfreeze them. To use the tape, attach it to the copper or plastic pipe with electrical tape, making sure the thermostat is directly on the pipe to sense its temperature.

How to prevent your pipes from freezing

The best way to deal with frozen pipes in your home is to not have them at all. After thawing the pipe, here are a few simple steps you can take to make sure you don’t have this problem ever again.

Keep faucets dripping – If it gets really cold and you think a pipe in your home might freeze, leave the faucet dripping to keep the water inside the pipes moving. This will prevent freezing.

Open the cabinet doors – Keep cabinet doors open to let warm air from the rest of the house circulate into the colder areas inside the cabinet. This will usually be sufficient to keep pipes from freezing.

Wrap the pipe with electrical heat tape – If a pipe is in the habit of freezing, wrap it permanently with electrical heat tape and turn on the heat if the weather starts to get cold.

Add insulation to pipes – To keep pipes in unheated spaces like basements and crawlspaces from freezing, wrap them with foam insulation. But this will only work if the rest of the room is not cold.

Install a permanent space heater – Permanently installing a space heater in unheated spaces in the home – garage, basement, and crawlspace – will keep exposed pipes or pipes inside the walls from freezing.

Disconnect garden hose in winter – If your faucet is not frost-proof, it will be vulnerable to freezing. Prevent this by turning off the water supply to the faucet and removing the garden hoses connected to it. If the outdoor faucet freezes it may need a repair or replacement come Spring time.

Who’s Responsible for Frozen Pipes in a Rental Apartment?

frozen pipes in a rental apartmentOwning a rental property comes with many benefits and a lot of challenges. If your property is located in an area with a temperate climate, one of the issues you may encounter is frozen pipes during winter. These can be pipes within the grounds of your property or inside the home.

Ideally, this is not something that should happen in a modern building. Modern houses are designed to have their own internal climate. The structure has systems that regulate its temperature to keep the home comfortable, regardless of what is happening outside.

But sometimes, this feature may not work, due to human error or system malfunction. When this happens, one of the consequences could be pipes freezing in very cold weather. A pipe freeze or burst can disrupt the water supply and should be solved immediately.

In a rental property, whose responsibility is it to deal with this problem?

Is the landlord supposed to solve frozen pipe issues or is this something the tenants are meant to take care of? This is a big source of conflict between landlords and tenants, says Keyrenter Property Management. Resolving it ahead of time is crucial for the landlord-tenant relationship.

Why Do Pipes in a Rental Property Freeze?

winter-chicago

To answer the first question of who is responsible for solving frozen pipe issues in a rental property, it is important to understand what causes pipes to freeze. There are three primary reasons why the pipes in your rental property may freeze:

  • Quick drops in temperature

Ambient temperature can fall very low during snowstorms and after heavy snowfalls. But this alone will not cause the pipes in the home to freeze. Extremely low outside temperature must be accompanied by other factors before it will lead to frozen pipes.

  • Damaged or inadequate insulation

If pipes that are exposed to cold air are not properly insulated, they may freeze. Also if there are cracks and openings that let cold air into the home, pipes close to these areas will be prone to freeze.

  • Low indoor temperatures

This is mainly due to the thermostat being set too low. To keep pipes from freezing, thermostats should be set at the same temperature day and night.

Landlord Responsibilities for Frozen Pipes

frozen-pipe-repair-chicago

Landlord responsibilities for preventing or resolving frozen pipe problem is twofold. Firstly, landlords are required to provide every amenity needed to make the home livable. These include functioning plumbing and a home that is adequately weather-proofed.

If pipes in a rental home freeze due to problems with the plumbing, heating, or insulation, the problem is the landlord’s to pay for. This is true even if the fault is due to the way a particular feature was installed and the landlord did not know of the problem.

The second aspect of landlord’s responsibility for frozen pipes is that landlords must educate their tenants on how to prevent frozen pipes in the home. The details of how to do this should be included in the lease agreement and the orientation new tenants get.

Some of the steps landlords should instruct tenants to follow during very cold weather are:

  • Keeping garage doors closed.
  • Leaving the closet and cabinet doors open to let pipes be warmed by the room temperature.
  • Letting a trickle of water drip from faucets to keep water flowing through pipes and keep them from freezing.

However, after a tenant has followed these instructions and the pipes in the home still freeze, the financial responsibility for the problem lies with the landlord.

Tenant Responsibilities for Frozen Pipes

tap-4501207_640

Just as landlords have an obligation to provide a rental home with adequate plumbing, heating, and insulation, tenants have the duty to use these amenities reasonably and to do what they should to protect the landlord’s property.

If a tenant fails to protect the owner’s property by doing any of the following, they will be held liable for any frozen pipes in the home:

  • If the tenant goes on vacation without shutting off the water supply or draining the water system and the pipes freeze as a result.
  • The tenant takes actions that damage the insulation, plumbing, or heating in the home.

What to do When a Pipe Freezes

  • It is the tenant’s duty, as the person who lives in the home and is in close proximity to the system, to inform the landlord of the problem.
  • Landlords on their part are to take immediate action to resolve the problem, regardless of who caused it. Afterward, they can try to determine if the tenant is responsible for the damage.
  • Finally, to solve a problem with frozen or burst pipes, call a qualified emergency plumber, do not attempt to fix it yourself. Frozen pipes are often accompanied by costly leaks and extensive damage to the building or tenant’s belongings.