Tag Archives: fix a leaking toilet

How to Fix a Leaking Toilet in Chicago: A Step-by-Step Guide

How to Fix a Leaking Toilet in Chicago

Dealing with a leaking toilet can be quite frustrating, but with the right tools and guidance, you can tackle this issue effectively. Whether you are a homeowner in Chicago or a tenant, this guide will provide you with the necessary instructions to resolve the problem and prevent further damage.

Step 1: Identify the Source of the Leak

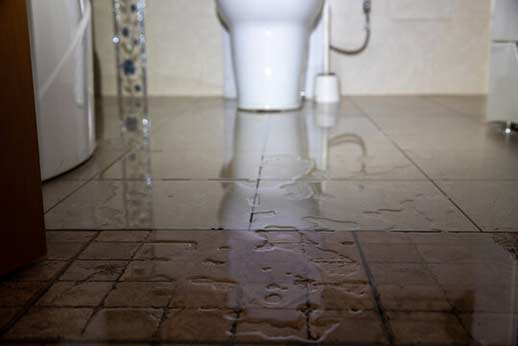
The first step in fixing a leaking toilet is to identify the source of the leak. Leaks can occur from various areas of the toilet, such as the base, the tank, or the supply line. It is crucial to pinpoint the exact location of the leak before proceeding with the repair.

Step 2: Shut Off the Water Supply

Before attempting any repairs, it is essential to turn off the water supply to the toilet. Locate the shut-off valve, typically located behind the toilet or near the bathroom pipes. Rotate the valve clockwise until the water stops running. This will prevent water from flowing into the toilet during the repair process.

Step 3: Drain the Toilet Tank

Once the water supply is turned off, you need to drain the toilet tank. Flush the toilet to remove as much water as possible from the tank. To eliminate any remaining water, use a sponge or a towel to soak up the excess moisture.

Step 4: Inspect and Replace the Flapper

The flapper is a rubber valve located at the bottom of the toilet tank. A faulty flapper is a common cause of leaks. Carefully inspect the flapper for any signs of damage or wear. If it appears worn out or is not sealing properly, it needs to be replaced. To replace the flapper:

  1. Turn off the water supply to the toilet.
  2. Remove the chain from the flush lever.
  3. Detach the old flapper from the flush valve.
  4. Install the new flapper by attaching it securely to the flush valve.
  5. Reconnect the chain to the flush lever.
  6. Turn on the water supply and test the toilet for leaks.
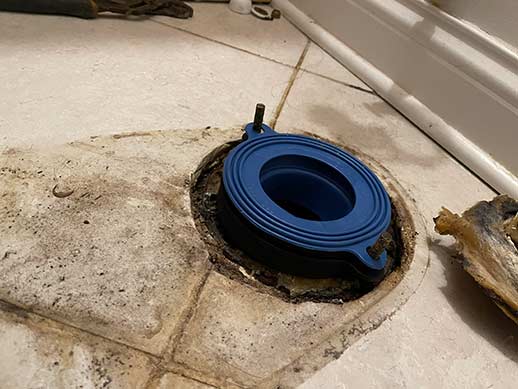
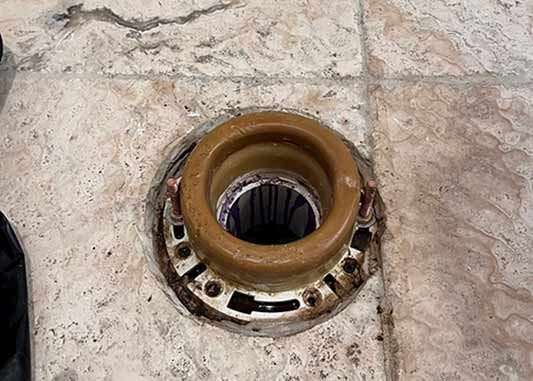
toilet wax ring replacement in chicago.

Replacing the wax ring can help create a watertight seal between the toilet and the sewer pipe.

Step 5: Check and Replace the Wax Ring

If the leak is coming from the base of the toilet, the wax ring may be damaged or worn out. Replacing the wax ring can help create a watertight seal between the toilet and the sewer pipe. Follow these steps to replace the wax ring:

  1. Turn off the water supply to the toilet.
  2. Drain the toilet tank as described in Step 3.
  3. Disconnect the water supply line from the bottom of the toilet tank.
  4. Remove the nuts securing the toilet to the floor.
  5. Lift the toilet carefully and set it aside.
  6. Scrape off the old wax ring from the toilet flange and inspect it for any signs of damage.
  7. Place a new wax ring on the flange, ensuring it is centered.
  8. Lower the toilet back onto the wax ring, aligning the bolts with the holes in the base.
  9. Tighten the nuts onto the bolts to secure the toilet in place.
  10. Reconnect the water supply line to the bottom of the toilet tank.
  11. Turn on the water supply and check for leaks.
Step 6: Examine and Repair the Supply Line

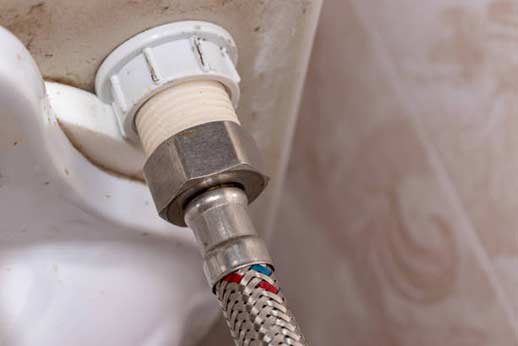
If the leak is originating from the supply line, it may require examination and repair. Follow these steps to address any issues with the supply line:

  1. Turn off the water supply to the toilet.
  2. Drain the toilet tank as described in Step 3.
  3. Inspect the supply line for any visible leaks or damages.
  4. If there is a leak in the supply line, it needs to be replaced.
  5. Disconnect the old supply line from both the toilet tank and the shut-off valve.
  6. Install a new supply line by connecting it firmly to the shut-off valve and the toilet tank.
  7. Turn on the water supply and check for leaks.
toilet water supply line.

If the leak is originating from the supply line, it may require examination and repair.

Step 7: Test for Leaks

After completing the necessary repairs, it is essential to test the toilet for any remaining leaks. Turn on the water supply and observe the toilet for any signs of water leakage. Inspect the base, the tank, and the supply line thoroughly. If any leaks persist, review the previous steps to ensure all repairs were performed correctly.

Summing it Up

Fixing a leaking toilet in Chicago requires a systematic approach to identify and resolve the issue. By following the step-by-step guide provided above, you can effectively fix the leak and prevent further damage to your toilet and property. Remember to exercise caution during the repair process and seek assistance from a Chicago plumber if needed. With proper maintenance and prompt repairs, you can ensure the longevity and functionality of your toilet in Chicago.

How to Fix a Leaking Toilet Base: A Complete Guide

How to Fix a Leaking Toilet Base

Toilets are an essential part of every household, providing convenience and hygiene. However, a leaking toilet base can be a frustrating and potentially costly problem. Ignoring a leaking toilet can lead to water damage, mold growth, and increased water bills. In this comprehensive guide, we will walk you through step-by-step on how to fix a leaking toilet base.

Identify the Source of the Leak

The first step in fixing a leaking toilet base is to identify the source of the leak. There are several potential causes, including:

  • Wax ring deterioration
  • Loose or damaged toilet bolts
  • Cracked toilet base
  • Incorrect toilet installation

To determine the cause, carefully inspect the area around the toilet base for any signs of water pooling or dampness. Additionally, check for any cracks or looseness in the toilet itself.

Turn Off the Water Supply

Before attempting any repairs, it is crucial to turn off the water supply to the toilet. Locate the shut-off valve, usually located near the base of the toilet or on the wall behind it, and turn it clockwise until it is fully closed. Flush the toilet to drain any remaining water from the tank and bowl.

Remove the Toilet

In order to access and repair the leaking toilet base, you will need to remove the toilet. Follow these steps:

  • Disconnect the water supply line from the bottom of the toilet tank.
  • Remove the nuts from the toilet bolts securing the toilet base to the floor.
  • Gently rock the toilet back and forth to break the wax seal and lift it off the floor.
  • Place the toilet on a towel or old newspaper to prevent any water or debris from spreading.
a toilet wax ring replacement.

A common cause of a leaking toilet base is a deteriorated wax ring. The wax ring creates a watertight seal between the toilet base and the floor.

Replace the Wax Ring

A common cause of a leaking toilet base is a deteriorated wax ring. The wax ring creates a watertight seal between the toilet base and the floor. To replace the wax ring:

  • Remove the old wax ring from both the toilet base and the flange on the floor.
  • Clean the flange and the toilet base thoroughly.
  • Place the new wax ring onto the flange, ensuring a snug fit.
  • Carefully lower the toilet onto the wax ring, aligning the toilet bolts with the mounting holes.
  • Press down firmly to compress the wax ring and create a proper seal.
  • Tighten the toilet bolts, being careful not to overtighten and crack the toilet.

Inspect and Repair Toilet Bolts and Base

Examine the toilet bolts and the base itself for any signs of damage or looseness. If the bolts are loose or damaged, replace them with new ones. If the toilet base is cracked or damaged, it may need to be replaced. Contact a nearby plumber if necessary.

Reinstall the Toilet

Once you have replaced the wax ring and addressed any issues with the toilet bolts or base, it is time to reinstall the toilet.

  • Lower the toilet back onto the flange, aligning the bolts with the mounting holes.
  • Apply downward pressure to compress the wax ring and create a tight seal.
  • Replace the nuts onto the toilet bolts and tighten them until snug.
  • Reconnect the water supply line to the bottom of the toilet tank.
  • Turn on the water supply and allow the tank to refill.
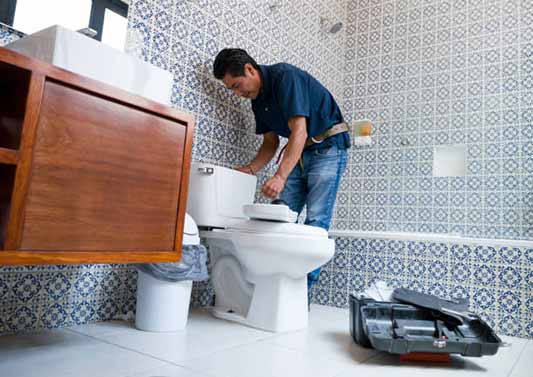
a plumber testing for any toilet leaks.

Once you have replaced the wax ring and addressed any issues with the toilet bolts or base, it is time to reinstall the toilet.

Test for Leaks

After reinstalling the toilet, it is essential to test for any remaining leaks. Flush the toilet and carefully inspect the area around the base for any signs of water seeping out. If you notice any leaks, repeat the necessary steps to ensure a proper seal.

Wrapping It Up

Fixing a leaking toilet base is a manageable task with the right tools and guidance. By following the steps outlined in this complete guide, you can successfully repair a leaking toilet base, preventing further damage and ensuring the continued functionality of your bathroom. However, if you encounter any difficulties or are unsure about any step, it is recommended to seek the assistance of a local residential plumber for expert advice and assistance.