Installing a water heater might seem like an overwhelming task, but with the right guidance, you can confidently tackle this project on your own.
This detailed DIY guide will walk you through every step of the process, ensuring that you have all the information you need to successfully install your new water heater.
From selecting the appropriate unit for your needs to the final installation steps, we’ve got you covered.
Understanding Your Water Heating Needs
Before getting into the technical aspects of water heater installation, it’s crucial to understand your household’s specific water heating requirements.
Consider factors such as the size of your home, the number of people living in it, and your daily hot water usage.
Identifying these needs will help you make an informed decision when selecting the right water heater unit.
Selecting the Right Water Heater Unit for Your Home
Choosing the correct water heater is paramount to ensure convenience and efficiency.
Start by determining whether a tankless or traditional tank-style water heater suits your needs best. Tankless water heaters provide an endless supply of hot water and are more energy-efficient but come at a higher initial cost.
On the other hand, tank-style water heaters are more affordable upfront and are suitable for households with lower to moderate hot water usage.
Additionally, you must decide between electric, gas, or solar-powered water heaters. Each type has its own set of advantages and drawbacks:
- Electric water heaters: Easy to install and maintain, but may have higher energy costs compared to gas models.
- Gas water heaters: Typically less expensive to operate, but require proper ventilation and can be more complex to install.
Consider energy efficiency ratings, warranty periods, and the capacity of the water heater before making your final decision. Speaking with a professional might be beneficial to ensure you select the optimal unit for your household. In some cases you might have to have an electric or gas water heater, such as cases in a condominium that strictly runs on electricity.
Gathering the Necessary Tools and Materials
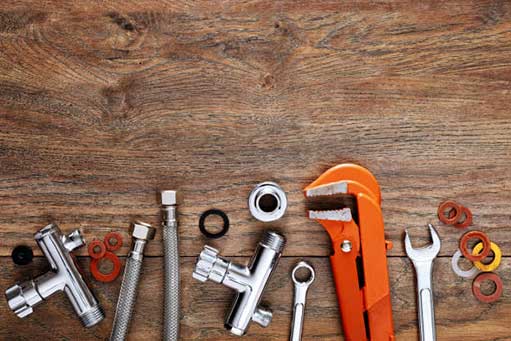
Before initiating the installation process, ensure you have all the required tools and materials on hand. This can prevent unnecessary interruptions and ensure a smoother installation experience.
Key items you’ll need include:
- Pipe Wrenches
- Adjustable Wrenches
- Screwdrivers
- Plumber’s Tape
- Pipe Cutter
- Measuring Tape
- Level
- Safety Glasses and Gloves
- Bucket
- Hacksaw (if dealing with metal pipes)
Having these tools readily available will make the installation process more efficient and less stressful.

Before initiating the installation process, ensure you have all the required tools and materials on hand.
Preparing for Installation
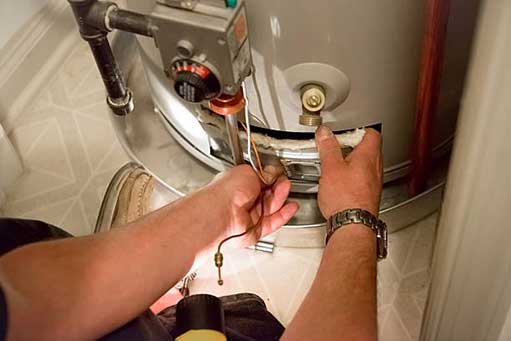
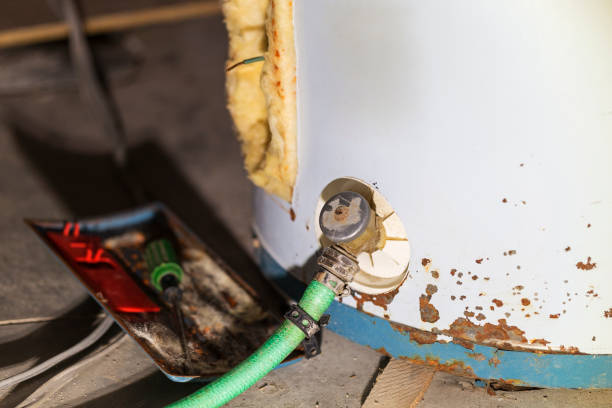
Preparation is a key element in the successful installation of a water heater. Begin by turning off the water supply and gas or electricity to the existing water heater. Drain the old water heater tank by attaching a garden hose to the drain valve and directing the water to a suitable drainage location.
If you’re replacing an old water heater, remove it once it is completely drained. Disconnect all water and power lines with appropriate tools and ensure the area is clear of any debris or obstacles. It’s crucial to make sure the new water heater will have adequate space and proper access for maintenance tasks.
Installing the New Water Heater
With the old water heater removed and the area prepped, you can now move forward with the installation of your new unit. Follow these detailed steps:
Positioning the New Unit
Carefully place the new water heater in the allocated space. Ensure it stands level and stable. Use a level to verify proper positioning.
Connect Water Supply Lines
Use flexible water connectors to join the cold and hot water supply lines to the corresponding inlet and outlet ports on the water heater. Apply plumber’s tape to threaded connections to ensure a tight, leak-free seal. Secure the lines with adjustable wrenches, being careful not to overtighten.
Connect Gas or Electrical Supply
Gas Water Heater: If you have a gas water heater, connect the gas line using appropriate fittings and ensure proper ventilation for safety. Check for any gas leaks using a mixture of soap and water applied to the gas line and connections.
Electric Water Heater: For electric models, connect the electrical wiring to the water heater. Ensure all connections are made according to the manufacturer’s instructions and local electrical codes. If unsure, consider hiring a licensed electrician to complete this step.
Fill the Tank
Open the main water supply valve and allow the tank to fill with water. Open a hot water faucet to let air escape from the system. Once the tank is full and the water flows smoothly from the faucet, turn it off.
Power On
For electric water heaters, switch on the power at the electrical panel. For gas models, relight the pilot light or follow the manufacturer’s instructions to ignite the burner. Monitor the water heater to ensure it functions correctly, and check for any leaks or issues.
Performing a Test Run
Once the installation is complete, it’s essential to perform a thorough test run of your new water heater. Turn on several hot water faucets in your home and verify that the water heats up to the desired temperature. Inspect all connections for leaks and ensure the unit operates efficiently.
During this phase, adjust the water temperature settings if necessary, and familiarize yourself with the operation and maintenance guidelines provided by the manufacturer.
Ensuring Safety and Compliance
As with any home improvement project, safety is a paramount concern during water heater installation. Adhere to all safety guidelines and codes, including proper ventilation, secure gas or electrical connections, and adequate clearance around the unit. This is vital for the long-term safety and functionality of your water heater.
It’s also essential to register your new water heater with the manufacturer to activate the warranty. Keep all paperwork and receipts in a safe place for future reference.

Check this component every few years and replace it if it’s significantly corroded to prevent tank rust.
Maintenance Tips for Longevity
Regular maintenance is key to prolonging the lifespan and efficiency of your water heater. Here are some essential tips:
- Flush the tank annually: This helps remove sediment buildup that can decrease efficiency and damage the tank.
- Inspect the anode rod: Check this component every few years and replace it if it’s significantly corroded to prevent tank rust.
- Check for leaks: Regularly inspect all connections and valves for any signs of leakage.
- Test the pressure relief valve: Ensure this safety feature is functioning properly by lifting the valve handle and allowing some water to eject.
Adhering to these maintenance practices can help you avoid costly repairs and ensure your water heater runs efficiently for many years.
Troubleshooting Common Issues
Even with proper installation and maintenance, you may encounter issues with your water heater. Here are some common problems and their potential solutions:
- No Hot Water: For electric heaters, check the circuit breaker or fuse box. For gas models, ensure the pilot light is lit. Verify that the unit’s thermostat is set to the appropriate temperature.
- Inadequate Hot Water: Consider if the unit’s capacity meets your household needs. Check the thermostat settings and ensure the tank is free of sediment buildup.
- Strange Noises: Sediment buildup in the tank can cause popping or rumbling sounds. Flushing the tank may resolve this issue.
If problems persist, check out the manufacturer’s manual or seek advice from a nearby plumber.
In Summary
Installing a water heater yourself can be a gratifying experience, providing both cost savings and a sense of accomplishment. By following the steps outlined in this detailed guide, you can approach your DIY water heater installation with confidence and ensure a successful outcome. Remember to prioritize safety, adhere to local codes, and perform regular maintenance to enjoy a reliable supply of hot water for years to come.


