Tag Archives: burst pipe emergency

Dealing with Burst Pipes: Step-by-Step Solutions for Homeowners

Dealing with Burst Pipes

As the saying goes, “Home is where the heart is.” We understand how much you cherish your homes, and we want to help you protect and maintain them. One of the most common challenges homeowners face is dealing with burst pipes. Burst pipes can cause extensive damage and inconvenience, but fear not! Below we will provide you with step-by-step solutions to tackle this issue effectively.

Understanding Burst Pipes

Before we get into the solutions, it’s essential to have a basic understanding of burst pipes. Burst pipes occur when water freezes and expands in the pipes, causing them to crack or rupture. It typically happens during colder seasons or in unheated areas of your home, such as attics, basements, or crawl spaces. Burst pipes can cause water leakage, leading to property damage, flooding, and costly repairs if not addressed promptly.

Step 1: Shut Off the Water Supply

The first and most crucial step in dealing with burst pipes is to shut off the water supply to your home. Locate the main shut-off valve, which is usually in the basement or near your water meter. Turn the valve clockwise until it is fully closed. This will stop the water flow and prevent further damage. It’s important to familiarize yourself with the location of the shut-off valve beforehand, so you can act swiftly during emergencies.

Step 2: Open Faucets

Once you have shut off the water supply, open all the faucets in your home, including both hot and cold water taps. By doing this, you will help relieve the pressure inside the pipes and minimize the potential for further bursting. Leave the faucets open until the issue is resolved, and keep an eye out for any changes in the water flow.

Step 3: Identify the Burst Pipe

Now that you have taken immediate measures to prevent further damage, it’s time to identify the location of the burst pipe. Start by inspecting the areas where pipes are exposed, such as the basement, crawl spaces, or utility rooms. Look for signs of water leakage, wet patches on walls or ceilings, or the sound of dripping water. Also, pay attention to any unusual smells or mold growth, as these can indicate water damage.

Step 4: Temporary Repair

While waiting for professional assistance, it’s crucial to perform temporary repairs to minimize the damage caused by the burst pipe. Here are a few temporary solutions you can implement:

  • Use a pipe clamp: If the burst is a clean split, you can use a pipe clamp to secure the area temporarily. Place the clamp over the affected section and tighten it using a screwdriver or a wrench. This will provide stability until a permanent fix is applied.
  • Apply epoxy putty: Epoxy putty is a waterproof adhesive that can be used to seal small cracks or leaks. Knead the putty according to the manufacturer’s instructions and apply it to the affected area. Smooth it out and let it cure as per the recommended drying time.
  • Wrap with rubber or silicone tape: Another temporary solution is to wrap the burst section with rubber or silicone tape. Start a few inches before the crack and continue a few inches beyond it. Wrap the tape tightly in overlapping layers to create a watertight seal.

Step 5: Seek Professional Help

While temporary repairs can help manage the situation for the time being, it is essential to seek professional help to permanently fix the burst pipe. Contact a licensed plumber who specializes in burst pipe repairs to assess the damage and provide a professional solution. They have the expertise and proper tools to ensure a long-lasting repair and prevent future incidents.

pipes with insulation around them.

Insulation helps protect the pipes from freezing temperatures and reduces the risk of bursting.

Preventing Burst Pipes in the Future

Now that you have successfully dealt with a burst pipe, it’s crucial to take preventive measures to avoid similar situations in the future. Here are some tips to keep in mind:

  • Insulate pipes: Properly insulate exposed pipes, especially those in unheated areas or near exterior walls. Insulation helps protect the pipes from freezing temperatures and reduces the risk of bursting. Use pipe sleeves, heat tape, or foam insulation to provide an extra layer of protection.
  • Maintain heating: Keep your home well heated, even during colder seasons or when you’re away for an extended period. Maintaining a consistent temperature helps prevent pipe freeze-ups.
  • Seal openings: Seal any gaps or openings near pipes that allow cold air to enter. Use caulk or insulation to close these gaps effectively.
  • Allow faucets to drip: During extremely cold weather, allow faucets connected to vulnerable pipes to drip slightly. This will promote water flow and prevent freezing.
  • Keep interior doors open: Keep interior doors open to allow heat to circulate evenly throughout your home. This helps in preventing cold spots that can lead to frozen pipes.
  • Drain outdoor faucets: Before the freezing temperatures set in for winter, disconnect and drain any garden hoses or outdoor faucets. This prevents water from freezing and causing damage to the pipes.

In Conclusion

Congratulations! You have successfully learned how to deal with burst pipes step by step. By following the solutions we’ve provided in this article, you can minimize damage and prevent further complications. Remember, shutting off the water supply, temporary repairs, and seeking professional help are key steps in addressing burst pipes. Additionally, implementing preventive measures can help you avoid such situations in the future. Stay proactive, maintain your home, and enjoy peace of mind knowing you can handle burst pipes effectively!

Emergency Tips from a Plumber: Dealing with a Broken Pipe

dealing with a broken pipe

What should you do if you have a broken pipe in your home? Broken water pipes in the home often announce their presence in the most destructive ways, warns Haas Property Management. You may not even know there is a problem with your pipes until your home is suddenly flooded by water spilling from a leak.

In the worse cases, you don’t even see any water because the broken pipe is hidden behind a wall. The only indication of the problem is when you start to see mold around the leak area, the paint changes color, or parts of the drywall become soft and start to bulge.

However, broken and burst water pipes are not the only plumbing leaks you can have in the home. Gas pipes can also leak. Although they are not as common as water pipe leaks, gas leaks are much more dangerous. This is because of the fire risk and gas leak suffocation.

If you spot a broken pipe in your home, what can you do to minimize the damage caused by the leak and the inconvenience to your household? The first minutes of discovering a leaking pipe in your home are the most critical; here is what you can do during those times.

Emergency tips for dealing with a broken pipe

What to do if the gas line is leaking

Turn the gas off

If you smell gas in your home, do not attempt to find the source of the leak; turn off the gas. To turn the gas off, locate the gas shutoff valve. It should be right next to the gas meter, the first fitting on the inlet side of the meter. To shut the line, turn the valve until it is at a ninety-degree angle to the pipe (crosswise). You may need a wrench for this operation.

Call your plumber

When dealing with gas leaks, it’s never a good idea to try to locate the leak yourself. Professional plumbers know how to identify and fix a gas leak. If you don’t know how to turn the gas off, call the plumber and have them come to your house immediately or tell you how to turn the gas off over the phone.

If you cannot reach a plumber, your next best option is to call the gas company. The gas company will only turn off your gas; they won’t fix the leak. Moreover, if the gas company turns the gas off, you will need a permit to fix the leak and an inspection before turning it back on. This will cost you money and time.

What to do if a water pipe is broken

Find the main water shutoff valve

It is important to know the location of your main water shutoff valve before you ever have a water leak in your home. Many plumbing fixtures in your home have a dedicated shutoff valve that you can use to stop water flow to that fixture. But the main water shutoff valve controls the water flow to the entire home.

For many homes, the main water shutoff valve is located on the street-facing side of the house, along the property’s perimeter, right after the water meter. Turning this valve until it closes will stop water flow to your home. Everyone in the house should know where this feature is located and how to use it. This is the easiest way to minimize damage to your home if you have a plumbing leak.

Turn off the water supply to the fixture

If you don’t know where the main water shutoff valve is, you can try to turn the water off at the valve near the leaking fixture. This is often only possible when dealing with water heater leaks or a burst pipe emergency. A shutoff valve should be next to your water heater or a ball or gate valve on the wall close to the bathroom. Turning the valve will stop the flow of water or slow it down.

Fix the leak with a rubber pad

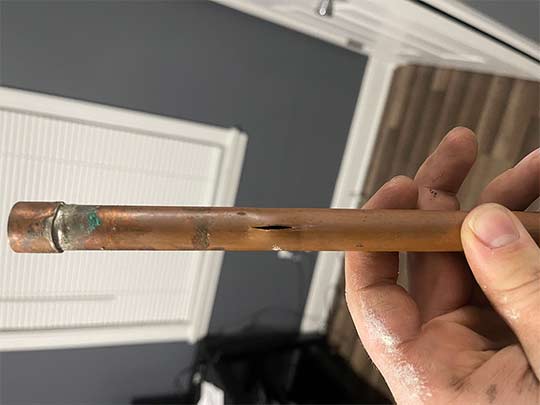
If there is a pinhole leak on a copper pipe, but you can’t get a plumber to come over (maybe because it is late in the night), this is what you can do: you can stop the leak temporarily by cutting a piece from a rubber pad and covering the hole with it. Clamp down on the part of rubber by tightening a hose clamp over it. This will let you run your water until you can get your local plumber to repair the leak properly.

Fix the pipe with a compression coupling

This only works for PVC pipes with a small crack in the pipe. To fix the pipe, cut off the affected portion, and slip the compression end and gasket of the coupling onto the two sides of the cut pipe. Install the sleeve from the coupling between the two ends of the cut pipe and seal the joint with the compression ends and gasket.

These are some simple steps you can do in case of a gas or water leak. Knowing what to do during these emergency plumbing situations may save you money and your property from further damage.

How to Survive a Burst Pipe in the Winter

How to Survive a Burst Pipe in the Winter

Harsh weather conditions can cause you and your household a lot of trouble. In the winter period, there are so many things to take care of, and your pipes are definitely one of them. Many household owners know how dangerous low temperatures can be, especially when there is no proper insulation on the household pipes. They can freeze and burst, causing great floods and serious property damage. That is why it is wise to get ready and know what to do in case of an emergency. For all those who think in advance, here are several main steps on how to survive a burst pipe in the winter.

The first signs of a problem

There is nothing that can completely save you from the damage when the pipe burst already happens. Still, the sooner you detect the signs of the problem, the less damage you will have to deal with. That’s why it is important to react to the first, even minor signs that something wrong is happening:

  • Occasional dripping sounds and the lack of water pressure are some things all of us have met at least once, but still, most tend to disregard them
  • Water spots on your walls or ceiling and water puddles are more obvious signs, but they say the problem is not at its first phase as well
  • The leaks of the main water shut-off are the most common and the most obvious signs

If any of the above-mentioned happen to you, especially during the winter, you need to reach out for help immediately. However, if you suspect something wrong is going on but cannot detect the problem, you can always hire a professional leak detection service in the area to confirm your suspicions.

1. The main water valve – the first step in surviving a burst pipe in the winter

The most important thing everyone should know about their home is where the main water valve is located. This is especially important if you are about to move into a new home. As professional movers from Last Call Movers suggest, experience is a crucial factor in relocation matters. But, if this is your first move into a new home, it would be wise to ask the previous homeowners about the main water shut-off or the condition of the household pipes before you decide to make a deal.

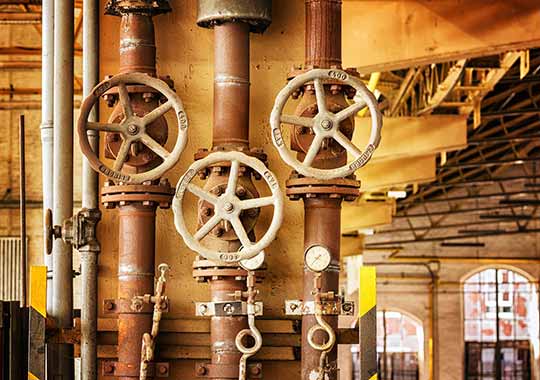
Metal pipes with big valves to turn off as the first step in our guide on how to survive a burst pipe in the winter

Act fast and smart

In the emergency case, turning off the main water supply will stop water from causing further damage to your property. On the other hand, it will also give you some time to pull yourself together until professional help comes.

In most cases, the water valves and the water heater are located in the same place and are usually turned clockwise to be turned off.

2. Deal with the electricity

All electrical devices can be potentially dangerous in contact with water. What’s more, if a pipe burst happened in your home, being surrounded by water while your electrical system is on can be fatal. Therefore, after you make sure you have turned the water off, you should also deal with turning off the electricity. You can simply turn it off in the part of your home that is flooded or even in the whole household.

In case you are not sure whether or not the power is off, calling on the electrical company for help will be the wisest option.

3. Contact the plumber

Now that you have dealt with the first two steps in our guide to surviving a burst pipe in the winter, it’s smart to contact an emergency plumber right away. Remember that the sooner you get the right professional help, the less consequence you will feel. Once a emergency plumber arrives at your home, they will start fixing the problem. What’s more, they can also help you with creating the whole repair plan, as well as with finding the most affordable solution for your current state. Finally, the most important thing is that your smart moves, as well as their prompt reaction, will help your pipes not remain broken for a long time.

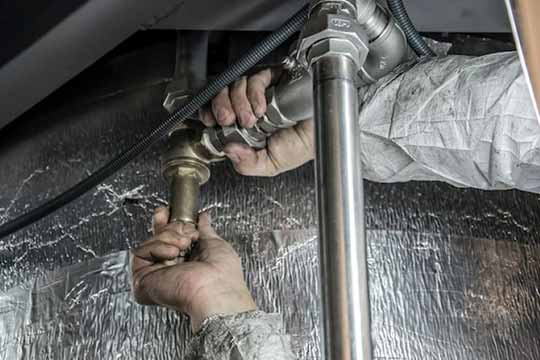
A plumber is installing the pipes

Let the professionals deal with the problem

4. Draining the pipes

Make sure that no water remains in your pipes after you turn off the main supply. Push the toilets, and remember to run first cold and then hot water through all your faucets. Plus, do not forget to turn the water heaters off, since they should not be in function while the water is off.

5. Remove water

Once when you are done with all these basic steps, you should turn to saving your home from further damage. Water can be pretty harmful to your floor, walls, and the whole house construction. So, try your best to remove as much water as possible from the flooded area. When we talk about ground floors or basements, things will go a little bit easier. You can use a drain, buckets, mops, and vacuums to remove the water. On the other hand, if you have a pipe burst emergency on some of the upper floors, the only way is to let the water drain out. This time you can use fans to speed up the process.

Prevention

Once you have faced the repair processes with a burst pipe, especially in the winter period, you’ve probably learned the lesson. It is high time to take steps to save your pipes from freezing:

  • Letting your faucets drip, at least a little, will help a lot. The water will be in constant motion, and it will not freeze that easily
  • Insulating the pipes is also a great idea. This is especially useful if your pipes are exposed, or set along the exterior wall, for example. Use some foam, fiberglass, or even newspaper to cover the pipes and protect them
  • Open the under-sink cabinet doors in both your kitchen and your bathroom. Warm air will circulate, and your pipes will not freeze during the cold days
  • Maintain your piping system, and let the plumber control them regularly. If breaks and cracks are located on time, it will save you a lot of money and stress, too
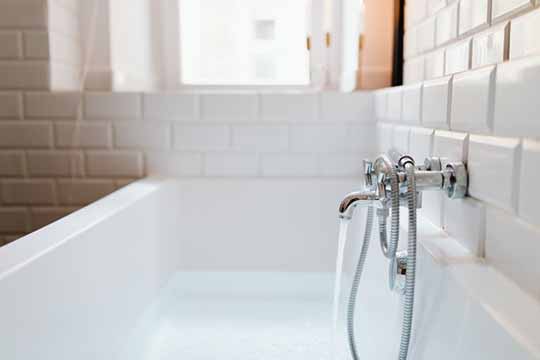
A close-up picture of a faucet in a bath

If you think about prevention, you won’t have to deal with how to survive a burst pipe in the winter

These would be the main things you need to remember if you want to survive a burst pipe in the winter. Keep them as a reminder just in case something unexpected happens to you in the next winter season.

What To Do When A Pipe Bursts?

What To Do When A Pipe Bursts

Even though you don’t see them often, there are water pipes inside the walls, floors, and ceilings of almost every room in your home. These pipes make it possible to enjoy one of the biggest wonders of modern life; access to clean water on demand.

But just as your home’s plumbing can make your life convenient, the plumbing can also cause massive destruction to your home, warns RENEW Real Estate. This happens when a plumbing pipe ruptures and spills the water inside it into the home. Burst pipes are a constant possibility with modern plumbing.

Every year, 250,000 American homes suffer property damage due to a burst pipe, and the average insurance claim for each of those homes is $15,000. What causes water pipes to burst, and how can you prevent it? More importantly, what should you do when a pipe bursts?

What to do if a pipe bursts in your home

Follow these steps to minimize water damage to your home when a burst plumbing pipe emergency occurs.

Step one: Find the main water shut-off valve and turn it off

This will turn off the water supply in your home. The main shut-off valve is usually located in the basement, near the water heater and after the water meter. Turning off the main shut-off valve will prevent further water damage to your home. If the burst pipe section has its own shut-off valve, you may also turn off the water supply at that point.

Step two: Turn off the electricity if necessary

If there is a chance that the spilled water may come into contact with a power outlet or an electrical feature in the house, you may want to disconnect the power supply to your home. This precautionary step will prevent electric shocks, short-circuiting, and damage to your home appliances.

Step three: Remove your personal belongings from the path of the water

If there are any items that the water may damage near the area of the leak, move them out of the reach of the water. This is important because if you have to make an insurance claim for damage caused by the leak, your insurer will not cover damage to those items. Removing them will reduce the cost of fixing the damage.

Step four: Take photos of the scene

You will need a visual record of what happened if you want to file an insurance claim. Take photos of the damaged pipe (or the general location of the leak if you don’t know where the burst pipe is) and the spilled water on the floor of your home. After you do the steps below (before and after you call your plumber), take photos of the scene.

Step five: Drain water from pipes

Open the faucets in your home to drain any water inside the system. Don’t do this step if you did not turn off the home’s water supply from the main shut-off valve. Only open your faucets if the water supply to the entire house is suspended. Draining the pipes will prevent accidental spillage when the damaged section of piping is either removed or repaired.

Step six: Dry up the water

Remove the water as quickly as possible by mopping it up with a mop bucket. Move items near the site of the spill to dry up any water that has collected beneath or behind them. Use a fan or dehumidifier to dry the area after mopping the water. The longer water remains on the surfaces, the more time it can penetrate and damage them; that’s why you want to be very thorough when drying your home.

Step seven: Call an emergency plumber

Do not try to fix the damaged pipe by yourself. Repairing the damaged pipe yourself could expose your home to the risk of future water damage if that damaged section of plumbing is not mended correctly. You may not get compensation from your insurer if you fix the pipe yourself and it bursts again. You are better off letting an emergency plumber handle the issue to avoid future problems.

Step eight: Learn how to prevent pipes from bursting

To save yourself the aggravation of cleaning up your home, fixing a damaged pipe, and filling out insurance paperwork after a burst pipe, here are the things you can do to prevent the problem:

  • Be aware of where your main shut-off valve is. In the time you take to look for the main shut-off valve in the wrong places, water can do massive damage to your home.
  • Tag the main water shut-off valve and let everyone in your household know where it is and how to use it.
  • Take the right steps to protect your water pipes during winter. Many pipes burst due to frozen water inside them during winter.