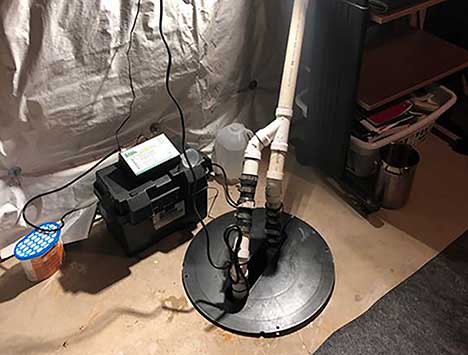
Sump pumps play an essential role in preventing flooding and water damage in Chicago homes. Whether your basement is prone to flooding or you want to take preventative measures, installing a sump pump is a smart investment. This guide will walk you through the steps of sump pump installation and maintenance to keep your home and belongings safe.
Types of Sump Pumps
Before installing a sump pump, it’s essential to understand the different types.
- Submersible sump pump: This type of pump is installed inside the sump pit, making it quieter compared to pedestal pumps. These also last longer and require less maintenance.
- Pedestal sump pump: This type of pump has a motor that is installed above the sump pit with the impeller at its base. This pump is usually suited for smaller sump pits and it is less expensive than submersibles.
- Battery-powered sump pump: This type of pump is an emergency backup in the event of a power outage. These usually have a float switch and begin operation when water levels rise.
Installing a Sump Pump
Installing a sump pump can be done with the help of a professional or with a DIY approach. Here are the steps to take when installing a sump pump:
Step 1: Determine the sump pit size
The first step is to determine the size of the sump pit, which should be at least 18 inches in diameter and 24 inches deep.
Step 2: Choose the right location
The sump pump should be installed in the lowest area of the basement floor. After determining the location, remove any debris or dirt that may be in the way.
Step 3: Dig the sump pit
Dig the sump pit to fit the size of the pump. The pit should be located against the wall where the discharge pipe can be easily connected.
Step 4: Install the pump
Place the pump in the sump pit and connect it to the correct discharge pipe. Ensure that it is levelled and add gravel to the bottom of the pit to stabilize it if necessary.
Step 5: Install check valves and discharge pipes
Install the check valves and discharge pipes to prevent backflow of water. The check valves keep water from coming back into the pit while the discharge pipe directs water outside.
Step 6: Connect to a power source
Connect the sump pump to a power source. Ensure that the plug is not in contact with water.

Check the sump pit regularly for any debris that may be clogging the pump and remove it.
Maintaining a Sump Pump
Once installed, it’s important to maintain your sump pump to ensure it functions correctly.
Step 1: Regularly check and clean the sump pit
Check the sump pit regularly for any debris that may be clogging the pump and remove it.
Step 2: Test the pump regularly
Testing the pump every six months is essential to ensure that it still works correctly. To test it, fill the pit with water to activate the pump and ensure that it is running smoothly.
Step 3: Replace the battery backup every 2-3 years
If you have a battery backup sump pump, replace the battery every 2-3 years to ensure that it will work in case of a power outage.
Step 4: Call a professional for maintenance
While regular maintenance can be done on your own, hiring a licensed Chicago plumber is essential to ensure that the pump is working correctly. Make sure to schedule a professional evaluation every year to ensure that the system is functioning correctly and identify any potential problems.
In Conclusion
Installing and maintaining a sump pump is an essential investment for Chicago homeowners. By following the steps outlined above, you can ensure that your sump pump functions correctly, preventing costly damages caused by flooding and water damage. Remember to check and clean the sump pump regularly, test the pump, replace the battery backup and call a professional for maintenance. Keeping these steps in mind can save you the headache and expense of water damage repairs in the future.