Category Archives: how to turn the water off in a home

A Professional Perspective on the Safety of Hydro Jetting for Old Pipes

Perspective on the Safety of Hydro Jetting for Old Pipes

Hydro-jetting is currently one of the most-effective methods for clearing clogs from drainpipes. This process uses a high-pressure water blast to dislodge and wash away clogs inside a drainpipe. But is this method safe for cleaning old pipes?

In this post, we will explain how hydro-jetting works, what you should consider before you hydro-jet your old sewer lines and the alternatives to hydro-jetting.

How hydro-jetting works

Hydro-jetting is a non-invasive method for unblocking and cleaning pipes. The plumber does not have to dig a trench to access the pipe that is being cleaned. Instead of digging a hole in the ground, a powerful jet of water is shot into the pipe to remove all blockages inside it.

The hydro-jetting machine, also known as a ‘jetter,’ is made up of the following components:

  • A tank which holds the water to be used during the operation
  • A flexible steel hose that is mounted on a drum or comes in sections which can be joined to make them as long as desired
  • A range of stainless steel nozzles; the type of pipe and severity of the clog determines the proper nozzle to use
  • The mechanism for pressuring the water

To hydro-jet a line, the flexible steel hose is passed into the pipe with the nozzle attached to its end. The drainpipe is accessed through a cleanout or one of the drains in the home, explains the Peak Residential Management team. The drum is used to unroll and push the hose into the drainpipe while it is guided by the plumber’s hand.

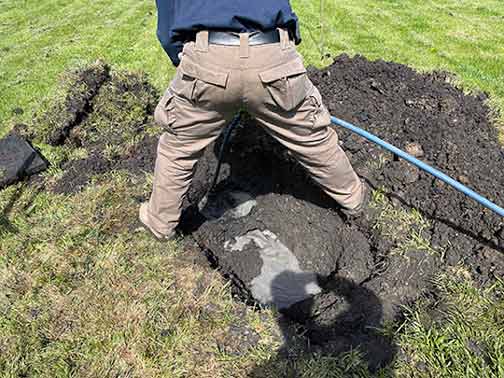
a hydro jetting taking place in chicago.

While this is going on, a stream of water is shot into the drain via the hose and nozzle. The nozzle can direct the water forward, backwards, and against the pipe surface. It not only clears the clogs inside the pipes, the pipes are washed clean, as the debris inside them is carried away.

To do this, a hydro-jetting machine uses pressures of 1,500 to 5,000 psi (pounds per sq. inch). That is enough pressure to shear away any tree roots inside the pipes. For reference, when pressure-washing a brick wall, you are advised never to exceed 1,500 psi. 

That is why before hydro-jetting a drain line, it is essential to conduct a visual assessment of the line first. That is typically done via a sewer camera inspection. Through this inspection, the plumber can check the condition of the pipes and determine if they can withstand hydro-jetting.

Should you hydro-jet old pipes?

Older pipes are more likely to have cracks and weak spots in them. The pressure of the water used in hydro-jetting can compound the existing issues with such pipes. For this reason, hydro-jetting is not always safe for old pipes. If pipes are fragile, do not hydro-jet them.

Old sewer pipes can be made from a range of materials, and as these pipe materials age, they may start to change in the following ways:

  • Cast iron: Despite its durability, the big issue with cast iron is its vulnerability to rust. A rusty cast iron pipe will not only slow your drain, it will become fragile.
  • Copper: Due to oxidation, copper pipes form pinholes over time and become vulnerable to corrosion.
  • ABS: Although similar to PVC, ABS is a polymer. It will become brittle if it is constantly exposed to low temperatures.
  • PVC: With frequent exposure to low temperatures, PVC will become brittle. This process does not depend on age; it can happen to PVC pipes of any age.
  • Clay:  Clay pipes are particularly susceptible to root invasion. Tree roots can undermine the stability of the pipe.

Hydro-jetting old pipes will damage them if they are showing any of these signs. Before hydro-jetting a sewer line with old pipes, you should get a professional plumber to do a sewer camera inspection to determine if hydro-jetting is the best drain-cleaning option for you.

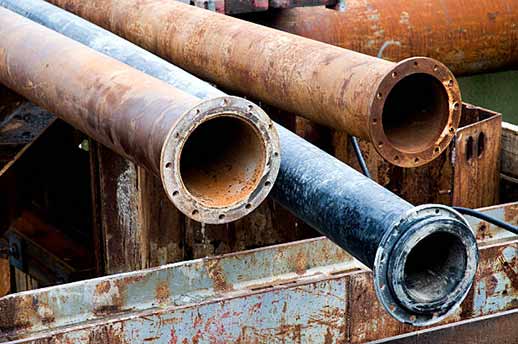
older pipes.

Alternatives to hydro-jetting

The best alternative to hydro-jetting is sewer rodding. That is a way to manually push or pull clogs out of the drain. Although no drain-cleaning method is 100%-safe, sewer rodding offers more control than hydro-jetting. A rodding machine can be maneuvered such that it doesn’t touch the pipe walls.

Sewer rodding is similar to hydro-jetting in some ways. When rodding a pipe, a long flexible tube (known as a ‘plumber’s snake’ or ‘drain snake’) is inserted into the drain. This tube contains a cable, the end of which is attached to a corkscrew auger that resembles a coiled spring or drill bit.

The tube is then hand-cranked to spin the corkscrew. A combination of twisting, pulling and pushing movements are used to snag any clog inside the drain and pull it out. Although it takes more time than hydro-jetting, a sewer rodding service is decidedly the better option when working with fragile pipes.

In Conclusion

Is hydro-jetting acceptable for old pipes? It depends on the condition of the old pipes. Before hydro-jetting old pipes, do a camera sewer inspection to determine their ability to withstand high water pressure. Depending on the inspection result, you may use or reject hydro-jetting.
How to Turn off the Water for Plumbing Repairs

How to Turn off the Water for Plumbing Repairs

There are several reasons why you may want to turn off the water supply to your home. Maybe you are about to leave town and don’t want to leave the water on. Or you are testing the shut-off valve. Or, the most common reason, is that you have a plumbing emergency.

Whatever your reason for wanting to turn off your water, you have to actually know where the shut-off valve is and how to use it before you can stop the water supply to your house, says Stringer Management. This post shows you how to turn off your home’s water supply before doing plumbing repairs.

There are two ways to turn off the water supply to your home. You may shut off the supply to the entire home by turning it off at the mains. Or you can cut off the supply to specific appliances or your water heater. The right method depends on your reason for shutting the water supply.

How to turn off the water at the main shut-off valve

The first step is to locate the main shut-off valve for your home. Its location depends on the age of your home and the climate in your location. You may have to look around your property to find it. The three places where you will often find the shut-off valve are:

Inside the house

Areas inside the home where the shut-off valve is often located are the basement, garage, laundry room, or exterior wall facing the street. In many homes, it is near the water heater. A shut-off valve inside the basement will often be at eye level. If it is on the main floor of the home, expect it to be positioned lower.

Outside on an exterior wall

If the climate in your region is relatively warm, the shut-off valve could be located outside the house. You will often find it sticking from the lower part of an exterior wall. Start your search in the areas near the outdoor faucet.

Close to the street

In some areas, the shut-off valve will be located in the same place as your water meter. You may find a fixture near the street and below the ground, with two shut-off valves on opposite sides. The street-facing valve is for the city’s use. The other valve facing your home is what you are looking for. Do not touch the valve until you verify that it is indeed the main shut-off valve for your home.

Now that you have found the main shut-off valve for your property the next step is to actually turn it off. How you turn off the valve depends on the type of valve your home has. The most common types are:

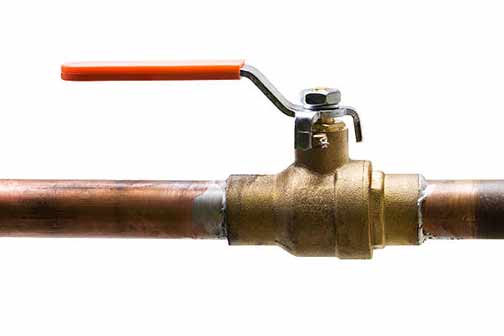
Ball valves: These have a lever handle. When the valve is open the handle lines up with the pipe. To shut it off you turn the lever until it is at a 90-degree angle to the pipe.

Gate valves: These have a circular handle. To shut this off turn the circular handle in a clockwise direction until it stops moving.

Note that since your main shut-off valve is rarely used, it might be stiff, and you will need to exert effort to get the valve handle or lever to move. Also, some homes have branch valves near the main shut-off valve; these let you cut off the water supply to selected areas of the home.

After shutting the valve, drain any water inside your home’s supply pipes. To do this, open the lowest faucet in the house as well as the highest one. This step helps you avoid flooding when you eventually start your repairs. You may also use this step to verify that the water supply is indeed terminated.

a water valve shut off.

When the valve is open the handle lines up with the pipe. To shut it off you turn the lever until it is at a 90-degree angle to the pipe.

How to turn off the water supply at the water heater

If your hot water pipe is leaking or you want to repair your water heater, there is no need to shut off the water supply to the entire home. You can easily prevent cold water from getting into the water heater or hot water from leaving the water heater in the home.

Your water heater has two valves; a blue one to control cold water supply and a red one to control hot water. If your hot water pipe is leaking and you need to fix it, shut the red valve. On the other hand, if you are trying to repair or replace a water heater, close the blue valve.

How to turn off the water supply for appliances

If the problem is with a dishwasher, washing machine, or any water-utilizing appliance, you can turn off the water supply to that appliance alone. You may also shut down the water supply to a specific plumbing fixture in the home, dripping faucet, or running toilet.

For sinks, toilets, and showers, you will usually find their shut-off valve close to the fixture. Dishwashers, washing machines, and refrigerators will have the shut-off valve mounted on a water supply tube or a wall close to the appliance.

error: Content is protected !!