Category Archives: how to clean your sump pump

A Professional Perspective on the Safety of Hydro Jetting for Old Pipes

Perspective on the Safety of Hydro Jetting for Old Pipes

Hydro-jetting is currently one of the most-effective methods for clearing clogs from drainpipes. This process uses a high-pressure water blast to dislodge and wash away clogs inside a drainpipe. But is this method safe for cleaning old pipes?

In this post, we will explain how hydro-jetting works, what you should consider before you hydro-jet your old sewer lines and the alternatives to hydro-jetting.

How hydro-jetting works

Hydro-jetting is a non-invasive method for unblocking and cleaning pipes. The plumber does not have to dig a trench to access the pipe that is being cleaned. Instead of digging a hole in the ground, a powerful jet of water is shot into the pipe to remove all blockages inside it.

The hydro-jetting machine, also known as a ‘jetter,’ is made up of the following components:

  • A tank which holds the water to be used during the operation
  • A flexible steel hose that is mounted on a drum or comes in sections which can be joined to make them as long as desired
  • A range of stainless steel nozzles; the type of pipe and severity of the clog determines the proper nozzle to use
  • The mechanism for pressuring the water

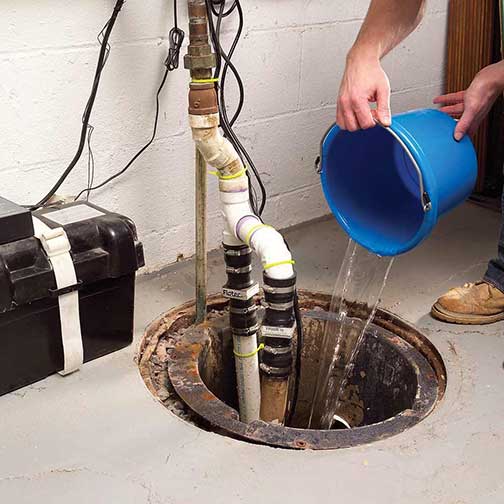
To hydro-jet a line, the flexible steel hose is passed into the pipe with the nozzle attached to its end. The drainpipe is accessed through a cleanout or one of the drains in the home, explains the Peak Residential Management team. The drum is used to unroll and push the hose into the drainpipe while it is guided by the plumber’s hand.

a hydro jetting taking place in chicago.

While this is going on, a stream of water is shot into the drain via the hose and nozzle. The nozzle can direct the water forward, backwards, and against the pipe surface. It not only clears the clogs inside the pipes, the pipes are washed clean, as the debris inside them is carried away.

To do this, a hydro-jetting machine uses pressures of 1,500 to 5,000 psi (pounds per sq. inch). That is enough pressure to shear away any tree roots inside the pipes. For reference, when pressure-washing a brick wall, you are advised never to exceed 1,500 psi. 

That is why before hydro-jetting a drain line, it is essential to conduct a visual assessment of the line first. That is typically done via a sewer camera inspection. Through this inspection, the plumber can check the condition of the pipes and determine if they can withstand hydro-jetting.

Should you hydro-jet old pipes?

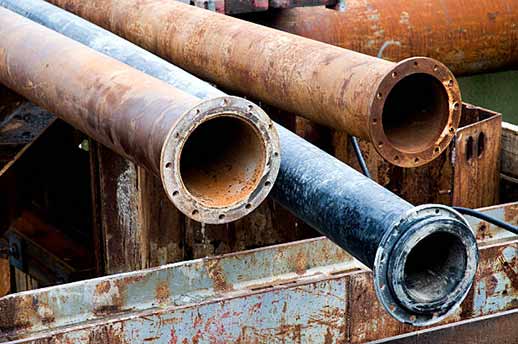
Older pipes are more likely to have cracks and weak spots in them. The pressure of the water used in hydro-jetting can compound the existing issues with such pipes. For this reason, hydro-jetting is not always safe for old pipes. If pipes are fragile, do not hydro-jet them.

Old sewer pipes can be made from a range of materials, and as these pipe materials age, they may start to change in the following ways:

  • Cast iron: Despite its durability, the big issue with cast iron is its vulnerability to rust. A rusty cast iron pipe will not only slow your drain, it will become fragile.
  • Copper: Due to oxidation, copper pipes form pinholes over time and become vulnerable to corrosion.
  • ABS: Although similar to PVC, ABS is a polymer. It will become brittle if it is constantly exposed to low temperatures.
  • PVC: With frequent exposure to low temperatures, PVC will become brittle. This process does not depend on age; it can happen to PVC pipes of any age.
  • Clay:  Clay pipes are particularly susceptible to root invasion. Tree roots can undermine the stability of the pipe.

Hydro-jetting old pipes will damage them if they are showing any of these signs. Before hydro-jetting a sewer line with old pipes, you should get a professional plumber to do a sewer camera inspection to determine if hydro-jetting is the best drain-cleaning option for you.

older pipes.

Alternatives to hydro-jetting

The best alternative to hydro-jetting is sewer rodding. That is a way to manually push or pull clogs out of the drain. Although no drain-cleaning method is 100%-safe, sewer rodding offers more control than hydro-jetting. A rodding machine can be maneuvered such that it doesn’t touch the pipe walls.

Sewer rodding is similar to hydro-jetting in some ways. When rodding a pipe, a long flexible tube (known as a ‘plumber’s snake’ or ‘drain snake’) is inserted into the drain. This tube contains a cable, the end of which is attached to a corkscrew auger that resembles a coiled spring or drill bit.

The tube is then hand-cranked to spin the corkscrew. A combination of twisting, pulling and pushing movements are used to snag any clog inside the drain and pull it out. Although it takes more time than hydro-jetting, a sewer rodding service is decidedly the better option when working with fragile pipes.

In Conclusion

Is hydro-jetting acceptable for old pipes? It depends on the condition of the old pipes. Before hydro-jetting old pipes, do a camera sewer inspection to determine their ability to withstand high water pressure. Depending on the inspection result, you may use or reject hydro-jetting.

How to Clean Your Sump Pump

How to Clean Your Sump Pump

Having a basement or crawlspace in your home has numerous benefits. However, your basement may be prone to flooding or wetness. Natural water can migrate from the soil into your basement, or water may flood your basement from the drain.

Studies from the American society of home inspectors show that over 60% of properties experience moisture in their basements. A wet basement has several setbacks. It may:

But that should not stop you from owning a property that has a basement. That is because sump pumps help prevent your basement from flooding. They send water from your basement into a dry well, municipal storm drain, or other places where it wouldn’t harm your property.

The sump pump may have a pressure sensor or float activator arm if it is automatic. In that case, it will turn on automatically to evacuate water from your basement. If situations demand, you can activate the automatic sump pump manually.

Sump pumps require regular cleaning and maintenance because of their benefits. We recommend that you clean your sump pump and sump pit at least once a year. Remove the sump pump and wash it. Use that opportunity to inspect your sump pit for debris and water. Clear the check valve and conduct other regular sump pump maintenance

If you are wondering how to clean your sump pump, follow the tips below.

Things you will need for sump pump cleaning

You will need specific tools that will aid in cleaning your sub pump. They include:

  • A garden hose
  • A wet/dry rag
  • A tarp or plastic sheeting
  • A large bucket
  • A plastic scraper
  • Protective gloves

Precautions

Below are certain precautions you should take before cleaning the sump pump:

  • Ensure that it is not raining when you are performing the cleaning.
  • Water should not be flowing into the sump basin from appliances connected to it.
  • Wear protective gloves during the cleaning.

Steps on cleaning the sump pump

Disconnect and unplug the sump pump

Before cleaning the sump pump, you need to unplug it and turn off the power supply on the circuit breaker. Also, disconnect the sump pump from the discharge pipe. Sometimes, you may use a screwdriver to loosen the sleeve and pull it from the pipe.

Remove the pump from the basin

After disconnecting the sump pump, allow it to drain into the pit. When it is no longer dripping, put it into a bucket or cover it with a plastic tarp or sheeting to prevent spills and take it outside for the cleaning.

Clean the sump pump

With the help of a garden hose, rinse off the dirt from the sump pump. Inspect for grime and use a plastic scraper to scrape off the dirt. Clean the outer surface of the pump using a rag. Spray water on the pump again with a garden hose and leave it to dry.

Drain the check valve

Disassemble the check valve, rinse, dry, and reassemble it. Ensure that your bucket is nearby when draining the check valve. 

Drain the sump pit

If there is any standing water in your sump pit, drain it. You can do this with a bucket or wet-dry vacuum. Clean the basin and remove any gravel, stone, or dirt. Doing this will prevent the risk of sump pump clogging or failure.

Clean the grate

It is essential to clean the grate if you have it in your sump pit. Remove the grate from the sump pump basin. Rinse it using a garden hose and wipe it off with a rag.

Clean the sump pump basin

With the help of a scraper and rag, clean the walls of your sump pump basin. Remove all dirt and grime. Ensure that nothing is clogging the drain holes. When your sump pump pit is clean, you will not notice any terrible smell.

Replace the sump pump

After cleaning and drying the sump pump, you can put it back. Ensure that the pump is at the appropriate level and position to enable its function. Check to ensure that the float arm can move freely without touching the basin walls.

Reconnect the pump

Reconnect your sump pump to the discharge pipe and tighten the sleeve. Ensure that there will be no leakage. However, avoid over-tightening it. Plug it back into the power supply and turn on the breaker.

Test the pump

This step is necessary to ensure that everything is functional after the cleaning. To do this, pour water into the basin until the sump pump activates. Inspect the sump pump as it is running to see if there is any fault.

The bottom line

Your sump pump also requires regular monthly maintenance aside from the annual cleaning. The monthly inspection and maintenance will ensure that your pump is functional whenever the need arises. If your pump fails, invite a local plumber to assess and advise accordingly.

error: Content is protected !!