Category Archives: hose bibb repair

How to Detect and Fix a Leaking Outdoor Faucet

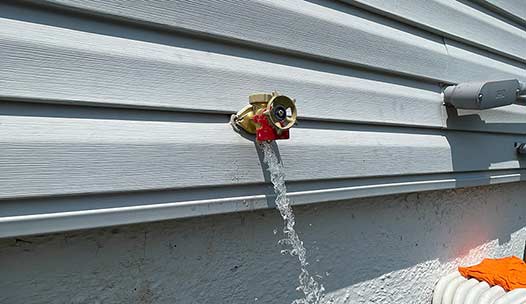
an outdoor faucet that has been freshly repaired.

A leaking faucet not only wastes water but also can lead to costly damage if left unattended. By learning how to detect and fix a leaking outdoor faucet, you can save water, money, and prevent further damage to your property. Below we will provide step-by-step instructions on how to identify and resolve a leaking outdoor faucet.

Understanding Outdoor Faucet Leaks

Before we dive into the detection and fixing process, it is important to understand the common causes of outdoor faucet leaks. Outdoor faucets, also known as hose bibs or water spigots, are prone to leaks due to various reasons including:

  • Worn-out washers or O-rings
  • Cracked or damaged pipe
  • Loose fittings
  • Freezing and thawing

Identifying the cause of the leak will help you determine the appropriate solution for fixing it.

Step 1: Shut Off the Water Supply

The first step in fixing a leaking outdoor faucet is to shut off the main water supply to your home. Locate the shutoff valve near the faucet and turn it clockwise to close it. This will prevent any further water flow and allow you to work on the faucet without getting soaked.

Step 2: Inspect the Faucet

Once the water supply is turned off, closely inspect the faucet for any visible signs of leakage. Check for dripping water, pooling water around the base, or any unusual dampness. Also, examine the handle, spout, and connections for any cracks or damage.

Step 3: Check the Washers and O-Rings

The most common cause of a leaking outdoor faucet is worn-out washers or O-rings. These rubber components can deteriorate over time and cause leaks. To check the condition of the washers and O-rings, follow these steps:

  1. Turn the faucet handle counterclockwise to remove it.
  2. Using a wrench, unscrew the packing nut located below the handle.
  3. Remove the stem assembly from the faucet.
  4. Inspect the washers and O-rings for any signs of damage or wear.
  5. If necessary, replace the washers and O-rings with new ones of the appropriate size.

Make sure to apply plumber’s grease or silicone lubricant to the new washers and O-rings before reassembling the faucet.

Step 4: Tighten Loose Fittings

If the leaking persists even after replacing the washers and O-rings, there may be loose fittings causing the problem. Use a wrench or pliers to tighten any loose connections between the faucet, pipe, and hose.

Step 5: Insulate the Faucet

In regions with colder climates, freezing and thawing can cause outdoor faucets to leak. To prevent this, it is essential to insulate the faucet before winter arrives. Use foam insulation sleeves or covers specially designed for outdoor faucets to protect them from freezing temperatures.

Step 6: Test the Faucet

Once you have completed the necessary repairs and insulation, it’s time to test the faucet for any remaining leaks. Turn on the water supply and check for any signs of leakage. If the faucet is still leaking, double-check the washers, O-rings, and fittings to ensure everything is tightened correctly.

Fixing a leaking outdoor faucet is a relatively simple task that can save you both water and money. By following the step-by-step instructions in this guide, you can easily detect and fix a leaking outdoor faucet. Remember to regularly inspect your outdoor faucets to catch any leaks early and prevent further damage. By taking prompt action, you can ensure the longevity of your outdoor faucets and conserve water for a greener future. If all else fails you can contact your local plumber to assist in repairing your outdoor water faucet.
How to Prevent Frozen Outdoor Faucets: A Complete Guide

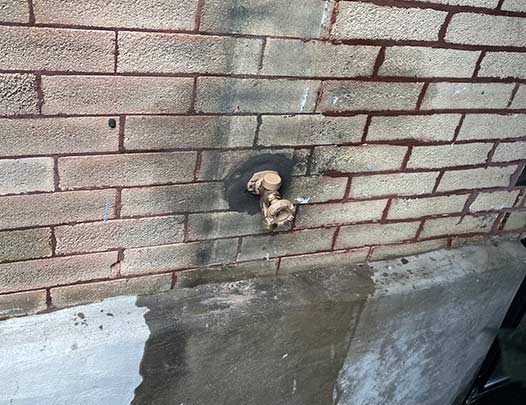
a frozen outdoor faucet.

As the cold winter months approach, one of the most important tasks for homeowners is to prevent their outdoor faucets from freezing. Frozen outdoor faucets can cause significant damage to the plumbing system and can be expensive to repair. In this complete guide, we will explore various methods and strategies to prevent frozen outdoor faucets, ensuring that you can continue to use them throughout the winter season without any issues. Whether you are a new homeowner or have been through the freezing winters before, this guide will provide you with valuable insights and tips to protect your outdoor faucets.

Understanding the Risks

Before we delve into the preventive measures, it is essential to understand why outdoor faucets freeze in the first place. Outdoor faucets are particularly vulnerable to freezing due to their exposure to the cold temperatures and the water connections remaining exposed. When temperatures drop below freezing, the water inside the pipes can freeze, causing them to expand and potentially crack. This can lead to water leakage or burst pipe emergencies when the ice thaws, leading to costly repairs or replacements.

Insulate Outdoor Faucets

One of the most effective ways to prevent frozen outdoor faucets is by insulating them. This provides a layer of protection against the cold temperatures and helps to maintain a more stable temperature inside the pipes. There are several methods for insulating outdoor faucets:

  • Insulated Faucet Covers: These covers are specifically designed to fit over outdoor faucets and provide insulation. They are made from materials that can withstand cold temperatures and block the flow of cold air, keeping the faucet and pipes protected.
  • Heat Tape: Heat tape is a flexible electrical heating element that can be wrapped around pipes and faucets. It provides a consistent source of heat that prevents freezing in the pipes and keeps the water flowing smoothly.
  • Insulation Sleeves: Insulation sleeves are foam or rubber tubes that can be fitted around the outdoor faucets. They provide a layer of insulation and help to prevent the transfer of cold air to the pipes.

Disconnect and Drain

Another effective preventive measure is to disconnect and drain the outdoor faucets before the cold weather sets in. This ensures that there is no water left in the pipes that can freeze and cause damage. Here’s how you can disconnect and drain the outdoor faucets:

  • Turn off the water supply: Locate the shut-off valve for the outdoor faucets and turn it off. This will prevent any water from flowing into the pipes.
  • Open the faucets: Open the outdoor faucets and let any remaining water drain out. This will empty the pipes and minimize the risk of freezing.
  • Store hoses indoors: Remove any hoses connected to the outdoor faucets and store them indoors. Hoses left outside can retain water and freeze, leading to damage.
frost free outdoor faucet installed.

When the outdoor faucets are not in use, keep them closed to prevent cold air from entering the pipes. This will help maintain a more consistent temperature and reduce the risk of freezing.

Install Freeze-Proof Faucets

If you live in an area with extremely cold temperatures, it may be worth considering installing freeze-proof faucets. Freeze-proof faucets are designed to prevent freezing by having the shut-off valve located inside the heated part of the house, rather than outside. This design keeps the water supply line from being exposed to the cold temperatures, significantly reducing the risk of freezing. Consult a professional plumber to assess your plumbing system and determine if freeze-proof faucets are a suitable option for your home.

Additional Tips

In addition to the aforementioned preventive measures, here are some additional tips to help you prevent frozen outdoor faucets:

  • Apply insulation to exposed pipes: Pipes leading to outdoor faucets should also be insulated to prevent freezing. Use pipe insulation sleeves or foam insulation to wrap around the exposed pipes.
  • Seal any gaps or cracks: Inspect the area around outdoor faucets for any gaps or cracks that could allow cold air to enter. Use weatherstripping or caulk to seal these gaps and minimize exposure to cold air.
  • Keep the faucets closed: When the outdoor faucets are not in use, keep them closed to prevent cold air from entering the pipes. This will help maintain a more consistent temperature and reduce the risk of freezing.
  • Monitor weather forecasts: Stay informed about upcoming freezing temperatures and take preventive measures accordingly. Cover outdoor faucets with insulated covers or use heat tape when extremely cold weather is expected.

Conclusion

Preventing frozen outdoor faucets is crucial in maintaining a well-functioning plumbing system during the winter months. By following the methods and strategies outlined in this complete guide, you can significantly reduce the risk of frozen outdoor faucets and avoid costly repairs. Remember to insulate the faucets, disconnect and drain them before winter, consider installing freeze-proof faucets, and implement additional tips to further protect your plumbing system. Taking these preventive measures will ensure that your outdoor faucets remain functional and ready for use, even in the coldest of winters.

How to Repair or Replace an Outdoor Hose Bibb

an outdoor hose bibb repair freshly completed.

Outdoor hose bibbs are a vital component of any outdoor watering system. Whether you use them to water your garden, wash your car, or clean outdoor surfaces, hose bibbs provide a convenient water source. However, over time, these fixtures may develop leaks or become damaged, requiring repair or replacement. Knowing how to repair or replace an outdoor hose bibb can save you time and money, as well as ensure a proper and efficient water flow.

Understanding the Outdoor Hose Bibb

Before diving into the repair or replacement process, it’s important to understand what an outdoor hose bibb is and how it functions. A hose bibb, also known as a spigot or faucet, is an outdoor water fixture with a valve that controls the flow of water. It is typically connected to a water supply pipe that extends from inside the house and protrudes through the exterior wall.

Hose bibbs come in various types, including frost-proof, compression, and sillcock. Frost-proof bibbs are commonly used in regions with colder climates to prevent freezing and bursting during winter. Compression and sillcock bibbs are more common in warmer climates.

Signs of a Damaged Outdoor Hose Bibb

Identifying the signs of a damaged hose bibb is crucial in determining whether a repair or replacement is necessary. Here are some common signs to look out for:

  • Leaks: Notice any water dripping from the hose bibb, even when the valve is closed.
  • Cracks or Fractures: Inspect the bibb for any visible cracks or fractures in the body or handle.
  • Difficulty Turning On/Off: If the valve is hard to turn or requires excessive force, it may be due to internal damage.
  • Poor Water Flow: If water flow is weak or irregular, it could indicate a problem with the bibb.

Repairing an Outdoor Hose Bibb

If the hose bibb shows minor damage or leaks, repair might be a viable option. Follow these steps to repair an outdoor hose bibb:

  • Turn off the Water Supply: Locate the shut-off valve connected to the bibb and turn it clockwise to shut off the water.
  • Drain the Faucet: Open the hose bibb to drain any remaining water from the pipe.
  • Remove the Handle: Unscrew or remove the handle to access the internal components.
  • Inspect and Replace O-Rings: Check the o-rings for any damage or wear and replace them if necessary.
  • Replace Washers and Seals: Replace any worn-out washers and seals inside the faucet body.
  • Reassemble the Bibb: Put all the components back together, making sure they fit snugly.
  • Turn on the Water Supply: Slowly turn on the water supply to check for leaks. If there are no leaks, the repair is successful.
an outdoor hose bibb replacement.

Proper maintenance can help prolong the lifespan of your outdoor hose bibb and prevent frequent repairs or replacements.

Replacing an Outdoor Hose Bibb

If the hose bibb is severely damaged or the repair attempts fail, replacing the bibb becomes necessary. Here’s the process for replacing an outdoor hose bibb:

  • Turn off the Water Supply: Locate the main shut-off valve for your water supply and turn it off.
  • Drain the System: Open the hose bibb to drain any remaining water from the pipe.
  • Detach the Bibb: Unscrew the hose bibb from the water supply pipe using a wrench or pliers.
  • Clean the Pipe End: Remove any debris or old tape from the pipe end to ensure a clean connection.
  • Apply Thread Seal Tape: Wrap thread seal tape clockwise around the pipe threads to create a tight seal.
  • Attach the New Hose Bib: Screw the new hose bibb onto the pipe threads and tighten it securely.
  • Test for Leaks: Slowly turn on the water supply and check for any leaks around the new bibb.

Maintaining the Outdoor Hose Bibb

Proper maintenance can help prolong the lifespan of your outdoor hose bibb and prevent frequent repairs or replacements. Here are some maintenance tips to follow:

  • Disconnect Hoses in Winter: Before freezing temperatures arrive, disconnect and drain all hoses connected to the bibb.
  • Insulate Frost-Proof Bibbs: If you have frost-proof bibbs, make sure they are properly insulated to prevent freezing.
  • Check for Leaks Regularly: Inspect your hose bibb periodically for any signs of leaks or drips.
  • Replace O-Rings and Washers: If you notice any deterioration in the o-rings or washers, replace them promptly to maintain a proper seal.
  • Protect from Extreme Temperatures: Avoid exposing the bibb to extreme heat or cold, as it can cause damage.

In Summary

Repairing or replacing an outdoor hose bibb may seem daunting, but with the right knowledge and tools, it can be a manageable task. Regular maintenance and prompt repairs can help ensure the longevity and efficiency of your watering system. Remember to always prioritize safety and turn off the water supply before attempting any repairs or replacements. If you feel unsure about any step, it is recommended to seek professional assistance from a local plumber to avoid causing further damage. With proper care, your outdoor hose bibb will provide a reliable water source for all your outdoor needs.

error: Content is protected !!