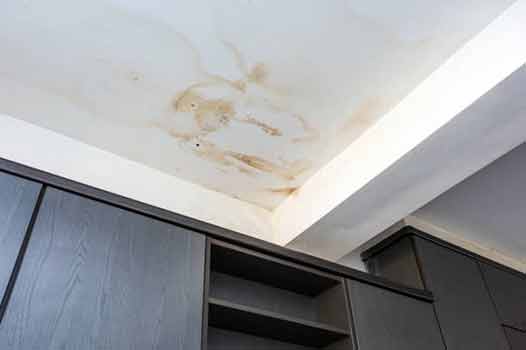
Understanding Water Stains on the Ceiling
Discovering a water stain on your ceiling can be quite alarming. Not only is it unsightly, but it also indicates that there might be a leak or water damage present. Ignoring a water stain on the ceiling can lead to further issues like mold growth, structural damage, or even potential health hazards. Therefore, it’s crucial to address this issue promptly and effectively. In this article, we will guide you on what to do about a water stain on the ceiling, ensuring that you take the necessary steps to prevent any further damage.
Identify the Source of the Leak
Before attempting to fix the water stain, it’s essential to detect the source of the leak. Water stains on the ceiling can be deceptive, and the actual leak might be originating from a different location. Look for any signs of water damage nearby, such as wet spots on the walls or floor, dripping water, or moisture. Common causes of ceiling water stains include roof leaks, plumbing issues, condensation, or even a faulty appliance. By determining the source, you can address the root cause and prevent future water stains from appearing.
Fix the Underlying Issue
Since a water stain on the ceiling is merely a symptom of a larger problem, it’s crucial to fix the underlying issue. Depending on the source of the leak, you may need to take different actions:
Roof Leaks
If the water stain is a result of a roof leak, it’s essential to inspect your roof for any damaged or missing shingles, cracks, or gaps. In this case, it’s recommended to hire a professional roofer to assess and repair the roof, as working at heights can be dangerous and requires expertise.
Plumbing Issues
In case the water stain is caused by plumbing problems, such as a leaking pipe, you might need the assistance of a licensed plumber. They can identify the specific area of the pipe that needs repair or replacement, ensuring the leak is properly fixed.
Condensation
Condensation can also lead to water stains on the ceiling, especially in areas with high humidity levels. To prevent condensation, ensure proper ventilation in rooms such as bathrooms, kitchens, and laundry areas. Installing exhaust fans or a dehumidifier can help reduce moisture levels and minimize the chances of water stains.
Faulty Appliances
If the water stain is a result of a malfunctioning appliance, such as an air conditioner or a refrigerator, you may need to contact a professional appliance repair service. They will be able to diagnose and fix the issue, preventing any further damage to your ceiling.
Assess the Damage
Once you have addressed the underlying issue causing the water stain, it’s necessary to assess the damage on your ceiling. Depending on the severity of the stain, you may need to decide whether to tackle the repair yourself or hire a professional.
Repair the Ceiling
Repairing the water stain on your ceiling can be a task that requires attention to detail and proper techniques. If the stain is small and superficial, you may consider repairing it yourself by following these steps:
Step 1: Prepare the Area
Start by preparing the area around the stain. Lay drop cloths or plastic sheets on the floor and move any furniture or belongings away from the work area. This will protect your floor and prevent any accidental damage.
Step 2: Remove the Stain
Before attempting to remove the water stain, it’s crucial to ensure that the underlying issue causing the stain is fully resolved. Otherwise, the stain will likely reappear. Use a stain-blocking primer to cover the affected area, applying multiple coats if necessary, until the stain is no longer noticeable.
Step 3: Paint the Ceiling
Once the primer has dried, paint the entire ceiling to achieve a uniform appearance. Select a paint color that matches your existing ceiling color for seamless blending. Apply at least two coats of paint, allowing sufficient drying time between each coat.
Step 4: Finishing Touches
Finally, inspect the repaired area and make any necessary touch-ups to ensure a smooth and flawless finish. Check for any remaining traces of the water stain and correct them accordingly. Once you are satisfied with the result, clean up the work area and remove the protective coverings.
Monitor for Future Issues
After addressing the water stain on your ceiling and completing the necessary repairs, it’s essential to monitor the area for any signs of recurring damage. Keep an eye out for new water stains, discoloration, peeling paint, or any other indications of water intrusion. Maintaining regular inspections will help detect potential issues early and prevent extensive damage in the future.
Discovering a water stain on your ceiling can be a cause for concern, but with proper understanding and prompt action, you can effectively address the issue. Start by identifying the source of the leak and fixing the underlying problem, whether it’s a roof leak, plumbing issue, condensation, or a faulty appliance. Assess the extent of the damage and decide whether to tackle the repair yourself or call in a professional. Follow the necessary steps to repair the water stain, ensuring a seamless and long-lasting result. Lastly, monitor the area for any signs of future water damage to prevent further issues. By taking these proactive measures, you can keep your ceiling in excellent condition and maintain the integrity of your home.