Blog

Tips for Eliminating a Persistent Sewer Smell in Your Basement Bathroom

Tips for Eliminating a Persistent Sewer Smell in Your Basement Bathroom

Understanding the Causes of Sewer Smell

Dealing with a persistent sewer smell in your basement bathroom can be a frustrating and unpleasant experience. The unpleasant odor can not only make spending time in the bathroom uncomfortable but may also indicate an underlying issue that needs to be addressed. Here we will discuss some effective tips for eliminating and preventing sewer smells in your basement bathroom. Before we delve into the solutions, it’s important to understand the common causes of sewer smell.

Drain Trap Evaporation: In many cases, the primary cause of a sewer smell is the evaporation of water in the drain trap. Drain traps are designed to prevent sewer gases from entering your living space by holding a small amount of water, creating a barrier. However, if the drain trap dries out due to infrequent use or a plumbing issue, it can allow sewer odors to escape.

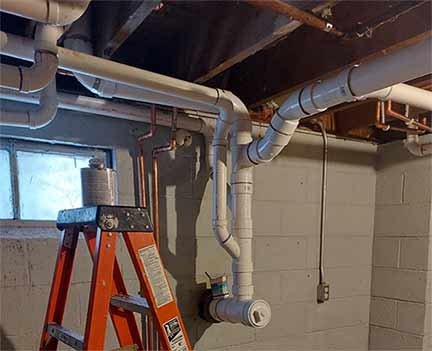
Faulty Ventilation: Another common cause is inadequate or faulty ventilation. Plumbing systems rely on vents to maintain pressure and proper airflow. When these vents become blocked or damaged, the sewer gases may not be able to escape, leading to a foul smell.

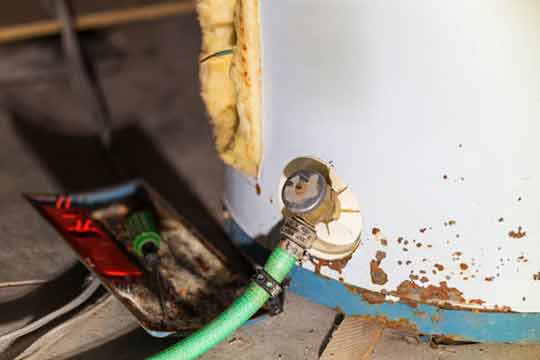
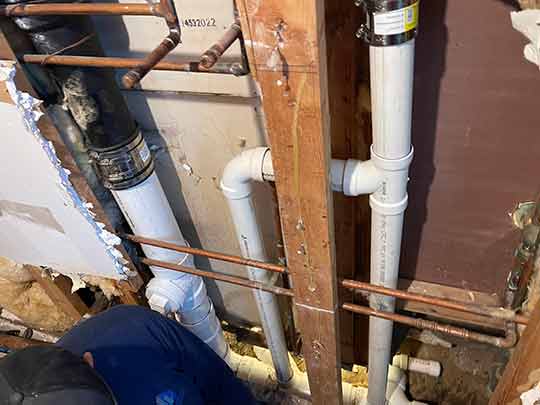
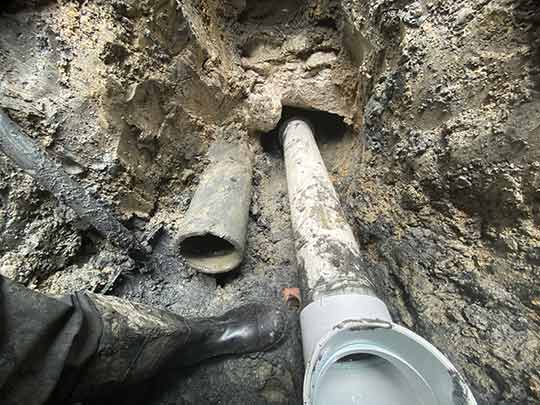
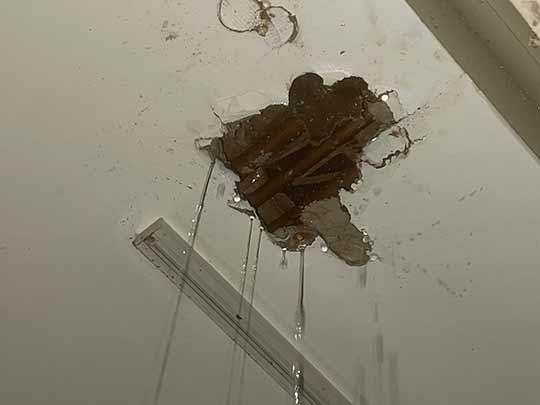
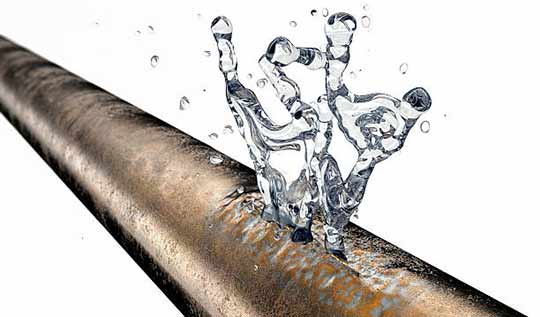
Broken or Leaking Pipes: Damaged or deteriorating pipes can also contribute to sewer smells in your basement bathroom. Cracked or broken pipes can allow sewer gases to escape, permeating your living space with an unpleasant odor.

Inadequate Sealing: Improper sealing around plumbing fixtures, such as toilets or sinks, can also lead to sewer smells in your basement bathroom. If there are gaps or cracks in the sealing, sewer gases can seep through and create an unpleasant odor.

running water through a drain helps sewer odors.

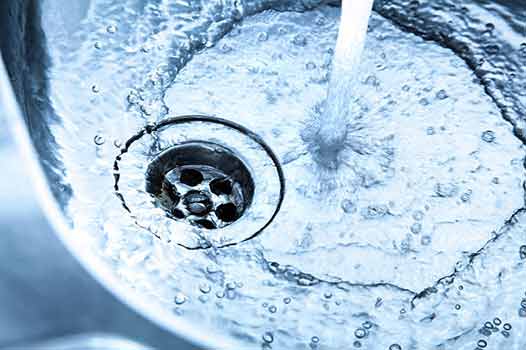
It is advisable to periodically run water in all the unused drains, including the shower, sink, and toilet.

Effective Solutions for Eliminating Sewer Smells

Now that we have identified the common causes of sewer smells, let’s explore some effective solutions to eliminate the persistent odor in your basement bathroom:

Regularly Run Water in Unused Drains

If your basement bathroom is infrequently used, the drain traps might dry out, leading to sewer smells. To prevent this, it is advisable to periodically run water in all the unused drains, including the shower, sink, and toilet. This simple act can refill the drain traps, creating a barrier against sewer gases.

Clean and Maintain Your Ventilation System

Ensure that your ventilation system is clear of any blockages or debris that may restrict airflow. Regularly inspect and clean your vents to maintain proper ventilation and prevent sewer smells from lingering in your basement bathroom.

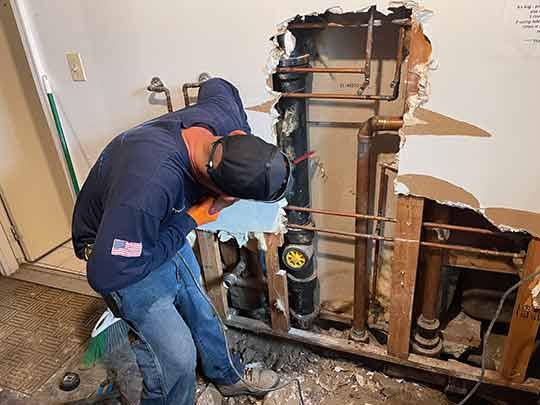
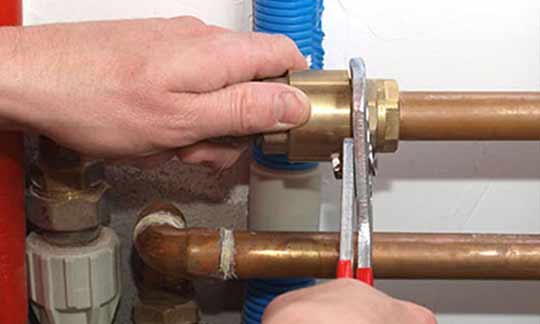
Check for and Repair Pipe Damage

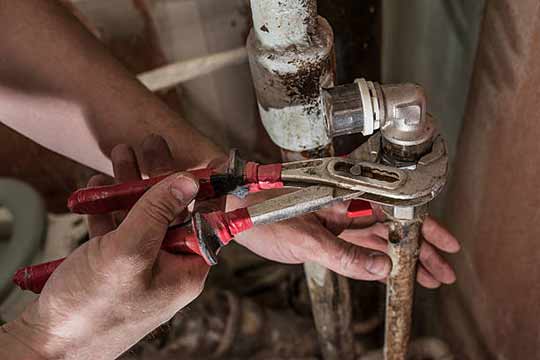
If you suspect that damaged pipes are contributing to the sewer smell, it is crucial to address the issue promptly. Inspect the pipes in your basement bathroom for any visible signs of damage, such as cracks or leaks. Contact a plumber to repair or replace any faulty pipes, ensuring the elimination of sewer odors and preventing further damage.

Re-Seal Plumbing Fixtures

Examine the seals around your plumbing fixtures to identify any gaps or cracks. If you notice any areas of inadequate sealing, apply a waterproof sealant to create an airtight barrier. This will prevent sewer gases from escaping and alleviate the persistent smell in your basement bathroom.

Keep Your Basement Bathroom Clean

Maintaining cleanliness in your basement bathroom is crucial for eliminating sewer smells. Regularly clean all surfaces, including floors, walls, and fixtures, using appropriate cleaning products. Clean any mold you might find in the shower and bath area. Pay special attention to areas that may trap moisture or accumulate grime, as these can contribute to the unpleasant odor.

Contact a Professional

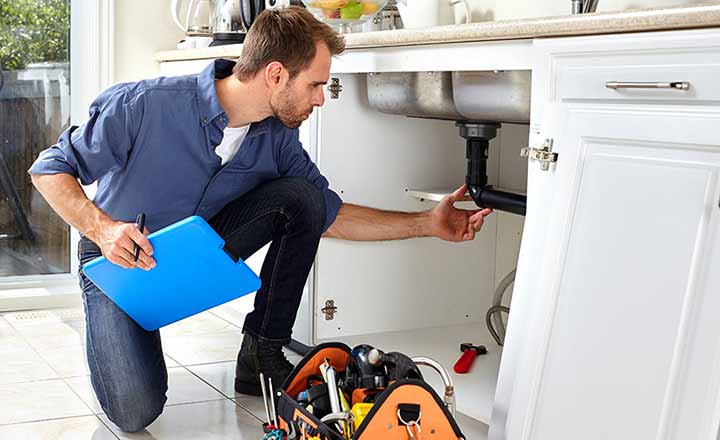
If you have attempted the above solutions and are still facing persistent sewer smells in your basement bathroom, it is recommended to call a licensed residential plumber. They will be able to conduct a detailed inspection of your plumbing system and identify any underlying issues that may require professional intervention.

By following these tips and solutions, you can effectively eliminate the persistent sewer smell in your basement bathroom and create a clean and odor-free environment. Remember, early detection and prompt action are key to preventing further damage to your plumbing system and ensuring the comfort of your living space.

Taking Care of Your Water Heater: A Step-by-Step Guide to Draining and Flushing

how to flush and drain a water heater

As a homeowner, it is essential to maintain your water heater regularly to ensure it functions optimally and has a long lifespan. Over time, sediment and mineral buildup can accumulate inside the tank, reducing the efficiency and performance of your water heater. Draining and flushing your water heater is a crucial maintenance task that should be done annually or as recommended by the manufacturer. In this step-by-step guide, we will walk you through the process of draining and flushing your water heater, providing you with the knowledge and confidence to undertake this task.

Why Should You Drain and Flush Your Water Heater?

Before we dive into the steps of draining and flushing your water heater, let’s understand why this maintenance task is essential. Over time, sediment, minerals, and debris can settle at the bottom of the water heater tank. This sediment buildup can cause several problems, including:

  • Reduced Efficiency: Sediment acts as an insulating layer, making it harder for the burner or heating element to heat the water. This can lead to increased energy consumption and higher utility bills.
  • Poor Performance: Sediment accumulation can reduce the water heater’s ability to provide an adequate supply of hot water, leading to lukewarm or cold showers.
  • Increased Risk of Damage: Sediment buildup can cause overheating, which can damage the tank and other components of the water heater.
  • Shortened Lifespan: Neglecting to drain and flush your water heater regularly can significantly reduce its lifespan, leading to costly repairs or premature replacement.

By draining and flushing your water heater, you can remove the sediment and maintain its efficiency, performance, and longevity.

Gather the Necessary Tools and Materials

Before you start, ensure you have the following tools and materials:

  • A garden hose long enough to reach a suitable drain location outside your home.
  • A screwdriver or wrench to open the drain valve.
  • A bucket or large container to collect the drained water.
  • A pair of gloves and protective eyewear to keep yourself safe.

Once you have gathered all the necessary tools and materials, you are ready to proceed with the draining and flushing process.

Step 1: Turn Off the Power and Fuel Supply

Before performing any maintenance on your water heater, it is crucial to turn off the power or fuel supply to ensure your safety. Follow these steps:

  • For Electric Water Heaters: Locate the circuit breaker labeled for your water heater and switch it off.
  • For Gas Water Heaters: Locate the gas supply valve near the bottom of the water heater and turn it off.

By turning off the power or fuel supply, you eliminate the risk of accidents or injuries while working on your water heater.

Step 2: Allow the Water to Cool Down

Next, you need to allow the water inside the tank to cool down before you proceed with draining it. Hot water can cause burns or scalding, so it is essential to exercise caution. The cooling process may take several hours, so it is recommended to perform this maintenance task when you do not need hot water for an extended period.

Step 3: Locate the Drain Valve

The drain valve is usually located near the bottom of the water heater tank. It is a brass or plastic valve with a threaded outlet. Once you have identified the drain valve, follow the next steps to drain the water heater.

Step 4: Connect the Garden Hose

Take one end of the garden hose and connect it to the drain valve outlet. Ensure the connection is secure to prevent any leaks or spills during the draining process.

Step 5: Position the Other End of the Hose

Position the other end of the garden hose at a suitable drain location outside your home. The water expelled from the tank can be hot or contain sediment, so selecting an appropriate drain location is crucial.

Step 6: Open the Drain Valve

Using a screwdriver or wrench, slowly open the drain valve by turning it counterclockwise. Be prepared for water to start flowing into the garden hose and out into the drain. Ensure the bucket or large container is ready to collect the water initially.

Step 7: Drain the Tank

Allow the water inside the tank to drain completely. This process may take some time, depending on the size of your water heater. Be patient and ensure the water is flowing steadily before proceeding to the next step.

Step 8: Flush the Tank

Flushing the tank helps remove any remaining sediment or debris that may not have been expelled during the draining process. To flush the tank, follow these steps:

  • Close the drain valve by turning it clockwise, ensuring it is tightly closed.
  • Turn on the cold water supply to the water heater. The cold water will help flush out any remaining sediment.
  • Allow the water to run through the tank and out through the drain valve for several minutes. This will help flush out any buildup.
  • Once you are satisfied that the tank is thoroughly flushed, turn off the cold water supply.

Step 9: Close the Drain Valve

Using a screwdriver or wrench, close the drain valve by turning it clockwise until it is tightly closed. Ensure there are no leaks around the valve.

Step 10: Refill the Tank

Now that the draining and flushing process is complete, it’s time to refill the water heater tank. Follow these steps:

  • Close the drain valve securely if it is not already closed.
  • Disconnect the garden hose from the drain valve outlet and store it away.
  • Turn on the cold water supply to the water heater.
  • As the tank fills with water, open one or more hot water faucets in your home to release any trapped air.
  • Once you have a steady flow of water from the faucets, close them.

Step 11: Restore Power or Fuel Supply

Lastly, restore the power or fuel supply to your water heater:

  • For Electric Water Heaters: Turn on the circuit breaker labeled for your water heater.
  • For Gas Water Heaters: Turn on the gas supply valve near the bottom of the water heater.

Ensure the water heater is functioning correctly and wait for it to heat the water to the desired temperature before using hot water in your home.

in the middle of draining a water heater tank.

Draining and flushing your water heater is a crucial maintenance task that should be done annually or as recommended by the manufacturer.

Maintaining Your Water Heater for Longevity

Draining and flushing your water heater is just one aspect of its overall maintenance. To ensure your water heater operates efficiently and has a long lifespan, consider the following tips:

  • Adjust the Temperature: Set the temperature of your water heater to a suitable level (usually between 120 and 140 degrees Fahrenheit) to prevent overheating and reduce energy consumption.
  • Insulate the Pipes: Insulate the hot water pipes leading from the water heater to maximize energy efficiency and minimize heat loss.
  • Check the Anode Rod: Regularly inspect and replace the anode rod if necessary. The anode rod helps prevent corrosion inside the tank.
  • Test the Pressure Relief Valve: Annually test the pressure relief valve to ensure it is functioning correctly. This valve helps prevent excessive pressure buildup inside the tank.
  • Keep the Area Clean: Ensure the area surrounding the water heater is clean and free from debris to prevent potential fire hazards and allow proper ventilation.

By following these additional maintenance steps and being proactive about the care of your water heater, you can extend its lifespan and enjoy reliable hot water for years to come.

In Summary

Regularly draining and flushing your water heater is a crucial maintenance task that should not be overlooked. By removing sediment and debris from the tank, you can ensure your water heater operates efficiently, provides an adequate supply of hot water, and has a longer lifespan. The step-by-step guide provided in this article offers you the knowledge and guidance to undertake this essential maintenance task. Remember to always prioritize safety by turning off the power or fuel supply and allowing the water to cool before starting the draining process. With proper maintenance and care, your water heater will continue to serve you well for many years and avoid a premature need for a water heater replacement.

Assessing the Cost-Effectiveness and Environmental Impacts of Overhead Sewer Systems

Impacts of Overhead Sewer Systems

Overhead sewer systems have become increasingly popular in recent years as an efficient and effective solution for managing wastewater in urban areas. These systems, also known as gravity sewer systems, are designed to transport sewage from homes and buildings to treatment facilities using gravitational force. However, it is essential to assess the cost-effectiveness and environmental impacts of installing an overhead sewer system to ensure that they are the most suitable option for a particular area.

Understanding Overhead Sewer Systems

Before delving into the assessment of cost-effectiveness and environmental impacts, it is crucial to have a clear understanding of overhead sewer systems. In these systems, the sewer pipes are positioned above ground instead of being buried underground. The main advantage of this design is that it eliminates the risk of basement flooding emergencies during heavy rain or sewer backups. By raising the sewer lines above the basement level, any wastewater or stormwater can flow directly into the system without causing damage to properties.

Overhead sewer systems typically consist of the following components:

  • Pipes: The sewer pipes carry wastewater from various sources to the treatment plant. These pipes can be made of materials such as PVC, concrete, or cast iron.
  • Pumps: In some cases, pumps are required to assist in moving the wastewater through the system. These pumps are usually housed in a pump station and help maintain optimal flow rates.
  • Control Panels: Control panels are used to regulate the operation of the pumps and monitor the overall performance of the overhead sewer system.

The Cost-Effectiveness of Overhead Sewer Systems

Assessing the cost-effectiveness of overhead sewer systems involves considering both the upfront costs of installation and the long-term savings in maintenance and repairs. While the initial investment for installing an overhead sewer system may be higher compared to traditional gravity sewer systems, the long-term benefits can significantly outweigh the initial costs.

One of the primary advantages of overhead sewer systems is their ability to prevent basement flooding and sewer backups. By eliminating the risk of property damage and the associated costs of cleanup and restoration, overhead sewer systems can provide substantial savings for homeowners and businesses in flood-prone areas.

Furthermore, overhead sewer systems often require less maintenance compared to conventional gravity sewer systems. Since the pipes are positioned above ground, they are more accessible for inspection and repairs. This accessibility reduces the time and labor required for maintenance, resulting in cost savings over the lifespan of the system.

In addition to the direct cost-effectiveness, overhead sewer systems can also contribute to the overall value of older homes. Potential homebuyers and investors are increasingly recognizing the importance of flood protection measures, and properties equipped with overhead sewer systems may command higher prices in the real estate market.

Assessing the Environmental Impacts of Overhead Sewer Systems

While overhead sewer systems offer numerous benefits in terms of cost-effectiveness, it is also critical to evaluate their environmental impacts. Understanding how these systems interact with the surrounding ecosystem is essential for sustainable urban development.

One of the key environmental benefits of overhead sewer systems is their ability to reduce the risk of wastewater overflows and the subsequent pollution of natural water bodies. By preventing sewage backups and overflow incidents, these systems help maintain the water quality of rivers, lakes, and streams, thereby preserving local ecosystems.

Additionally, due to their above-ground nature, overhead sewer systems offer improved accessibility for maintenance and repairs. As a result, any potential leaks or pipe bursts can be detected and addressed promptly, minimizing the risk of long-term environmental damage.

Furthermore, overhead sewer systems can help alleviate the burden on existing wastewater treatment plants. As these systems provide a more efficient means of transporting wastewater, they can help ensure that treatment facilities operate at optimal capacity. By reducing the strain on treatment plants, overhead sewer systems contribute to a more sustainable and environmentally friendly wastewater management infrastructure.

Considerations for Implementation

Before implementing overhead sewer systems, several factors need to be carefully considered:

  • Geographical and Hydrological Factors: The topography and hydrological characteristics of the area should be thoroughly assessed to determine the feasibility of overhead sewer systems. Factors such as slope, soil conditions, and proximity to water bodies can influence the system’s effectiveness.
  • Cost-Benefit Analysis: Conducting a comprehensive cost-benefit analysis is essential to evaluate the financial viability of implementing overhead sewer systems. This analysis should consider the upfront installation costs, ongoing maintenance expenses, and potential savings in flood damage and sewer backups.
  • Local Regulations: Familiarize yourself with local building codes and regulations related to overhead sewer systems. Ensure that all necessary permits and approvals are obtained before commencing any construction or modification work.
  • Community Engagement: Engage with the local community and stakeholders to gather their input and address any concerns related to the implementation of overhead sewer systems. Consider hosting informational sessions or workshops to educate residents about the benefits and implications of these systems.

In Conclusion

Assessing the cost-effectiveness and environmental impacts of overhead sewer systems is crucial for making informed decisions regarding wastewater management in urban areas. By carefully evaluating the financial benefits and environmental considerations, municipalities, homeowners, and businesses can determine whether overhead sewer systems are the most suitable option for their specific needs. By implementing these systems appropriately and considering local conditions, communities can enhance the resilience of their wastewater infrastructure while minimizing environmental impacts.

Expert Insights on the Necessity of Repiping to Safeguard Your Property

Safeguard Your Property with repiping

Understanding the Importance of Repiping for Property Protection

As a property owner, it is crucial to prioritize the maintenance and protection of your valuable investment. Repiping, in particular, plays a vital role in ensuring the safety and functionality of your property’s plumbing system. Ignoring the signs of deteriorating pipes can lead to severe damage, costly repairs, and potential risks to your property and its occupants. Below we will get into expert insights on the necessity of repiping to safeguard your property.

The Lifespan of Pipes

Before discussing the reasons why repiping is essential, it’s important to understand the lifespan of different types of pipes commonly used in properties. The material and age of your property will largely determine the type of pipes installed. Here are some general estimations of pipe lifespans:

  • Copper pipes: The lifespan of copper pipes can range from 50 to 70 years. However, factors like water pH levels and water chemistry can influence their durability.
  • Galvanized steel pipes: Galvanized steel pipes have an average lifespan of 20 to 50 years. Over time, these pipes are prone to rust and corrosion, resulting in reduced water pressure and potential leaks.
  • PVC pipes: PVC pipes are known for their longevity and can last anywhere from 50 to 100 years. They are not susceptible to rust and corrosion like other materials.

Signs Your Property Needs Repiping

Identifying the signs that your home requires repiping services is crucial to prevent further damage and ensure the safety of your property. Here are some common indicators that your pipes may need replacement:

  • Frequent leaks: If your property experiences multiple leaks over a short period, it could be a clear sign of deteriorating pipes that need immediate attention.
  • Discolored water: When the water flowing from your faucets appears rusty, brown, or discolored, it may indicate corroded pipes that need to be replaced.
  • Low water pressure: Aging pipes often suffer from reduced water pressure, making it difficult to perform regular tasks like showering or using appliances efficiently.
  • Strange odors or taste: Unpleasant odors or a metallic taste in your tap water can signify the presence of contaminants due to deteriorating pipes.
  • Frequent plumbing repairs: If you find yourself constantly calling plumbers to fix various issues, it could be a symptom of underlying pipe problems that require repiping.

Benefits of Repiping

Investing in repiping offers several advantages that contribute to the long-term protection and value of your property. Let’s explore some of the key benefits:

1. Enhanced Property Value

Repiping can significantly increase the value of your property. Potential buyers are more inclined to invest in a property with a newer, reliable plumbing system that eliminates the hassle and cost of immediate repairs.

2. Improved Water Quality

Old, deteriorating pipes can contaminate your water supply, compromising its quality and potentially posing health risks. Repiping ensures clean and safe water for you and your household.

3. Increased Water Pressure

Replacing outdated pipes with newer ones can restore the water pressure in your property. Enjoy a more efficient and satisfying shower experience, as well as better functionality for various appliances that rely on water.

4. Minimized Plumbing Emergencies

Repiping eliminates the constant need for plumbing repairs and maintenance. By proactively replacing old pipes, you can minimize the risk of emergencies and the associated expenses.

5. Enhanced Property Safety

Leaky pipes pose a significant threat to your property’s structural integrity and can lead to mold growth, water damage, and even flooding. Repiping ensures a secure and safe environment for your property and its occupants.

a home in chicago being repiped by a plumber.

A professional plumber will conduct a thorough inspection of your property’s existing pipes to evaluate their condition and identify any potential issues.

The Repiping Process

When considering repiping your property, it is crucial to engage professional plumbing services to ensure a successful and efficient process. Here’s a general overview of the repiping process:

1. Inspection and Assessment

A professional plumber will conduct a thorough inspection of your property’s existing pipes to evaluate their condition and identify any potential issues. This assessment helps determine the extent of repiping required.

2. Pipe Material Selection

Based on the assessment and your property’s specific needs, the plumber will recommend the most suitable pipe material for the repiping project. Factors such as durability, cost-effectiveness, and water quality should be considered during this selection process.

3. Pipe Replacement

Once the material is selected, the repiping process begins. Professional plumbers will systematically remove the old pipes and replace them with new ones. This process ensures minimal disruption to your property and a smooth transition to the new plumbing system.

4. Testing and Inspection

After the repiping is complete, residential plumbers will conduct rigorous testing and inspection to ensure the integrity and functionality of the new plumbing system. This step is crucial to identify any potential leaks or issues that might require immediate attention.

5. Clean-Up and Restoration

Once the testing and inspection confirm the successful installation of the new plumbing system, the plumbers will proceed with the clean-up process, ensuring that your property is left in impeccable condition post-repiping.

Wrapping It Up

Repiping is a necessary investment to safeguard your property and ensure the long-term functionality of your plumbing system. By addressing deteriorating pipes proactively, you can avoid expensive repairs, maintain property value, and provide a secure environment for your household. Always consult professional plumbers to guide you through the repiping process and ensure optimal results.

Proper Timing to Call a Plumber for Sewer Repair: Knowing the Warning Signs

Proper Timing to Call a Plumber for Sewer Repair

In every household, the plumbing system plays a vital role in maintaining a clean and functional living space. One of the critical components of this system is the sewer line. The sewer line serves as the passage for wastewater to leave your home and enter the public sewer system. However, like any other part of your plumbing, the sewer line is susceptible to damage and deterioration over time.

When issues arise with your sewer line, it is crucial to address them promptly to prevent further damage. Ignoring sewer line problems can lead to costly repairs and even health hazards. But how do you know when it’s the right time to call a plumber for sewer repair?

This article aims to guide homeowners in recognizing the warning signs of sewer line issues and determining when it is appropriate to contact a professional plumber. By understanding these signs and acting promptly, you can mitigate potential risks and save yourself from unnecessary expenses.

Slow Draining Fixtures

If you notice that multiple fixtures in your home, such as sinks, bathtubs, or toilets, are draining slowly, it could be an indication of a sewer line problem. Typically, a blockage or clog in the sewer line can cause water to drain slowly or back up into your fixtures. This issue may worsen over time, so it is advisable to call a plumber as soon as you notice this warning sign.

Foul Odors

Unpleasant odors emanating from your drains, particularly when you run water or flush the toilet, can be a clear indicator of a sewer line issue. The foul smell is often a result of gases escaping from the sewer line and entering your home through the drain system. If you experience persistent odors that do not dissipate with normal cleaning methods, it is crucial to have a plumber camera inspect your sewer line.

Frequent Clogs

While occasional clogs can happen in any household, frequent clogging in multiple drains or toilets is a cause for concern. This could be a sign of a more significant issue within your sewer line. It is essential to differentiate between localized clogs, which typically affect a single fixture, and widespread clogs that impact several drains throughout your home. If you find yourself repeatedly dealing with drain clogs, it is advisable to have a professional plumber hydro jet your sewer line first to determine if an actual repair is needed.

Water Backup

Water backup is a severe warning sign that should never be ignored. If you notice water backing up in your sinks, toilets, or other fixtures when you use the plumbing in your home, it indicates a significant blockage or damage in your sewer line. This issue requires immediate attention from a plumber to prevent further damage and potential flooding.

Pooled Water in the Yard

If you observe standing water or soggy areas in your yard, it could be an indication of a leaking or damaged sewer line. When a sewer line crack or break occurs underground, it allows wastewater to escape and pool in your yard. This not only poses a threat to your property but also increases the risk of contamination. It is crucial to contact a plumber to identify the exact location and cause of the problem and perform the necessary repairs.

Unexplained Increase in Water Bills

Another sign of a potential sewer line issue is a sudden and unexplained increase in your water bills. A hidden leak or a continuous flow of water caused by a damaged sewer line can result in excessive water usage and higher bills. If you receive a noticeably higher water bill without any change in your water consumption habits, it is advisable to consult a plumber to investigate possible sewer line problems.

Mold and Mildew Growth

Mold and mildew thrive in damp and moist environments. A leaking or damaged sewer line can create the perfect conditions for mold and mildew growth in your home. If you notice an increase in mold or mildew, particularly near your plumbing fixtures or in areas adjacent to your sewer line, it could indicate an underlying issue. Calling a plumber to assess your sewer line can help identify the source of the moisture and prevent further mold growth.

a sewer repair being performed.

Professional plumbers adhere to safety standards and regulations, ensuring a reliable and long-lasting solution to your sewer line problems.

When to Call a Professional Plumber?

While some minor plumbing issues can be resolved with DIY methods, sewer line problems require the expertise of a professional plumber. If you experience any of the warning signs mentioned earlier, it is vital to contact a reputable plumbing service without delay. Attempting to fix sewer line issues without proper knowledge and equipment can worsen the problem and potentially cause extensive damage to your home.

By calling a professional plumber, you benefit from their experience, skills, and specialized tools. They can perform a thorough camera inspection of your sewer line, identify the root cause of the issue, and implement the necessary repairs or replacements. Additionally, professional plumbers adhere to safety standards and regulations, ensuring a reliable and long-lasting solution to your sewer line problems.

Remember that prevention is always better than cure. Regular maintenance and inspections of your plumbing system, including the sewer line, can help identify potential issues before they escalate into costly repairs. Contacting a plumber for professional drain cleaning services can keep your sewer line in optimal condition and prevent major problems in the future.

Conclusion

Recognizing the warning signs of sewer line problems is crucial for every homeowner. By paying attention to slow draining fixtures, foul odors, frequent clogs, water backup, pooled water in the yard, increased water bills, and mold growth, you can detect potential sewer line issues early on. Promptly contacting a professional plumber when these signs arise is essential to prevent further damage, unnecessary expenses, and potential health hazards.

When it comes to the proper timing to call a plumber for professional sewer line repair service, it is always better to err on the side of caution. Addressing sewer line issues promptly ensures the safety and functionality of your plumbing system while maintaining a clean and sanitary living environment for you and your family.

Plumber Repair for Older Homes: Challenges and Solutions

Plumber Repair for Older Homes

Here we will explore the challenges faced in repairing plumbing systems in older homes and discuss possible solutions to overcome these challenges. Older homes often have unique plumbing infrastructure and materials that require specialized knowledge and techniques. The purpose of this article is to provide guidance and insights to homeowners, plumbers, and anyone involved in the repair and maintenance of plumbing systems in older homes.

The Importance of Plumbing Repair in Older Homes

Plumbing systems play a crucial role in any home, and this is especially true for older homes. As homes age, their plumbing systems tend to deteriorate and become less efficient. They are more susceptible to leaks, clogs, and damage, potentially causing significant issues such as water damage, mold growth, and even structural damage.

Regular maintenance and timely repairs are essential to ensure the functionality and longevity of the plumbing system in older homes. Neglecting plumbing problems can lead to costly repairs and compromise the safety and comfort of the residents.

Challenges in Repairing Plumbing Systems in Older Homes

Repairing plumbing systems in older homes presents unique challenges due to several factors. Let’s explore some of the most common challenges:

Outdated Plumbing Materials

Many older homes were constructed using materials that are no longer in common use. These materials, such as cast iron, galvanized steel, and lead pipes, may present various challenges during repairs. For example, lead water pipes may need to be replaced due to health concerns, while corroded galvanized steel pipes may cause reduced water flow and require extensive repairs or replacements.

Inaccessible Pipework

The layout and design of older homes often make it challenging to access and repair the plumbing system. Pipes may be hidden behind walls, under floors, or in crawl spaces, which may require additional effort and expertise to address any issues. The need for accessing these hidden areas can result in additional costs and may involve temporary disruptions to the residents.

a plumber providing a home buyer with a plumbing inspection.

When repairing plumbing systems in older homes, it’s essential to comply with modern plumbing codes.

Multiple Plumbing Code Updates

Plumbing codes have evolved significantly over the years to ensure safety and efficiency. When repairing plumbing systems in older homes, it’s essential to comply with modern plumbing codes. This may involve updating the system to meet the current standards, such as installing pressure regulators, backflow preventers, or additional shut-off valves.

Fragile and Aging Components

Components of the plumbing system, such as faucets, valves, and fixtures, typically have a limited lifespan. In older homes, these components are often older and more susceptible to wear and tear. Replacing these fragile and aging components requires careful handling to avoid further damage while ensuring compatibility with the existing system.

Possible Solutions

While repairing plumbing systems in older homes can be challenging, there are several solutions to address these difficulties and ensure the longevity and quality of the repaired system:

Hiring Experienced Plumbers

Hiring experienced plumbers who specialize in working with older homes can make a significant difference. These professionals possess the necessary skills, knowledge, and expertise to navigate the challenges specific to older home plumbing systems. They can efficiently diagnose issues, offer suitable solutions, and carry out repairs with minimal disruption to the residents.

Thorough Inspection and Planning

Before commencing any repairs, it is essential to conduct a thorough inspection of the entire plumbing system. This inspection will help identify potential issues and develop a comprehensive repair plan. By investing time in meticulous planning, homeowners and plumbers can prioritize repairs, estimate costs accurately, and minimize unforeseen surprises during the repair process.

a plumber upgrading a customers plumbing.

Replacing outdated materials, such as lead pipes or corroded steel, with modern, durable, and code-compliant materials can enhance the reliability and safety of the plumbing system.

Upgrading Plumbing Infrastructure

In some cases, upgrading the pipes in older homes may be necessary. Replacing outdated materials, such as lead pipes or corroded steel, with modern, durable, and code-compliant materials can enhance the reliability and safety of the plumbing system. Upgrades may also involve installing shut-off valves, pressure regulators, and other components to meet current code requirements.

Preserving Historical Features

For owners of historical homes, preserving the unique character and aesthetic features of the plumbing system is crucial. Experienced plumbers can work closely with preservation experts to find innovative solutions that blend modern functionality with the historical charm of the home. By carefully considering preservation needs, homeowners can maintain the integrity of their older homes while improving the plumbing system.

Regular Maintenance and Preventive Measures

Prevention is key to minimizing plumbing issues in older homes. Implementing a regular maintenance routine and conducting preventive measures, such as having your drains professionally cleaned by way of a hydro jetting service, pipe insulation, and periodic inspections, can help identify potential problems early on and prevent major repairs down the line. Homeowners should also be mindful of their water usage habits and avoid putting undue stress on the plumbing system.

Summing it Up

Repairing plumbing systems in older homes requires specialized knowledge, skills, and techniques due to the unique challenges they present. However, with the right approach and professional assistance, these challenges can be overcome effectively. By focusing on thorough inspections, careful planning, and utilizing suitable solutions, homeowners can ensure the reliability, safety, and longevity of their plumbing systems in older homes. Regular maintenance and preventive measures also play a vital role in preventing major issues and preserving the charm of these cherished homes for generations to come.

What Do You Do If a Pipe Bursts? How to Handle Plumbing Emergencies in Apartment Buildings

What Do You Do If a Pipe Bursts

Plumbing emergencies can happen at any time, and when they occur in apartment buildings, they can result in significant damage and inconvenience for residents. One of the most common plumbing emergencies is a burst pipe, which can cause flooding, property damage, and disruption of daily activities. It is crucial to know how to handle such a situation promptly and effectively to minimize the damage and restore normalcy as quickly as possible. Here we will discuss the necessary steps to take if a pipe bursts in an apartment building, providing a comprehensive guide for both tenants and property managers.

Understanding the Severity of a Burst Pipe

Before we delve into the steps to handle a burst pipe, it is essential to understand the severity of the situation. A burst pipe is a significant plumbing emergency that can result in substantial water damage and structural issues. The severity of the damage depends on various factors, including the size of the pipe, the water pressure, and the location of the burst. In some cases, a burst pipe can lead to a flooded basement emergency, causing extensive damage to walls, floors, and personal belongings. Therefore, it is crucial to act swiftly and efficiently to mitigate the damage.

Step 1: Shut Off the Water Supply

The first and most crucial step in handling a burst pipe is to shut off the water supply. This step is vital to stop the continuous flow of water and prevent further flooding and damage. In most apartment buildings, there is a main shut-off valve that controls the water supply for the entire building. Typically, this valve is located in the basement or utility room. However, it may vary depending on the building’s design and plumbing system. It is essential for tenants and property managers to familiarize themselves with the location of the shut-off valve beforehand to ensure quick access during emergencies.

Step 2: Prevent Water Damage

Once the water supply is turned off, the next step is to prevent further water damage. This can be done by removing any standing water and drying the affected areas as much as possible. If there is excessive flooding, it may be necessary to use buckets, mops, or a wet-dry vacuum to remove the water. Additionally, towels and fans can help in the drying process. It is crucial to act quickly to minimize the risk of mold growth and structural damage.

Step 3: Notify the Relevant Parties

After taking immediate action to prevent water damage, it is essential to notify the relevant parties about the burst pipe. As a tenant, you should inform your landlord or property manager about the situation as soon as possible. Provide them with all necessary details, such as the location of the burst pipe and the severity of the damage. Property managers should establish a clear communication system to ensure prompt response to plumbing emergencies and provide tenants with this information upon moving in. Additionally, if the burst pipe is affecting multiple units, it may be necessary to notify the other residents, especially those living below the affected floor, to take necessary precautions.

Step 4: Document the Damage

Documenting the damage caused by the burst pipe is crucial for insurance purposes and to facilitate the repair process. Take photographs or videos of the affected areas, focusing on the damaged pipes, flooded areas, and any personal belongings that have been affected. This documentation will help support your insurance claim and provide evidence of the repairs needed. It is recommended to seek guidance from your insurance provider regarding the necessary documentation and the claims process.

Step 5: Contact a Professional Plumber

While you may have temporarily mitigated the damage, it is essential to contact a professional plumber to repair the burst pipe. Attempting to fix a burst pipe yourself can lead to further damage or ineffective repairs. It is crucial to hire a licensed and experienced plumber who specializes in emergency plumbing. Contact your property manager or search for reputable plumbing services in your area. When contacting the plumber, provide them with all the necessary information regarding the burst pipe, location, and severity of the damage. The plumber will assess the situation, provide an estimate, and recommend the appropriate course of action.

Step 6: Communicate with Your Insurance Provider

If you have renter’s insurance or if the building has insurance coverage, it is crucial to contact your insurance provider and inform them about the burst pipe. They will guide you through the claims process and provide instructions on what documents and information they require to process your claim efficiently. It is essential to be thorough in providing accurate details and submitting all the necessary documentation to ensure a smooth insurance claim process.

Step 7: Coordinate Repairs and Restoration

Once the burst pipe has been repaired, it is necessary to coordinate the repairs and restoration of the affected areas. This may involve hiring professionals to repair structural damage, replace damaged drywall or flooring, and clean up any mold or mildew that may have developed. In apartment buildings, property managers often handle these coordination efforts. However, as a tenant, you should communicate with your property manager and keep them informed about the progress of the repairs.

a plumber providing a home buyer with a plumbing inspection.

Regularly inspect the plumbing system in your apartment, including faucets, pipes, and toilets, for any signs of leaks, corrosion, or damage

Preventing Future Plumbing Emergencies

While you cannot always avoid plumbing emergencies completely, there are preventive measures you can take to minimize the risk of a burst pipe or other plumbing issues in your apartment building. Here are some essential tips:

  • Regularly inspect the plumbing system in your apartment, including faucets, pipes, and toilets, for any signs of leaks, corrosion, or damage.
  • During winter months, take precautions to avoid frozen pipes, such as insulating exposed pipes and allowing faucets to drip during extremely cold temperatures.
  • Do not ignore minor leaks or drips, as they can gradually worsen over time and lead to more significant issues.
  • Inform your landlord or property manager if you notice a sudden drop in water pressure or any other irregularities in the plumbing system.
  • Consider investing in renter’s insurance to protect your personal belongings in the event of a plumbing emergency.

Wrapping It Up

A burst pipe in an apartment building is a plumbing emergency that requires immediate attention and action. By following the steps outlined in this article, both tenants and property managers can effectively handle a burst pipe emergency and minimize the damage caused by flooding. Taking swift action to shut off the water supply, preventing further water damage, and contacting professionals for repairs are essential in resolving the issue quickly. It is also important to communicate with the relevant parties and document the damage for insurance purposes. By understanding the severity of a plumbing emergency and taking proactive measures, you can help prevent future incidents and keep your apartment building in optimal condition.

Advice From a Chicago Plumber: How to Save Money On Your Utilities and Water Bills

How to Save Money On Your Utilities and Water Bills

As a professional Chicago plumber with years of experience serving the local community, we have witnessed firsthand how high utility and water bills can impact homeowners’ budgets. In today’s economy, finding ways to save money is of the utmost importance. Whether you are a homeowner or renter, there are several practical steps you can take to reduce your utility and water expenses without sacrificing comfort or convenience.

Understanding Your Utility Bills

Before exploring money-saving tips, it is essential to understand how your utility bills are calculated. Most utility companies charge based on the amount of energy and water consumed, as well as any additional fees or taxes. By analyzing your bills and identifying areas of high consumption, you can gain insights into your household’s energy usage patterns and make informed decisions to cut costs.

Tips for Saving Money on Your Utilities

Upgrade to Energy-Efficient Appliances

Investing in energy-efficient appliances can significantly reduce your electricity bills over time. Look for appliances with the ENERGY STAR label, as they meet strict energy efficiency guidelines set by the Environmental Protection Agency. From refrigerators to washing machines and air conditioners, these appliances use less energy without compromising performance.

Implement Smart Thermostat Technology

Smart thermostats allow you to control your home’s temperature remotely and create personalized heating and cooling schedules. By optimizing your HVAC system based on your daily routine, you can avoid unnecessary energy consumption when no one is home. This simple upgrade can lead to substantial savings on your monthly heating and cooling bills.

Unplug Electronics When Not in Use

Even when they are not in use, electronic devices and appliances continue to consume energy if they are plugged into an outlet. This phenomenon, known as standby power or phantom load, can account for a significant portion of your electricity bill. Make it a habit to unplug chargers, televisions, computers, and other devices when they are not actively being used.

Use Natural Light and LED Bulbs

Take advantage of natural lighting during the day by opening curtains and blinds. This will reduce your reliance on electric lights and save on energy costs. Additionally, replacing traditional incandescent bulbs with energy-efficient LED bulbs can significantly lower your lighting expenses. LED bulbs consume less electricity, last longer, and produce less heat.

Insulate Your Home

Inadequate insulation is one of the leading causes of energy loss in homes, especially during extreme weather conditions. Insulating your walls, attic, and windows can help maintain a comfortable temperature and reduce your heating and cooling expenses. Speak with a professional to determine the best insulation options for your home.

Install Low-Flow Fixtures

Reducing water consumption not only helps the environment but also lowers your water bills. Consider installing low-flow fixtures, such as aerating showerheads and high-efficiency toilets. These fixtures use less water without compromising water pressure, allowing you to save money while still enjoying a satisfying shower or efficient flush.

Fix Leaks promptly

Even minor leaks in faucets, toilets, and pipes can add up to significant water waste and inflated bills. Take swift action to repair any leaks as soon as they are detected. Hiring a plumber to inspect your home for leaks and fix any plumbing issues can help identify hidden leaks and ensure long-term water savings.

Practice Water-Saving Habits

Simple changes in your daily routines can make a big difference in reducing water consumption. Turn off the faucet while brushing your teeth, install water-efficient showerheads, and only run the dishwasher or washing machine when you have a full load. Every drop of water saved adds up to long-term savings on your utility bills.

To Sum It Up

By implementing these money-saving tips, you can effectively reduce your utility and water bills while contributing to a more sustainable future. Conserving energy and water not only benefits your wallet but also the environment. Start making small changes today, and watch as your utility bills decrease month after month. Remember, every little effort counts!

Dealing with Water Damage: How to Handle a Burst Pipe in Your Home

How to Handle a Burst Pipe in Your Home

Water damage can be a homeowner’s worst nightmare. Whether it’s due to heavy rainfall, a natural disaster, or a burst pipe, the consequences can be devastating. A burst pipe in your home can quickly lead to a flooded house, damaged belongings, and costly repairs. Knowing how to handle this situation promptly and effectively is crucial in minimizing the damage. Here we will discuss the steps you should take if you experience a burst pipe emergency in your home.

Shut off the Water

As soon as you discover a burst pipe, your first step should be to shut off the water supply. This will stop the flow of water and prevent further damage. Locate the main water valve in your home, which is usually in the basement or crawl space. Turn the valve clockwise to shut off the water. If you are unsure of the location or cannot shut off the main valve, contact a professional plumber who can assist you.

Turn Off Electricity

Water and electricity can be a dangerous combination. To prevent the risk of electrocution, turn off the electricity in the affected area. Locate the breaker box in your home and switch off the circuit breaker that controls the affected area or consider shutting off power to the entire house. If you are unsure which breaker controls the area, it’s best to turn off the power to the entire house to be safe.

Assess the Damage

Once you have stopped the water flow and turned off the electricity, assess the extent of the water damage. Take note of any areas that have been affected, including walls, floors, furniture, and personal belongings. Document the damage by taking photographs for insurance purposes.

Call Your Insurance Company

Contact your insurance company as soon as possible to report the burst pipe and the resulting water damage. They will guide you through the claims process and provide you with the necessary paperwork. Be sure to provide them with the details of the incident and the photos of the damage you have taken.

Remove the Water

The next step is to remove the water from your home. Depending on the amount of water and the size of the affected area, you may be able to do this yourself with a wet/dry vacuum or a pump. If the damage is extensive, it is recommended to hire a basement water extraction service. They have the expertise and equipment to efficiently extract the water and reduce the risk of mold and secondary damage.

Dry Out the Affected Area

After removing the water, it is essential to thoroughly dry out the affected area to prevent further damage and the growth of mold. Use fans, dehumidifiers, and open windows to increase air circulation and promote drying. Dry the affected area as quickly as possible to minimize the risk of mold growth.

Document Damaged Belongings

If any personal belongings have been damaged by the water, document them for your insurance claim. Create an inventory of the damaged items and gather any receipts or proof of purchase that you may have. Your insurance company will need this information to determine the value of your belongings and process your claim.

Seek Professional Assistance

While you may be able to handle some aspects of the water damage cleanup yourself, it is advisable to seek professional assistance, especially for extensive damage. A professional water damage restoration company will have the knowledge, experience, and equipment to thoroughly dry out your home, prevent mold growth, and perform necessary repairs. They can also help with coordinating the insurance claims process.

Prevent Future Incidents

Once the water damage has been addressed and repairs have been made, it is important to take steps to prevent future incidents. Insulate pipes in cold areas, such as basements and attics, to prevent freezing and bursting. Regularly inspect pipes for any signs of deterioration or leaks, and promptly repair or replace them as needed.

To Wrap It Up

A burst pipe in your home can cause significant water damage and disrupt your daily life. By following the steps outlined in this article, you can effectively handle a burst pipe situation and minimize the damage. Remember to shut off the water, turn off the electricity, assess the damage, contact your insurance company, remove the water, dry out the affected area, document damaged belongings, seek professional assistance if needed, and take preventive measures to avoid future incidents. Prompt action is key in mitigating the impact of water damage and getting your home back to its pre-damaged condition.

Burst Pipes: What to Do If This Emergency Occurs In Your Rental Property

Burst Pipes in your rental property

As a tenant, it is important to be prepared for emergencies that may arise in your rental property. One such emergency is burst pipes. When a pipe in your rental property bursts, it can cause significant damage to the property and your personal belongings. Here we will discuss what you should do if this emergency occurs in your rental property.

Assess the Situation

When you discover a burst pipe emergency in your rental property, the first step is to assess the situation. Determine the extent of the damage and identify the location of the burst pipe. This will help you communicate effectively with your landlord or property manager.

Shut Off the Water

Once you have assessed the situation, it is important to shut off the water supply to prevent further damage. Locate the main water shut-off valve in your rental property and turn it off. If you are unsure of the location, consult your landlord or property manager for guidance.

Notify Your Landlord or Property Manager

After shutting off the water, you should immediately notify your landlord or property manager about the burst pipe. Provide them with clear and concise information about the situation and any relevant details such as the location of the burst pipe.

Take Steps to Minimize Damage

While waiting for your landlord or property manager to address the issue, there are a few steps you can take to minimize further damage:

  • Remove any furniture or belongings from the affected area to a dry location.
  • Place buckets or towels under the leak to collect water and prevent it from spreading.
  • Use a mop or wet vacuum to remove excess water.
  • Open windows or use fans to promote ventilation and help dry the area.

Document the Damage

It is important to document the damage caused by the burst pipe for insurance purposes and to ensure that you are not held responsible for any repairs or replacement costs. Take photographs or videos of the affected areas and any damaged belongings. Keep copies of any correspondence with your landlord or property manager regarding the incident.

Communicate with Your Insurance Company

If you have renters insurance, contact your insurance company as soon as possible to report the burst pipe and the resulting damage. They will guide you through the claims process and provide assistance in assessing the extent of the damage.

Cooperate with Repairs and Restoration

Once your landlord or property manager has been informed about the burst pipe, they will take steps to repair the pipe and restore the property. Cooperate with their efforts and follow any instructions or guidelines they provide. This will help expedite the repair process and minimize the impact on your living situation.

Communicate Any Concerns

If you have any concerns or questions regarding the burst pipe incident or the repair process, do not hesitate to communicate them to your landlord or property manager. They are responsible for ensuring that the property is habitable and addressing any issues that may arise.

Learn from the Experience

A burst pipe can be a stressful and inconvenient experience, but it also provides an opportunity to learn and prevent future burst pipe emergencies. Reflect on the incident and identify any actions or precautions you can take to minimize the risk of a burst pipe in the future. This may include keeping the property adequately heated during cold weather, monitoring water pressure, or promptly reporting any signs of leaks or plumbing issues to your landlord or property manager.

In Conclusion

Knowing what to do in the event of a burst pipe in your rental property can help you mitigate damage and protect your personal belongings. By assessing the situation, shutting off the water, notifying your landlord, and taking steps to minimize damage, you can ensure a prompt response to the emergency. Cooperating with repairs and communicating any concerns will help expedite the restoration process. Remember to document the damage and contact your insurance company if you have renters insurance. Lastly, learn from the experience to prevent future emergencies. Stay prepared and proactive to ensure a safe and comfortable living environment in your rental property.