Blog

Common Mistakes to Avoid When Installing a Water Heater: Expert Insights and Recommendations

Common Mistakes to Avoid When Installing a Water Heater

Installing a water heater can be a complex process that requires careful planning and execution. Whether you are replacing an old unit or installing a brand new water heater, there are several common mistakes that homeowners often make during the installation process. Below we will discuss these mistakes and provide expert insights and recommendations to help you avoid them.

Importance of Proper Water Heater Installation

Before diving into the common mistakes, it is crucial to understand why proper water heater installation is important. A properly installed water heater ensures efficient and reliable operation, reduces the risk of malfunctions and accidents, and can even prolong the lifespan of the unit. By following the correct installation guidelines, you can optimize your water heater’s performance and minimize the need for repairs in the future.

Expert Insights and Recommendations

Neglecting to Properly Size the Water Heater

One of the most common mistakes during water heater installation is selecting the wrong size for your needs. Many homeowners make the mistake of choosing a water heater that is either too small or too large for their household. This can lead to inefficient operation and even higher energy bills.

To avoid this mistake, it is essential to consider the size and occupancy of your household when selecting a water heater. Speak with a professional or refer to the manufacturer’s guidelines to determine the appropriate size for your specific needs. Taking into account factors such as the number of occupants, peak hot water demand, and usage patterns can ensure that you choose a water heater that provides sufficient hot water without wasting energy or money.

Incorrect Placement and Venting

Another common mistake during water heater installation is improper placement and venting. Water heaters require adequate ventilation to ensure proper combustion and safe operation. Vent pipes should be correctly sized, properly sealed, and installed according to the manufacturer’s instructions.

Additionally, water heaters should be placed in an accessible area that allows for easy maintenance and repairs. Avoid installing the unit in a confined space or a location that is difficult to access. Proper clearance around the water heater is also crucial to prevent potential fire hazards and to ensure proper air circulation.

Failure to Install a Pressure Relief Valve

A pressure relief valve is a vital component of a water heater as it helps regulate the pressure inside the tank and prevents excessive buildup. Unfortunately, some homeowners neglect to install or properly maintain this essential safety feature.

During water heater installation, it is imperative to install a pressure relief valve and ensure it is in good working condition. Regular inspection and testing of the valve should be part of your maintenance routine to guarantee its proper functionality. This simple step can prevent the risk of a dangerous pressure buildup and potential damage to the water heater.

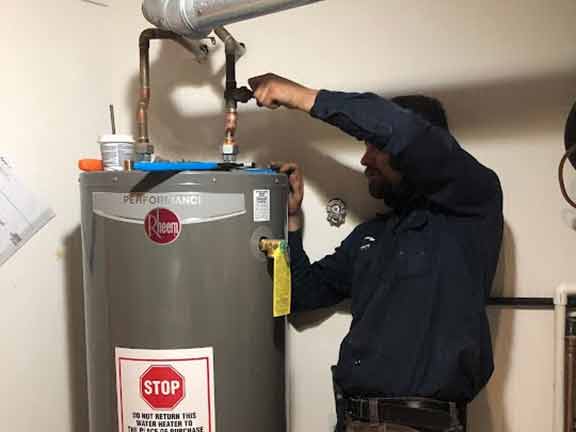
Improper Connection of Plumbing and Electrical Components

When installing a water heater, it is necessary to properly connect the plumbing and electrical components. This includes correctly attaching the inlet and outlet pipes, as well as the electrical connections.

Improper plumbing connections can result in leaks and water damage, while incorrect electrical connections can lead to electrical hazards or malfunctions. It is crucial to carefully follow the manufacturer’s instructions and ensure that all connections are secure and properly sealed. If you are unsure about the correct installation process, it is advisable to seek assistance from a licensed plumber or electrician.

Failure to Flush the Tank

A common mistake that homeowners make during water heater installation is neglecting to flush the tank before initiating regular use. New water heaters often contain sediment and debris that can accumulate inside the tank during manufacturing and transportation.

Flushing the tank helps remove these impurities and ensures the longevity and efficiency of the water heater. Failure to flush the tank can lead to reduced performance, decreased energy efficiency, and potential damage to the heating elements. Therefore, it is crucial to follow the manufacturer’s instructions and flush the tank properly before using the water heater.

In Summary

Proper installation of a water heater is crucial for ensuring its optimal performance, efficiency, and longevity. By avoiding common installation mistakes such as improper sizing, incorrect placement and venting, failure to install a pressure relief valve, improper connection of plumbing and electrical components, and neglecting to flush the tank, homeowners can enjoy a reliable and efficient hot water supply while minimizing the risk of malfunctions and accidents.

If you are unsure about any aspect of water heater installation, it is always recommended to speak with a professional plumber or electrician. Their expertise and experience can help ensure a smooth and successful installation process, providing you with peace of mind and the benefits of a properly functioning water heater for years to come.

How To Make Money From Your Home Improvement Expertise

How To Make Money From Your Home Improvement Expertise

Do you love working on home improvement projects in your spare time? Turn your passion into a money-making opportunity by monetizing your upgrades and renovations! Today, Chicago Plumbing Experts shares a few ways you can do this, including documenting your projects, using social media advertising, and more. We’ll also provide some tips on how to turn your home improvement passion into a full-fledged business.

4 Ways to Monetize Your Home Improvement Projects

These days, there are many ways to generate income from your home improvement interests, but here are four tried-and-true methods to get you started.

Document your projects for social media followers. 

If you’re handy with a camera, document your home improvement projects by taking photos or filming videos, and share them on social media platforms like Instagram, Facebook, and YouTube. You can also start a blog and write about your experiences.

Not only are these excellent ways to document your projects, but they also give you a chance to build an audience of followers who may be interested in hiring you for future projects. If you grow a large enough following, you can even make money through sponsorships or advertisements. As you take photos and videos of your upgrades and renovations, you’ll want to ensure your projects are captured in the best light possible. You might consider hiring professional home organizers to put everything in order for the perfect display!

Monetize your website or blog. 

Another way to make money from your home improvement projects is to monetize your website or blog. If you have a dedicated following of readers, you can place advertisements on your site or sell products related to home improvement, such as e-books detailing step-by-step instructions for popular DIY projects. You can also join affiliate programs and earn commission from any products purchased or links clicked by readers.

Use social media advertising. 

Social media platforms like Facebook and Instagram offer opportunities to place paid ads that target specific demographics, interests, and even locations. This could be an excellent option for getting the word out if you want to sell products related to home improvement or advertise your contracting services. Plus, with Facebook‘s advanced targeting options, you can be sure that only people who are actually interested in what you’re offering will see your ads; these people are more likely to take action and convert into paying customers.

Design your own logo.

Creating your own logo is a great way to put a face on your company. It doesn’t have to cost a fortune either. In fact, instead of hiring a graphic designer, you can have a go at it yourself for free – this site could be helpful, and once you have your logo, you can start sharing it via social media and adding it to your email, newsletter, and business cards.

Turning Your Home Improvement Passion Into a Business 

When you start reeling in the dough from your upgrades and renovations, you’ll need to handle specific business tasks to keep things going smoothly. The first step is to create a brand identity for yourself. This includes choosing a name for your business (try to keep it simple and catchy), designing a logo, and developing branding guidelines (like choosing colors and fonts representing your business). With all these elements in place, you’re ready to start marketing yourself as a professional in the home improvement industry!

Consider forming an LLC (limited liability company) to protect yourself financially from liability in case something goes wrong with one of your projects. This type of business structure shields your personal assets if someone sues you over damages incurred while working on a project under your supervision. You can set up an LLC online in about five steps with a formation service.

These days, you can generate income by making your home a more comfortable place to live. Consider the ideas above for monetizing your home improvement projects, and handle any necessary tasks to convert your passion into a full-fledged business. Who knows, maybe your upgrades and renovations will turn into a full-time vocation that benefits your family for the long term!

When Should I Repair or Replace My Faucet?

When Should I Repair or Replace My Faucet

When it comes to faucets in our homes, we often take them for granted until they start malfunctioning. Whether it’s a leaky faucet or a problem with the water flow, these issues can be quite bothersome. In such cases, homeowners are often faced with the dilemma of whether to repair the faucet or replace it altogether. Here we aim to provide guidance on when it is appropriate to repair or replace a faucet based on various factors, ensuring that homeowners make an informed decision.

Signs of Faucet Problems

Before delving into the decision of repair or replacement, it is important to identify signs that indicate faucet problems. Recognizing these signs early on can save homeowners from more extensive damage and costly repairs.

Some common signs of faucet problems include:

  • Leakage from the spout or base
  • Inconsistent water pressure
  • Stiff or difficult-to-turn handles
  • Sudden decrease in water flow
  • Noisy faucet operation
  • Rust or corrosion

Factors to Consider

When determining whether to repair or replace your faucet, there are several factors you should take into consideration.

Age of the Faucet

The age of the faucet plays a crucial role in deciding whether to repair or replace it. Most faucets have a lifespan of around 15-20 years, depending on the quality and maintenance. If your faucet is nearing the end of its lifespan and experiencing frequent problems, it may be more cost-effective to replace it rather than continually repairing it.

Cost of Repairs

Assessing the cost of repairs is another vital factor to consider. If the cost of repairing the faucet is significantly lower than the cost of a new faucet, it might be worth opting for a repair. However, if the repair cost is close to or exceeds the cost of a new faucet, a replacement would be a wiser investment in the long run.

a dripping faucet that could use fixing.

The age of the faucet plays a crucial role in deciding whether to repair or replace it.

Availability of Replacement Parts

Availability of replacement parts for your specific faucet model is an important consideration. Some older or unique faucet models may have discontinued parts, making repairs difficult or expensive. Before deciding on repair or replacement, contact a professional plumber or visit a specialized store to ensure the necessary replacement parts are accessible for your faucet.

Energy Efficiency

With the growing focus on energy conservation, upgrading to a more energy-efficient faucet can be a significant consideration. Older faucets may lack the latest water-saving features, resulting in higher utility bills and unnecessary water wastage. In such cases, replacing the faucet with a newer, eco-friendly model can have long-term financial and environmental benefits.

Aesthetic Appeal

The overall aesthetic appeal of your faucet and its compatibility with the surrounding decor should also be taken into account. If your faucet no longer complements the style of your bathroom or kitchen, replacing it presents an opportunity to upgrade to a more visually appealing option that enhances the overall ambiance of the space.

When to Repair

Deciding to repair your faucet instead of replacing it is often a suitable option in certain scenarios.

Minor Leaks

If your faucet is experiencing minor leaks from the spout or base, these issues can typically be resolved with a repair. Often, a faulty washer or O-ring is responsible for the leakage, and replacing these small components can make the faucet as good as new.

Simple Mechanical Issues

Problems like stiff handles or loose connections can often be fixed with simple repairs. Tightening loose parts or applying lubrication to stiff handles can restore the smooth functioning of your faucet without the need for a full replacement.

Low Repair Costs

If the repair costs are minimal and significantly lower than the cost of a new faucet, opting for a repair can be a cost-effective choice. In these situations, professional plumbers can assess the problem and provide an estimated cost for the repair.

When to Replace

Although repair is a viable option in some cases, there are instances where replacing the faucet is the more prudent choice.

Extensive Damage or Corrosion

If your faucet is extensively damaged or shows signs of corrosion, repairing it may only offer a temporary solution. In such cases, replacing the faucet entirely ensures a reliable and long-term fix, preventing further damage and potential water leakage.

Frequent Repairs

If your faucet requires frequent repairs and continues to experience problems, it may be indicative of larger underlying issues. Constantly investing in repairs can be a financial burden, especially when the cumulative cost exceeds the price of a new faucet. Replacing your faucet in these circumstances saves you from the hassle and expense of regular repairs.

a touchless faucet is nice when replacing.

Modern faucets often come with touchless operation, adjustable water flow options, and water-saving aerators, resulting in improved functionality and reduced water consumption.

Upgrade to Modern Features

If your current faucet lacks the latest technological advancements and water-saving features, replacing it with a newer model can provide added convenience and efficiency. Modern faucets often come with touchless operation, adjustable water flow options, and water-saving aerators, resulting in improved functionality and reduced water consumption.

Renovation or Remodeling

If you are planning a renovation or remodeling project that involves updating your bathroom or kitchen, replacing the faucet is a logical step. Choosing a faucet that complements the upgraded design and aligns with your overall vision allows for a cohesive and aesthetically pleasing outcome.

Conclusion

Deciding whether to repair or replace your faucet requires careful consideration of various factors, including the age of the faucet, repair costs, availability of replacement parts, energy efficiency, and aesthetic appeal. Evaluating these aspects enables homeowners to make an informed decision that best suits their needs and budget. While repairs can suffice for minor issues and low-cost fixes, replacement is often the wiser choice for extensively damaged faucets, frequent repairs, technological upgrades, and renovation projects. Seeking professional advice from a plumber can further assist in determining the most suitable course of action for your specific faucet dilemma.

Why Is My Main Water Shut Off Valve Leaking?

Why Is My Main Water Shut Off Valve Leaking

Having a leaking main water shut off valve can be a frustrating and potentially costly issue. It is essential to address this problem promptly to avoid further damage to your plumbing system and potential water wastage. Below we will explore the possible causes of a leaking main water shut off valve and provide some solutions to help you resolve this issue.

Understanding the Main Water Shut Off Valve

Before diving into the reasons behind a leaking main water shut off valve, let’s first understand its role in your home’s plumbing system. The main water shut off valve is a vital component that allows you to control the water supply to your entire house. It is usually located near the water meter or where the main water line enters your property.

This valve is responsible for stopping the flow of water into your home in the event of a plumbing emergency such as a burst pipe or a major water leak. It is crucial to have a functioning shut off valve, as it allows you to control the water supply and minimize damage to your property.

Possible Causes of a Leaking Main Water Shut Off Valve

1. Worn-out or Damaged Valve: Over time, the main water shut off valve may develop wear and tear due to constant use or aging. This can result in leaks around the valve stem or gland nut. If the valve is damaged or has reached the end of its lifespan, it may need to be replaced entirely.

2. Loose Packing Nut: The packing nut is designed to prevent water leakage from the valve stem. If it becomes loose or worn out, it can lead to leaks. Tightening the packing nut can often solve this issue.

3. Corroded Valve Body: If your main water shut off valve is made of cast iron or brass, it can corrode over time, especially if it has been exposed to moisture or chemicals. Corrosion can lead to leaks and make it difficult to close the valve properly. In such cases, replacing the valve is necessary.

4. High Water Pressure: Excessively high water pressure can put additional stress on the shut off valve, causing it to develop leaks. A pressure regulator can help alleviate this issue by reducing the water pressure to a safe and manageable level.

Signs of a Leaking Main Water Shut Off Valve

Identifying the signs of a leaking main water shut off valve can help you take immediate action. Here are some common indicators:

– Water dripping or pooling around the shut off valve

– Difficulty in turning the valve on or off

– Water meter indicating continuous water flow even when all faucets are closed

– Decreased water pressure throughout the house

If you notice any of these signs, it is crucial to investigate the issue further and address it promptly to prevent further damage or water wastage.

 a completed main water shut off valve repair.

If all previous attempts fail or if the valve is severely damaged or corroded, it may be necessary to replace the entire shut off valve.

Steps to Fix a Leaking Main Water Shut Off Valve

1. Identify the Source of the Leak: Before taking any further action, it is essential to pinpoint the exact location of the leak. This will help determine the most appropriate solution.

2. Tighten the Packing Nut: If the leak is coming from the valve stem, try tightening the packing nut using a wrench. Be cautious not to overtighten, as it may cause additional damage.

3. Replace the Packing: If tightening the packing nut does not resolve the leak, you may need to replace the packing. Remove the packing nut, replace the packing material, and reassemble the valve. Ensure everything is tightly secured.

4. Apply Plumbing Tape or Compound: If the leak persists, you can try applying plumbing tape or compound to the valve stem threads. This can create a watertight seal and prevent further leakage.

5. Consider Valve Replacement: If all previous attempts fail or if the valve is severely damaged or corroded, it may be necessary to replace the entire water shut off valve. This task is best left to a professional plumber to ensure a proper installation.

Remember, if you are unsure about any step or lack the necessary plumbing knowledge, it is always best to call a licensed plumber for assistance.

Preventing Future Leaks

Once you have resolved the issue with your main water shut off valve, there are some preventive measures you can take to minimize the chances of future leaks:

– Regularly inspect the shut off valve for signs of wear or damage

– Perform routine maintenance on your plumbing system

– Keep the valve area clean and free from debris

– Monitor and maintain appropriate water pressure

Implementing these preventive measures can help extend the lifespan of your main water shut off valve and prevent future leaks.

Conclusion

A leaking main water shut off valve can be a cause for concern, but with the right knowledge and steps, it can be addressed effectively. In this article, we explored the possible causes of a leaking valve and provided steps to fix the issue. Remember, if you encounter any difficulties or lack the necessary expertise, it is always recommended to seek assistance from a local plumber. Taking prompt action and implementing preventive measures can help you maintain a functional and leak-free main water shut off valve in your home.

8 Sump Pump Problems and How To Fix Them

Sump Pump Problems and How To Fix Them

Sump pumps are essential devices in many homes, particularly in areas prone to heavy rainfall or flooding. They help prevent water damage and keep your basement dry and safe. However, like any mechanical device, sump pumps can encounter problems. Understanding these common issues and their solutions can help you troubleshoot and fix them promptly, ensuring your sump pump continues to work efficiently. Here we will discuss eight common sump pump problems and provide step-by-step instructions on how to fix them.

1. Pump Not Activating

One of the most frustrating problems you may encounter with your sump pump is when it fails to activate. There are several potential causes for this issue:

  • Check the power source: Ensure that the sump pump is connected to a working electrical outlet and that the circuit breaker has not tripped.
  • Float switch malfunction: Inspect the float switch for any debris or obstructions. Clean or replace it if necessary.
  • Faulty check valve: A malfunctioning check valve can prevent the sump pump from activating. Inspect the valve for any clogs or damage and replace it if needed.

By addressing these potential causes, you can typically resolve the issue of the pump not activating.

2. Continuous Running

If your sump pump keeps running constantly, it may be a sign of an underlying problem. Here are some troubleshooting steps to follow:

  • Check the float switch: Ensure that the float switch is not stuck in the “on” position. Clean any debris or obstructions that may be preventing it from functioning properly.
  • Examine the check valve: Verify that the check valve is installed correctly and is not damaged. Faulty check valves can cause water to flow back into the pit, triggering the pump to run non-stop.
  • Inspect the discharge pipe: Ensure that the discharge pipe is not clogged or frozen. Clear any obstructions or consider insulating the pipe in colder climates.

Addressing these issues can help resolve the problem of your sump pump running continuously.

3. Insufficient Pumping

If you notice that your sump pump is no longer pumping out water as effectively as before, it may be due to the following reasons:

  • Check for clogged intake screens: Clean any debris or dirt from the intake screens to ensure water can flow freely into the pump.
  • Inspect the impeller: The impeller may become jammed or worn out over time. Remove any obstructions or consider replacing the impeller if necessary.
  • Check the discharge pipe diameter: Ensure that the diameter of the discharge pipe matches the pump’s specifications. Using an undersized pipe can restrict water flow and reduce pumping efficiency.

By addressing these potential causes, you can improve the pumping efficiency of your sump pump.

a sump pump in need of repair.

Ensure that the float switch is positioned correctly, allowing for adequate water levels to trigger the pump.

4. Noisy Operation

A sump pump that operates loudly can be disruptive and indicate an underlying problem. Here are some steps to help reduce excessive noise:

  • Tighten loose parts: Check all connections and fasteners to ensure they are tightened properly. Loose components can cause vibrations and noise during operation.
  • Inspect the impeller: A damaged or loose impeller can create excessive noise. Inspect the impeller for any signs of damage or wear and replace if necessary.
  • Consider noise insulation: Installing noise insulation around the sump pump or placing it on a vibration-dampening pad can help reduce noise levels.

Following these steps can help mitigate the noise produced by your sump pump and identify any potential issues.

5. Short Cycling

Short cycling refers to the constant starting and stopping of the sump pump within a short period. Here are some possible causes of short cycling:

  • Improper float switch placement: Ensure that the float switch is positioned correctly, allowing for adequate water levels to trigger the pump. Adjust or reposition the switch if necessary.
  • Inspect the check valve: A malfunctioning or improperly installed check valve can cause water to flow back into the sump pit, leading to short cycling. Verify that the valve is working correctly and replace if needed.
  • Check for a high water table: If the water table in your area is high, it may cause frequent pump activation. Consider installing a larger capacity pump to handle the volume of water more efficiently.

Addressing these potential causes can help resolve the issue of short cycling and needing your sump pump replaced.

6. Overwhelmed by High Volume of Water

In situations where heavy rainfall or flooding occurs, your sump pump may struggle to handle the increased water volume. Here’s what you can do:

  • Consider a battery backup sump pump: Installing a battery backup sump pump system can provide additional pumping capacity during periods of high water volume, ensuring your basement stays dry.
  • Inspect the primary pump’s capacity: If your current sump pump is continuously overwhelmed, consider upgrading to a larger capacity pump to handle heavier water influxes more effectively.
  • Ensure proper discharge outlet: Check that the sump pump’s discharge outlet is directing water away from your home’s foundation to prevent any potential flooding.

By implementing these measures, you can better prepare your sump pump to handle high volumes of water and safeguard your basement.

7. Unpleasant Odors

If you notice foul odors emanating from your sump pump, it can be an indication of bacteria or mold growth. Follow these steps to address the issue:

  • Clean the sump pit: Remove any water and debris from the sump pit and clean it thoroughly. Scrub the walls with a mixture of bleach and water to kill bacteria and mold.
  • Inspect and clean the discharge pipe: Check for any clogs or buildup in the discharge pipe that may be causing the odor. Clean the pipe using a suitable cleaning solution or a plumbing snake.
  • Install a deodorizing tablet: Placing a deodorizing tablet or sump pump treatment product in the sump pit can help eliminate odors and prevent bacterial growth.

Following these steps will help alleviate any unpleasant odors associated with your sump pump.

a man handling sump pump maintenance.

If your current sump pump is continuously overwhelmed, consider upgrading to a larger capacity pump to handle heavier water influxes more effectively.

8. Power Outage

During a power outage, your sump pump is rendered ineffective, leaving your basement vulnerable to flooding. To mitigate the risk, consider the following options:

  • Invest in a generator: Having a generator as a backup power source can ensure continuous electricity supply to your sump pump and other essential home appliances during extended outages.

By having a backup power solution in place, you can safeguard your basement even in the event of a power outage.

In Conclusion

Sump pump problems can be a significant inconvenience, but with the right knowledge and troubleshooting steps, many issues can be resolved without professional assistance. By following the guidelines provided in this article, you can identify and fix common sump pump problems, ensuring the longevity and effectiveness of your sump pump system. Remember, regular maintenance and inspection play a crucial role in preventing problems before they occur. If you encounter complex issues or are unsure about any repairs, always contact a qualified plumber for assistance.

The Definitive Handbook for Installing Flood Control Systems in Home Settings

The Definitive Handbook for Installing Flood Control Systems in Home Settings

When fortifying your residence against potential water damage, installing flood control systems in home settings emerges as a paramount safeguarding solution. In the face of an increasingly unpredictable climate, the significance of this cannot be overstated. So, let’s get into the essential aspects of the process, offering valuable insights to help you protect your property!

Understanding flood risks

Understanding flood risks is crucial for installing flood control systems in home settings. Flooding can occur due to various factors, such as heavy rainfall, overflowing rivers, or blocked drainage systems. By comprehending the specific risks in your area, you can proactively prepare for potential disasters. Conduct research on local zones, historical data, and your property’s elevation relative to nearby water sources. This knowledge lets you make informed decisions about flood control systems, like sump pumps or elevation measures. And it’s always better to be ready than forced to do some plumbing maintenance and repair! So, stay vigilant, stay informed, and take preventive steps to protect your home from the unpredictability of floods.

Types of flood control systems

There are several types of flood control systems designed to shield properties. One common option is using passive flood control systems, which include landscaping to redirect water away from your property. On the other hand, active control systems involve mechanisms like sump pumps and barriers that require active intervention during a flood event. Sump pumps efficiently remove excess water from your basement or crawl space, while barriers, such as sandbags or specially designed door barriers, protect against rising water levels. Elevated homes are another control method, minimizing damage by raising the living space above potential water levels. The choice of flood control system depends on factors like your home’s location, budget, and the severity of the risks you face. Understanding these options empowers you to make an informed decision to safeguard your property effectively.

Assessing your home’s needs

Before installing flood control systems in home settings, you need to know your best options. So, the first thing you need to do after moving to Chicago from NYC and hiring interstate movers is to assess your home’s current flood preparedness. Start by evaluating your property’s vulnerabilities. Check for any cracks or weak points in your foundation, as these can be entry points for water. Next, consider local regulations and codes related to control systems, as compliance is essential. Budgeting for installation is crucial, too, as having a clear financial plan ensures that you can adequately protect your property without breaking the bank. 

Foundation Waterproofing

Foundation waterproofing prevents water from seeping through your property’s foundation walls and basement floors. Waterproofing methods typically include applying a waterproof coating or membrane to the exterior of the foundation walls. Alternatively, you can install a drainage system to divert water away from the foundation. Or use sealants to fill any cracks or gaps. Properly waterproofing your foundation helps keep your basement dry and reduces the risk of mold and mildew growth. Thus ultimately extends the lifespan of your home. It’s an investment that pays off by preventing costly water-related repairs in the future! Whether in a flood-prone area or want to ensure your basement stays dry, foundation waterproofing is a smart choice.

Sump pump installation

When installing a sump pump, choose the right one for your home’s needs. Assess the pump’s capacity and the size of the area it will protect. Proper installation is key, too, ensuring the pump is correctly positioned and connected to a discharge pipe that directs water safely away from your home. Additionally, remember that sump pumps are not ‘set and forget’ devices, so make sure to regularly perform sump pump maintenance. This includes inspecting the pump, testing it, and cleaning the pit to prevent debris buildup. Routine maintenance keeps your sump pump in optimal working condition, providing reliable protection against environmental hazards and helps avoid premature sump pump replacement.

Elevating your home

Elevating your home is a strategic approach to minimize flood damage and enhance its resilience. This process involves lifting your house above potential water levels, providing adequate protection. Elevating your home offers reduced insurance costs, increased property value, and, most importantly, protection against rising water levels. The process typically requires professional expertise, including raising the structure, reinforcing the foundation, and ensuring the stability of utilities. Costs and considerations for elevation vary depending on factors like the home’s size, location, and elevation requirements. While it’s a significant investment, elevating your home can save you substantial costs later down the road. So, this is a long-term solution that offers protection for your property and its occupants, making it a wise choice.

Retrofitting your home for flood control

Retrofitting your home involves modifying and improving your existing home to enhance its resilience. Steps to retrofitting an existing home include elevating utilities, installing backflow preventers, reinforcing walls and foundations, and improving drainage systems. Retrofitting strategies can be cost-effective, tailored to your specific needs, and in compliance with local regulations. While some homeowners may try DIY, hiring qualified contractors ensures the work is done correctly and effectively. Finally, retrofitting reduces the risk of water damage and can lead to lower insurance premiums, making it a valuable investment for homeowners. 

Maintenance and testing

Regular maintenance, such as inspecting sump pumps for wear and tear, testing float switches, and cleaning out debris, is essential to prevent system failures. It’s advisable to perform these checks at least once a year, ideally before the rainy season hits. However, some tasks, like inspecting the foundation waterproofing, may require professional expertise, so it’s best to involve professional plumbers who can assist you. Additionally, testing the effectiveness of your defensive measures is crucial. Simulate a flood event to ensure your systems activate as intended! Then, address any issues promptly to avoid surprises during the real thing. 

Protect one of your most important investments

In the end, the importance of installing flood control systems in home settings cannot be underestimated. These proactive measures both shield your property from potential water damage and provide peace of mind in the face of unpredictable weather patterns. So, by understanding risks, assessing your property’s unique needs, and implementing the right control solutions, you take vital steps to safeguard your most significant investment!

The Dangers of Lead Water Lines in Chicago: Replacement and Cost Considerations

The Dangers of Lead Water Lines in Chicago

Lead water lines in cities across the United States, including Chicago, pose a significant health risk to residents. With aging infrastructure and outdated plumbing systems, the presence of lead in drinking water has become a pressing concern. Here we will explore the dangers of lead water lines in Chicago, the importance of their replacement, and the cost considerations involved.

Understanding the Hazards of Lead Contamination

Lead is a highly toxic metal that can have severe consequences on human health, particularly in young children and pregnant women. When lead pipes corrode, they can release lead particles into     the drinking water supply. Ingesting lead-contaminated water over time can cause lead poisoning, which can lead to developmental delays, learning disabilities, and a range of other health problems.

The Prevalence of Lead Water Lines in Chicago

Chicago, like many older cities in the United States, has a significant number of lead water lines serving residential properties. These lead service lines were commonly installed before the dangers of lead were fully understood or regulated. It is estimated that around 400,000 properties in Chicago still have lead service lines, potentially putting thousands of residents at risk.

The Importance of  Water Line Replacement

Given the serious health risks associated with lead-contaminated water, the replacement of lead water lines in Chicago is of utmost importance. The City of Chicago has taken steps to address this issue and has implemented a program to replace lead service lines. However, it is essential for property owners to understand their responsibilities and take immediate action to ensure the safety of their drinking water.

main water line replacement in chicago.

By eliminating the potential for lead contamination in the water supply, we can reduce the risk of lead poisoning and its associated health consequences.

The Process of  Water Line Replacement

Lead water line replacement involves the removal of existing lead service lines and replacing them with safer materials, such as copper or high-density polyethylene (HDPE) pipes. The process typically requires coordination between the property owner, a licensed Chicago plumber, and the city’s water department. It is important to follow the specific guidelines and regulations set forth by the city to ensure a successful and compliant replacement.

The Cost Considerations of Water Line Replacement

The cost of lead water line replacement can vary depending on various factors, including the length of the service line, the type of material used for replacement, and any additional repairs or modifications required. While the responsibility of lead water line replacement falls on the property owner, the City of Chicago offers financial assistance programs to help alleviate some of the financial burden. It is advisable to explore these programs and consult with professionals to determine the cost implications and available options.

Health and Environmental Benefits of Lead Water Line Replacement

Replacing these water lines not only safeguards the health of residents but also benefits the environment. By eliminating the potential for lead contamination in the water supply, we can reduce the risk of lead poisoning and its associated health consequences. Moreover, the use of modern, non-toxic materials in water line replacements contributes to the overall improvement of water quality and sustainability.

In Conclusion

Lead water lines in Chicago pose significant health risks and must be promptly replaced. The dangers of lead contamination are well-known, and the City of Chicago is taking steps to address this issue. However, it is crucial for property owners to understand the importance of lead water line replacement and take action to protect the health of themselves and their families. While there may be cost considerations involved, financial assistance programs are available to help mitigate the financial burden. By prioritizing lead service line replacement, we can ensure safer, healthier drinking water for all residents of Chicago.

Interested in replacing your lead service line in Chicago? Contact us at 773-599-9181 or by form below:
0 of 275 max characters.

How To Locate A Burst Water Pipe

How To Locate A Burst Water Pipe

The Importance of Locating a Burst Water Pipe

Water is an essential resource in our daily lives. From drinking and cooking to cleaning and bathing, we rely on a constant supply of clean water. However, when a water pipe bursts, it can lead to significant disruptions and damage. Locating a damaged water pipe is crucial to minimize the extent of the damage and to ensure prompt repairs. Here we will explore the importance of locating a ruptured water pipe and provide a step-by-step guide on how to do it.

Why Locating a Burst Water Pipe is Critical

When a water pipe bursts, it can result in a variety of problems, including water damage, structural damage, and even health risks. Here are some reasons why locating a broken water pipe is crucial:

  • Water Damage: A burst water pipe can release a substantial amount of water into your property, leading to flooding and damage to your belongings.
  • Structural Damage: If left unrepaired, the continuous flow of water from a burst pipe can weaken the structure of your property, leading to costly repairs.
  • Mold and Mildew Growth: Excess moisture resulting from a damaged water pipe can create the perfect environment for mold and mildew to grow, posing health risks to you and your family.
  • Water Wastage: A burst pipe can cause significant water wastage, leading to higher water bills and contributing to water scarcity.

Signs of a Burst Water Pipe

Before you can locate a burst water pipe, it is essential to be able to recognize signs that indicate its presence. Here are some common signs of a burst water pipe:

  • Water Leaks: Obvious signs of water leaks, either visible or audible, can indicate a ruptured water pipe.
  • Low Water Pressure: If the water pressure in your faucets or shower suddenly decreases, it may be a sign of a burst pipe.
  • Discolored Water: Brown or rusty water coming out of your taps can indicate a damaged water pipe.
  • Unusually High Water Bills: An unexpected increase in your water bills without any change in water consumption can suggest a hidden burst pipe.
  • Damp or Wet Spots: The presence of damp or wet spots on walls, floors, or ceilings may indicate a hidden water pipe.
  • Foul Odors: Mold or stagnant water resulting from a burst pipe can cause unpleasant odors in your property.
a burst water pipe in need of repair.

If all else fails or if you are uncomfortable locating the broken water pipe yourself, it is advisable to consult a professional plumber.

Step-by-Step Guide: How to Locate a Burst Water Pipe

Locating a burst water pipe requires a systematic approach to identify the exact location of the problem. Follow these steps to effectively locate a broken water pipe:

Step 1: Turn Off the Water Supply

The first and most crucial step is to turn off the water supply to your property. This will prevent further damage and flooding. Locate the main shut-off valve, typically found near the water meter, and turn it clockwise to shut off the water.

Step 2: Check the Water Meter

After shutting off the water supply, check the water meter. If it continues to indicate water flow, it suggests that there is a leak somewhere in your plumbing system. If the meter stops moving, it indicates that the leak is likely isolated to a specific area.

Step 3: Inspect Visible Pipes

Conduct a visual inspection of all visible pipes, both indoors and outdoors. Look for any signs of water leaks, such as dripping or pooling water, dampness, or discoloration. Pay close attention to areas such as basements, crawl spaces, and utility rooms where pipes are often located.

Step 4: Listen for Water Sounds

After checking visible pipes, listen for any sounds of running or dripping water. The sound may indicate the general vicinity of the burst pipe.

Step 5: Use a Water Leak Detection Service

If you are unable to visually locate the broken water pipe or determine its location by sound, consider using a professional water leak detection service. These services use advanced technology to identify underground leaks or leaks behind walls without causing any damage.

Step 6: Contact a Professional Plumber

If all else fails or if you are uncomfortable locating the burst water pipe yourself, it is advisable to contact a professional plumber. With their expertise and specialized tools, they can accurately locate and repair the burst pipe, ensuring a swift resolution to the issue.

In Summary

Locating a broken water pipe is essential to mitigate damage, prevent further issues, and ensure the timely repair of the problem. By following the step-by-step guide provided in this article, you can identify the burst pipe’s location and take appropriate action. Remember, if you encounter any difficulties or do not feel confident in your abilities, it is always best to seek the assistance of a professional plumber. Promptly addressing a broken water pipe will save you time, money, and potential health risks in the long run.

The Role of Main Water Line Replacement in Ensuring Safe and Reliable Water Supply Systems: Insights from Professionals

Role of Main Water Line Replacement

The water supply system in your home is easily the biggest difference between your home and the homes that existed 150 years ago. Access to modern plumbing systems is why we no longer fetch water from streams and transport it over long distances to our homes.

But do you ever ask yourself how this system works?

After the home’s electrical wiring, the plumbing is the most extensive system in your home, says Specialized Property Management Oklahoma City. The network consists of hundreds of feet of pipes with joints, fittings, and other features. This system is divided into two parts: the main water line and the web of pipes connected to it.

Today, we will look at the main water line: the plumbing feature with the most influence on the quality and efficiency of your home’s water supply.

What is the main water line?

The main water line is the large pipe that carries water from the municipal supply into your home. The pipe is usually underground and connected to your water meter and main water shut-off valve. The pipes for the individual plumbing fixtures in your home are all linked to the main water line. 

Whatever affects your main water line affects the entire water supply for your home. Common issues that can affect your main water line include:

  • Corrosion: Given that it is underground, the water line is particularly susceptible to corrosion due to constant exposure to soil and groundwater.
  • Tree root intrusion: Tree roots may dislodge the main water line by growing around it. Tree roots can also penetrate the pipe, leading to blockages and water contamination.
  • Shifting soils: If the soil around the home is not unstable, changes in the underground conditions can damage the main water line by altering its slope or cracking it.
  • Hydraulic damage: Sudden or sustained changes in the pressure may damage the water line. A common cause of this problem is the installation of systems – pressure gauges, well pumps, cutoff switches, etc. – that are not suited to the plumbing.
  • Freezing and thawing: This is a less common problem that happens mostly to pipes that are buried less than four feet in the ground.
main water line maintenance.

If the water line leak is above ground, the resulting flood can ruin your lawn and overflow into the street in front of your home or your neighbor’s properties.

The impact of main water line issues on your home

What are the possible impacts of any of the above problems?

  • The first obvious issue is contamination of the water supply. All unwanted materials, including lawn chemicals and sewage, can enter a broken main water line.
  • A broken water line will affect the reliability of the home’s water supply. The issues can range from low water pressure to complete termination of the water supply.
  • If a water line burst happens below ground, the problem is less obvious but not less damaging. The leak can damage the home’s foundation and impair its structural integrity.
  • If the water line leak is above ground, the resulting flood can ruin your lawn and overflow into the street in front of your home or your neighbor’s properties.
flowing water from a tap.

If your home’s main water line is starting to show signs of failure, any solution that does not include the replacement of the existing line is simply a stop-gap.

Safeguarding your water supply via a main water line replacement

Water line replacement is often an unplanned but necessary step when your home’s main water line starts to show troubling signs. This crucial step is the only way to put an end to all water supply issues in your home if they are caused by the main water line.

If your home’s main water line is starting to show signs of failure, any solution that does not include the replacement of the existing line is simply a stop-gap. While these temporary solutions may offer immediate relief, they also worsen problems in the main water line.

What happens is that when the main water line eventually fails, the ensuing damage costs a lot more money than the homeowner saved by avoiding a replacement of their main water line. How can you tell when you need a main water line replacement.

  • Leaks: These leaks manifest in different ways. You may need to have a professional plumber inspect the main water line to detect where it is leaking.
  • Low water pressure: This is a more subtle sign of problems in your main water line, and it can result from leaks in the water line or blockages.
  • Strange noises: Strange noises from the water pipes and plumbing fixtures in your home may be coming from the main water line.

What should you do if you suspect that the main water line in your home is damaged?

You need to have an expert inspect and test the water line and the entire plumbing to identify any problems. The expert will also recommend the best water line replacement method for you (based on costs), the kind of pipes in the water line, and other considerations.

Finally, it is always a good idea to deal with these kinds of problems sooner rather than later to avoid future complications and bigger costs. That is why you may want to take action right now.