Blog

The Potential Consequences of Hiring an Unlicensed Plumber for Your Home

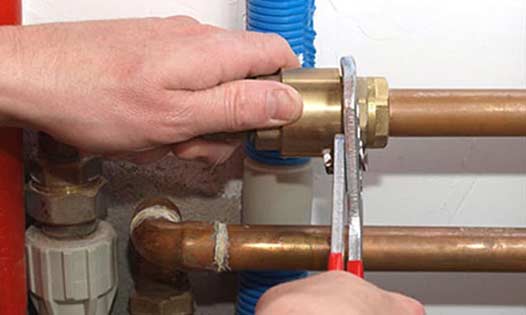
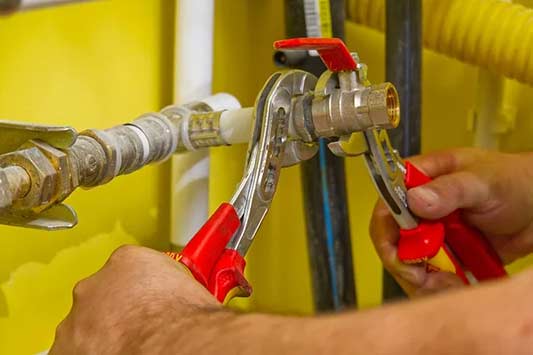
an unlicensed plumber attempting to make a repair.

When it comes to hiring a plumber for your home, many homeowners are focused on finding the most affordable option. While it’s understandable to want to save money, hiring an unlicensed plumber can lead to potential consequences that can be costly and even dangerous. Below we will explore the risks involved in hiring an unlicensed plumber and why it is crucial to prioritize hiring a licensed professional.

What is an Unlicensed Plumber?

An unlicensed plumber is an individual who lacks the necessary credentials and certifications required to legally practice plumbing services. Licensing ensures that plumbers have undergone the appropriate training, education, and have met the necessary safety standards to provide reliable and high-quality services.

The Risks of Hiring an Unlicensed Plumber

1. Lack of Expertise and Skill:

One of the most significant risks of hiring an unlicensed plumber is the lack of expertise and skill they may possess. Licensed plumbers have completed rigorous training programs, apprenticeships, and exams, ensuring they possess the necessary knowledge and skills to handle various plumbing issues. On the other hand, unlicensed plumbers may lack the required training, leaving them ill-equipped to handle complex problems adequately.

2. Inadequate Workmanship:

Hiring an unlicensed plumber can result in poor workmanship. Without the necessary credentials, unlicensed plumbers may cut corners or use subpar materials to complete a job quickly. This can lead to shoddy repairs that may not last long or may worsen over time, ultimately costing you more money in the long run.

3. Limited Liability:

Another consequence of hiring an unlicensed plumber is the limited liability they offer. Licensed plumbers are typically insured and bonded, meaning they have coverage in case of accidents, damages, or faulty workmanship. On the other hand, unlicensed plumbers may lack insurance coverage or the financial resources to rectify any damages caused during their work. This may leave homeowners responsible for any additional repairs or medical expenses if accidents occur.

4. Safety Concerns:

Plumbing systems can pose various safety hazards if not installed or repaired correctly. Hiring an unlicensed plumber increases the risk of improper installations, faulty repairs, and potential safety breaches. This can lead to issues such as leaks, water damage, mold growth, and even gas leaks, which can compromise the health and safety of your household. Homeowners should also be aware that plumbing codes and regulations vary by state, and unlicensed plumbers may not be up-to-date with the local standards.

5. Unreliable Warranties:

An unlicensed plumber is unlikely to provide warranties or guarantees for their work. Warranties offer homeowners peace of mind, assuring them that if something goes wrong after the installation or repair, the plumber will take responsibility and fix the issue without additional cost. Without a warranty, homeowners may have to bear the financial burden of any repairs if the job was not done correctly.

a plumber showing off his smooth water heater replacement in chicago.

Licensed plumbers take pride in their work and strive to deliver high-quality results.

The Benefits of Hiring a Licensed Plumber

1. Professional Training and Expertise:

Licensed plumbers undergo extensive training and education programs to obtain their licenses. They are well-versed in the latest industry standards, regulations, and best practices. Their knowledge and expertise allow them to diagnose plumbing issues accurately and provide effective solutions, ensuring the work is done efficiently and safely.

2. Compliance with Codes and Regulations:

Licensed plumbers are familiar with local building codes, regulations, and permit requirements. They follow these guidelines to ensure all plumbing installations and repairs are up to standard. Hiring a licensed plumber guarantees that the work performed in your home is compliant with these codes and regulations, providing peace of mind and avoiding potential legal issues in the future.

3. Liability Insurance:

Most licensed plumbers carry liability insurance, protecting homeowners from any damages or accidents that may occur during the plumbing project. This insurance coverage provides financial security and reassurance that any mishaps will be rectified without additional costs to the homeowner.

4. Quality Workmanship:

Licensed plumbers take pride in their work and strive to deliver high-quality results. They follow industry best practices, utilize proper tools and materials, and maintain a high standard of workmanship. This ensures that the repairs or installations will be durable, reliable, and long-lasting, ultimately saving homeowners money on future repairs.

5. Warranty and Follow-up Service:

Hiring a licensed plumber often comes with warranties or guarantees for the work performed. In case of any issues or defects arising from the installation or repair, licensed plumbers typically offer follow-up service to rectify the problem at no additional cost. This extra level of service provides peace of mind and ensures that homeowners are not left to deal with problems on their own.

choosing the right plumbing professional is important.

Licensed plumbers strive to provide reliable service, emphasizing customer satisfaction and long-term relationships.

The Importance of Hiring a Licensed Plumber

Aside from the potential consequences mentioned above, there are other compelling reasons to hire a licensed plumber. Homeowners should prioritize hiring licensed professionals to protect their investment, ensure their safety, and prevent any unnecessary headaches in the future.

1. Reliable Service:

Licensed plumbers strive to provide reliable service, emphasizing customer satisfaction and long-term relationships. They prioritize completing the job correctly the first time, minimizing the need for callbacks or additional repairs.

2. Access to Permits and Inspections:

Licensed plumbers can obtain the necessary permits and schedule inspections required for specific plumbing projects. They understand the legal requirements for various jobs and ensure that all necessary documentation is submitted correctly. This alleviates the burden on homeowners and guarantees that the work is compliant with local regulations.

3. Long-Term Cost Savings:

While hiring an unlicensed plumber may initially seem like a cost-saving measure, it can lead to higher expenses in the long run. Licensed plumbers deliver quality work that is built to last, preventing frequent repairs or replacement requirements. Additionally, their expertise allows them to identify underlying issues that may be missed by unlicensed individuals, saving homeowners from potential costly problems.

4. Proper Handling of Warranties:

If your plumbing system is under warranty, hiring a licensed plumber ensures that any repairs or replacements will not void the warranty. They understand the terms and conditions associated with warranties, protecting homeowners’ rights and preventing unnecessary expenditure if things go wrong.

You Get What You Pay For

When it comes to plumbing services, the phrase “you get what you pay for” truly applies. While unlicensed plumbers may lure homeowners with lower prices upfront, the potential consequences far outweigh the initial cost savings. By hiring a licensed plumber, homeowners can rest assured that they are receiving professional service, expert advice, and the peace of mind that comes with knowing the job is done right.

Conclusion

Hiring an unlicensed plumber may seem like a quick and inexpensive solution, but it can lead to a host of problems down the line. From inadequate workmanship to safety concerns and potential legal repercussions, the risks associated with hiring an unlicensed plumber are not worth taking. By prioritizing the hiring of a licensed plumber, homeowners can ensure reliable service, quality workmanship, and long-term cost savings. Protect your home, your investment, and your peace of mind by choosing a licensed plumbing professional for your needs.

Chicago’s Water Line Replacement Program: A Step Towards Environmental Stewardship

Chicago's Water Line Replacement Program

If you’re a Chicago resident, you might have heard about Chicago’s water line replacement program. It’s becoming a big topic in our community. In simple terms, the city is looking into updating and improving the pipes that bring water to our homes. Over time, our city’s infrastructure, including the water lines, has aged and needs an update. This isn’t just a minor change, though. It has significant benefits for homeowners and the environment. You might wonder why the city decided to take on this project and what it means for you. From reduced water bills to easier plumbing system rehabilitation, let’s get into the details and explore the importance of this program for all of us.

The Popularity of Eco-Conscious Living

In recent years, homeowners have exhibited a growing emphasis on environmentally conscious living. Research conducted by the moving company Helix Transfer & Storage even suggests that more and more people are deciding to move to a new home because they want to live in an area that guarantees better sustainability standards. This shift can be seen in the choices they make, from energy-efficient appliances to sustainable home-building materials. Many are adopting rainwater harvesting systems, solar panels, and energy-saving light fixtures in a bid to reduce their carbon footprint. Additionally, the rise in organic gardening, composting, and recycling at home highlights an increasing responsibility towards sustainable waste management. This eco-conscious approach is not just about immediate cost savings or trendy home makeovers; it’s rooted in a deeper understanding of the long-term impacts of human habits on the environment. 

The modern homeowner is more informed, thanks to easily accessible information and greater awareness. They recognize that their home is not an isolated unit but an integral part of a larger ecosystem and are making efforts to ensure that their abode is harmonious with the environment.

Understanding the Need for the Program

Why has Chicago felt the need for this vast undertaking? The reason is twofold. On the one hand, much of Chicago’s infrastructure, including the water lines, is aging. Some of these systems have been in place for decades, and like all things, they wear out over time. The wear and tear aren’t just a minor inconvenience. Old water lines can pose significant challenges. Many homes in the city are serviced by lead pipes. These pipes, while once standard, are now known to carry potential health risks, especially as they deteriorate. On the environmental front, these older systems can be inefficient. They can leak and waste water, which isn’t good for our bills or the environment.

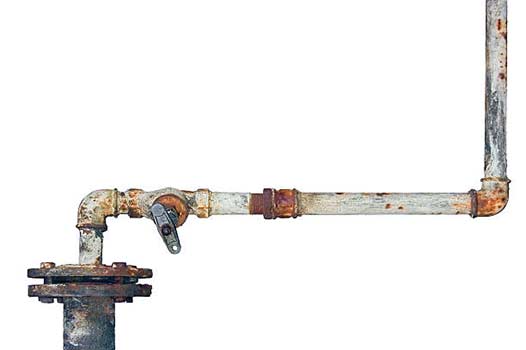
A large rusted pipe.

The main reason for this initiative is that the local plumbing systems are filled with outdated and rusted pipes.

What the Water Line Replacement Program Entails

So, what exactly is involved in Chicago’s water line replacement program? The city has laid out a well-planned, phased approach for this initiative. Not all areas will see updates simultaneously; instead, the work will be rolled out progressively across different neighborhoods. A team of experts and local contractors have been carefully selected to do the job, ensuring that the work is of high quality and up to current standards. The focus isn’t just on replacing old pipes but on installing newer main water lines. The new lines are expected to be more durable and less prone to problems like leaks. By doing this, the city aims to create a more reliable, safer, and environmentally friendly water system for everyone.

Benefits for the Everyday Homeowner

Now, let’s delve into what this means for you, the homeowner. The promise of enhanced water quality is at the heart of the replacement program. With the removal of old, potentially problematic pipes, residents can expect safer and clearer drinking water straight from the tap. This isn’t just a health benefit; it could also translate into financial advantages. Homes with updated infrastructure are often more appealing in the real estate market, possibly boosting property values.

Water in a beaker being tested in a lab.

Improvement projects like Chicago’s water line replacement program have been shown to provide safer and cleaner drinking water to consumers.

Additionally, modern, efficient water lines are designed to reduce water loss. This means those annoying and costly leaks should be a lot rarer, potentially reflecting in reduced water bills. Overall, homeowners can anticipate both tangible and intangible benefits – from better health and potential savings to the peace of mind that comes with a safer home environment.

How the Program Fosters Environmental Progress

When it comes to environmental benefits, Chicago’s water line replacement program offers more than what meets the eye. First and foremost, the updated water lines are designed to minimize waste. Old and deteriorating pipes can often leak, wasting significant amounts of water. With the new system in place, the water is conserved, and energy costs associated with treating and pumping wasted water can also be reduced. Besides, phasing out potentially harmful materials in older pipes decreases the risk of contaminants entering our natural water sources. By opting for sustainable materials in the new lines, the city is taking a firm step towards its broader vision of environmental responsibility by helping aid in the replacement of lead service lines.

What Homeowners Need to Know

With such a substantial program underway, it’s crucial for Chicago homeowners to be in the know. The water line replacements will be conducted in stages, meaning different parts of the city will experience the upgrades at varied times. It’s important to watch for city communications regarding the schedule for your particular area. While this project is undoubtedly beneficial in the long run, there might be short-term disruptions. Road closures, water shut-offs, or noise might be part and parcel of the process. But worry not; the city has plans to minimize inconvenience and ensure smooth transitions. Furthermore, it’s advised to keep abreast of the city’s guidelines. Lastly, once the new system is in place, getting a residential plumber in Chicago to inspect your setup is a smart move to ensure everything’s in tip top shape.

A person covering their ears in distress.

Prepare for at least some noise while construction occurs in your area.

In Conclusion

Chicago’s water line replacement program is not merely a technical upgrade or a city project; it represents a larger vision and a commitment to future generations. Through this initiative, Chicago reaffirms its dedication to enhancing the quality of life for its residents while also playing a part in global sustainability. It’s about more than just pipes and water. It’s about creating a legacy of responsibility, care, and stewardship. For homeowners, this is an opportunity to witness and be a part of a significant transformation. As we embrace this change, it’s also a moment to reflect on our individual roles. By staying informed, engaging in constructive discussions, and supporting the city’s efforts, we move closer to a brighter, cleaner, and more sustainable future for Chicago and its proud residents.

A Proactive Approach to Residential Plumbing Maintenance: Identifying and Preventing Common Issues

Proactive Approach to Residential Plumbing Maintenance

Problems in your home’s plumbing don’t just happen overnight. Most times, they take weeks or months to unfold. The reason a lot of the plumbing issues in homes happen as emergencies is because the early signs of the problem are undetected or they were overlooked.

Because most plumbing issues in the home are preceded by warning signs, it is possible to prevent them. If you are keen to minimize your plumbing maintenance costs and prolong the life of your plumbing, Rockbridge Real Estate says you need a system for early detection and quick resolution of problems.

In this post, we identify four of the most common plumbing issues in homes and explain what you can do to prevent them.

4 common plumbing issues in homes and how to prevent and solve them

Clogged drains

Clogged drains happen when solid or semi-solid materials inside the drainpipes prevent wastewater from flowing freely through the drainage system.

Causes of drain clogs:

  • Hair inside shower drains
  • Dumping grease into the kitchen sink
  • Flushing materials other than toilet paper and human waste into the toilet
  • Too much soap scum mixing with grease inside the drains
  • Small items that fall into the toilet or other drains

Signs of a clogged drain include:

  • Slow draining sink or shower
  • Water collecting in toilet bowl instead of flushing
  • Gurgling sounds when you flush the toilet
  • Movement in nearby drains when you use the washer
  • Odor of sewage gases in the home

How to prevent the problem:

  • Install strainers over drain openings
  • Never pour grease into the drain
  • Only flush toilet paper into your toilet
  • Call a professional plumber if you see any of the above signs
  • Have the drainage system inspected and cleaned once a year
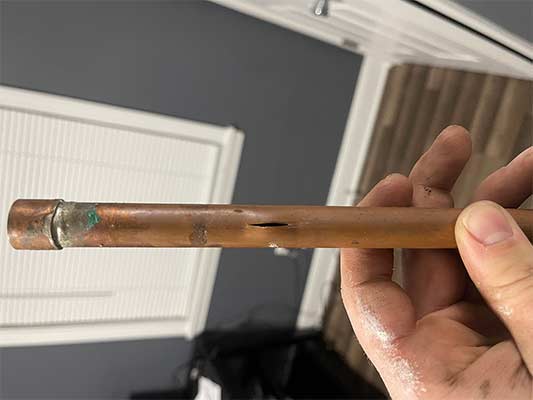
leaky pipes in a home.

The main problem with leaky pipes is the problem is notoriously hard to detect.

Leaky faucets and pipes

A leaky pipe won’t only waste water and increase your water bills but can cause massive damage to flooring, walls, cabinets and even the building foundation. The main problem with leaky pipes is the problem is notoriously hard to detect. That is because pipes are often found in inaccessible parts of the home. Leaky faucets, on their part, will also waste your water, but they are more of a nuisance due to the irritating sound of constant dripping.

Causes:

  • Excessive water pressure can cause pipes to leak
  • Extreme temperature changes will cause pipes to freeze and burst
  • Sediments inside pipes can also make them prone to leak
  • Weak pipe joints will cause leaks
  • In faucets, the main cause of leaks is a damaged washer

Signs of leaky pipes and faucets:

Preventing the problem:

  • Since leaks are mostly caused by wear and tear, a yearly pipe inspection is the best way to prevent the problem
  • Knowing how to prepare the plumbing for winter will help prevent frozen pipes

Water pressure issues

All water pressure issues in the home are bad. But it is low water pressure that usually gets the homeowner’s attention because it makes simple things like taking a shower, washing clothes or doing the dishes hard. High water pressure is worse than low water pressure because excessive water pressure will damage appliances and make the plumbing more likely to leak.

Causes:

  • The problem may be from the municipal water supply
  • Leaking pipes and faucets can divert water pressure
  • Overuse of water in the home; too many plumbing fixtures being used at once
  • Pipes diameter has been narrowed by sediments
  • Clogged faucet aerators and showerheads

How to prevent the problem:

  • Clean faucet aerator and showerhead with vinegar to remove sediments
  • Install a water filtration system to prevent sedimentation
  • Contact the utility company to report the problem
  • Check pipes on a schedule to detect leaks
a plumber replacing a water heater in chicago.

The majority of the issues highlighted are caused by sedimentation inside the water heater tank.

Water heater issues

Water heater issues are particularly dangerous because of the risk of electric shocks, fires and explosions. Common water heater issues include;

  • Discolored water
  • Noises from the water heater
  • No or inadequate hot water
  • Puddles beneath the water heater tank
  • Excessively hot water from the water heater

The majority of the issues highlighted are caused by sedimentation inside the water heater tank. Sediments will not only discolor the water. It can prevent effective heating. Sediments will also cause your water heater to leak.

How to prevent water heater problems:

  • Tank water heaters should be drained at least once a year
  • Replace essential components like the anode rod when needed
  • Once a year, have the water heater checked for leaks and other problems
  • Install a water filtration system to prevent sedimentation inside the water heater

To conclude, the two most vital steps for spotting or preventing plumbing issues in your home are;

  • Regular inspections, and
  • Knowing the signs of different plumbing problems

If you can spot the signs of an impending issue and call a professional plumber to fix them, your plumbing will be just fine.

The Magic of Hydro-Jetting: Say Goodbye to Clogged Drains in Chicago

the magic of hydro-jetting in chicago

Clogs are the most common and most persistent problems in drain systems. A drain is clogged when wastewater cannot flow freely through the pipes. This problem happens in residential and commercial drain systems, regardless of their age or the type of materials they are made of.

Drain clogs happen for two major reasons:

  • They are also the inescapable consequence of how drains are designed to work. That is because of the solid and semi-solid materials contained in wastewater. These materials accumulate inside drainpipes and cause them to clog.
  • Drain clogs also happen because of how a drainage system is used. If the plumbing is misused by those who live in a home or by the occupants of a commercial building, the drainage system will be more likely to experience clogs.

As with buildings everywhere, drain clogs are common in Chicago homes and businesses. Every year, millions of dollars are spent by homeowners and businesses to fix drainpipes that have been damaged by clogs. The sad thing is these problems and costs are entirely preventable.

Hydro-jetting, the definitive solution for clogged drains in Chicago

Drains that clog often wear out faster because of the constant stress of buildup on the pipes. Any solution that relieves this stress by quickly and efficiently removing the offending materials from the pipes will not only cut your maintenance costs but also prolong the life of your drainage.

Olympic Management says that solution is hydro-jetting

What is hydro-jetting? How does it work, and why is it the best solution for cleaning clogged drains?

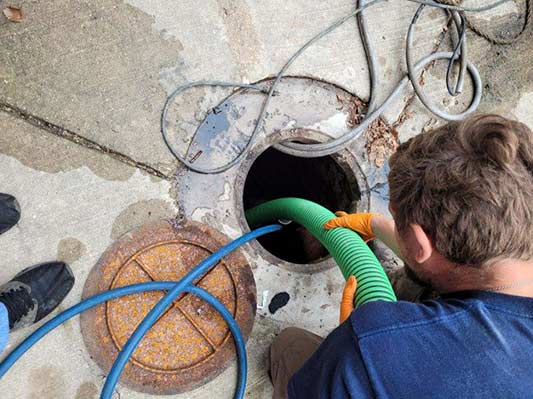
Hydro-jetting is a drain-cleaning technique that uses high-pressure water to clear clogs from drainpipes while also cleaning the pipes. The method is effective for dealing with stubborn clogs or buildup and will even remove tree roots that have found their way into the pipes.

To hydro-jet a drain system, a machine (a “jetter”) sprays water at extremely high pressures into the pipes. This pressure can range from 3,000 to 8,000 pounds per square inch (psi). The correct pressure depends on the severity of the clogs and how long they have been there.

Unlike other drain-cleaning methods, hydro-jetting can be used to prevent drain clogs. That’s because this method will wash your drainpipes. Where other drain-cleaning methods leave the dislodged materials inside the pipes, hydro-jetting will flush them out.

Drainpipes that are clean function better and also last longer. The cost of maintaining them is lower because no sediment inside the pipes can snag debris and cause clogs. Hydro-jetting does not just address the symptoms of drain clogs; it solves the problem.

the science behind hydro jetting.

The best thing about hydro-jetting is how it can clean the drains. Since it uses water, hydro-jetting will completely remove debris from the nooks and crannies of your drain system.

Advantages of hydro-jetting

It is non-invasive

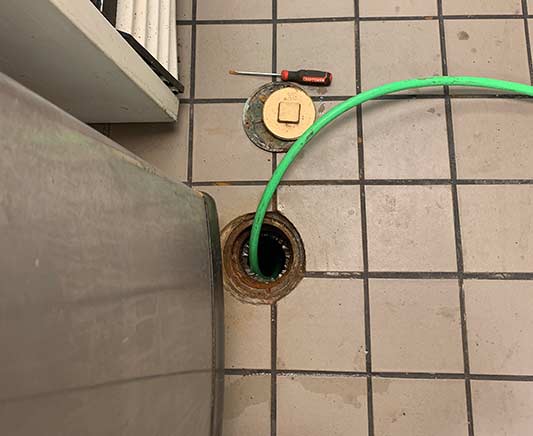
With this method, there is no need for expensive excavations in your yard. As long as the drains can be accessed through a cleanout, toilet or floor drain, they can be hydro-jetted.

It is fast

The entire drain system in a building can be hydro-jetted in a few hours. The amount of disruption to your family or business is minimal, and there is no mess to clean up after the operation.

Thorough cleaning

The best thing about hydro-jetting is how it can clean the drains. Since it uses water, hydro-jetting will completely remove debris from the nooks and crannies of your drain system.

It is versatile

Hydro-jetting works for all kinds of drain systems (residential, commercial, or industrial), regardless of the kind of debris inside them. It also works for a wide range of pipe materials.

Lasting results

The results you get from hydro-jetting are long-lasting. Chronic clogs and recurrent drainage problems are quickly and easily solved by hydro-jetting the drain system.

hydro-jetting is eco-friendly.

Hydro-jetting uses only water, environmentally friendly cleaning solutions and heat.

Eco-friendly

Hydro-jetting your drains will not harm the environment. No harmful chemicals are used in the process. Hydro-jetting uses only water, environmentally friendly cleaning solutions and heat.

It is preventative

Instead of waiting until your residential or commercial drain system is damaged by clogs, you can use hydro-jetting as a preventive and cost-effective measure to keep them working.

Should you hydro-jet your drains today?

If the drainage system in your Chicago home or business is showing the following signs or you have the following habits, you need hydro-jetting:

  • Slow drains: Slow drains or toilets that don’t flush well could be due to clogs deep inside the drains
  • Recurring clogs: If you have tried everything to fix the clogs in your drains, but they keep coming back
  • Issues with grease buildup: If you constantly flush FOGs (fats, grease and oil) into the kitchen sink
  • Non-flushable items in the toilet: If you flush anything but toilet paper and human waste into the toilet
  • Tree root intrusion: If there are trees near your sewer line and they have invaded the pipes in the past

Lastly, you need hydro-jetting if you simply want to keep your drains working efficiently, reduce maintenance costs and prolong the lifespan of your drains.

Chicago Burst Pipe? Minimize Water Damage With These Useful Tips

Chicago Burst Pipe Tips

Water pipes burst in Chicago for several reasons, many of which are avoidable. But when you have a burst water pipe discharging water into your home, you really don’t care about the cause of the problem. You want to know how you can save your home and belongings.

In these situations, Francis Taylor Properties say prompt and decisive action is required. In the first few minutes of the event, the speed and preciseness of your actions will make a world of difference to how much you eventually spend on fixing the water damage to your home.

This post explains the crucial steps to minimize the impact of a ruptured water pipe in your home.

Shut the water from the mains

Stop the burst pipe from releasing more water into your home. Shut the supply of water by closing the water main shut-off valve for your house. This is usually located outside the home, and every member of your household must know the location of the water main shut-off valve and how to use it.

Drain faucets

To stop more water from being released onto the floor of your home, drain all remaining water out of the faucets. But before you do this, ensure that the water heater has been turned off. Open the cold water faucets first, followed by the hot water faucets, and lastly, flush your toilets several times to get rid of all the water. 

Remove your belongings from the path of the water

To minimize damage, remove all items vulnerable to water, such as carpets, furniture, clothes and other absorbent materials. Take them outside the house or place them on platforms. If there are electrical appliances in the region of the flood, avoid the risk of electric shock by turning off the water supply to your home.

plumber taking stock of water damage caused by a burst pipe in chicago.

Now that you have taken steps to prevent further damage to your home, it is time to assess the situation.

Take stock of the damage

Now that you have taken steps to prevent further damage to your home, it is time to assess the situation. Slowly do a walkthrough of the affected areas with a camera. Record and take pictures of the scene, shooting from different angles for a clear perspective of the damage. The insurance claims adjuster will need this information.

Call a professional plumber

A good plumber will not only repair your burst pipe, they will explain why it happened and what you can do to prevent a recurrence. Using a plumber who is insured and who will guarantee their work is vital. The quality of the plumbing work will not only keep your home safe by preventing future problems but it can also influence your insurance claims.

Contact your insurance agent

You must inform the insurance company as soon as possible. This will not only fast-track the process of making your insurance claims, but your insurance agent can provide vital information that will make the process of water damage restoration quicker and easier. If the agent asks you any questions, do not answer them if you are unsure.

Mop up the water

The next step is to remove the water from your home. You want to start this as soon as possible. Quick action will reduce the amount of damage to your flooring, walls or ceilings and minimize the risk of mold and mildew. Mop up the water as quickly as you can and dry the area thoroughly.

Keep your doors open

To facilitate the drying process, you should improve airflow within your home. Do this by opening all the doors and windows. Improved ventilation will accelerate the rate of evaporation and further reduce the risk of mold and mildew. Do not forget to open the cupboard, cabinet, and vanity doors. Do this even if they were not touched by the water.

heat youe home to prevent burst pipes in wintertime in chicago.

Raise the indoor temperature of your home to help the water dry faster and reduce your water damage repair costs.

Heat your home

Raise the indoor temperature of your home to help the water dry faster and reduce your water damage repair costs. If the problem was caused by a frozen pipe, you will need to thaw it by applying heat directly to it or by warming the room where the pipe is. Do this with a hair dryer, an electric heating pad or a space heater (you can hire one).

Prevent it from happening again

Now it is time to find out the immediate and remote reasons why the pipe burst. Water pipes burst for several reasons, but the most common one is extremely low winter temperatures. Taking the proper steps to maintain your water pipes and protect them from cold will help you avoid this problem in the future.

Finally, consider the value of retaining the services of an emergency plumber nearby. This kind of relationship means you get preferential treatment from your plumber during times of emergency. Your home’s plumbing will also be maintained in a consistent manner that greatly limits the risk of damage.

Exploring Best Practices for Smooth Water Heater Replacement in Chicago: Tips from the Experts

a plumber showing off his smooth water heater replacement in chicago.

Replacing a water heater can be a daunting task for homeowners, but with the right knowledge and expert guidance, the process can be smooth and efficient. In a city like Chicago, where extreme winters demand a reliable and efficient water heating system, it is essential to understand the best practices for water heater replacement. With the help of industry experts, we have compiled a comprehensive guide to navigate through the process seamlessly and ensure a long-lasting and trouble-free water heating system in your Chicago home.

Understanding the Importance of Water Heater Replacement

A water heater is a crucial component of any household, providing hot water for various tasks such as bathing, washing dishes, and laundry. Over time, water heaters experience wear and tear, leading to decreased efficiency and potential malfunctions. Additionally, older water heaters may not meet the latest energy efficiency standards, causing increased energy consumption and higher utility bills.

Replacing a water heater at the right time not only guarantees a reliable supply of hot water but also provides several benefits:

  • Improved Energy Efficiency: Newer models of water heaters are designed to meet higher energy efficiency standards, ultimately reducing energy consumption and saving money on utility bills.
  • Enhanced Performance: A new water heater ensures optimal performance, meaning faster heating and a more consistent supply of hot water for your daily needs.
  • Lower Maintenance Costs: Older water heaters may require frequent repairs, resulting in higher maintenance costs. By replacing it with a newer model, you can reduce the need for repairs and associated expenses.
  • Extended Lifespan: Timely replacement of a water heater can prevent major breakdowns and significantly extend the overall lifespan of the system.

Determining When to Replace Your Water Heater

While knowing when to replace your water heater is important, it can be challenging for homeowners to identify the right time. However, there are some key indicators that can help you make an informed decision:

  • Age of the Water Heater: The typical lifespan of a water heater is around 8-12 years. If your water heater is nearing or surpassing this age range, it is advisable to start exploring replacement options.
  • Frequent Repairs: If you find yourself frequently calling a plumber to repair your water heater, it might be an indication that the system is nearing the end of its life expectancy.
  • Inefficient Performance: Decreased performance, such as longer heating times or insufficient hot water supply, could indicate that your water heater is no longer operating at its optimal capacity.
  • Rust or Corrosion: The presence of rust or corrosion on the tank or water pipes is a sign of underlying damage. This could lead to leaks or complete failure of the system if not addressed promptly.
  • Loud Noises: Strange noises coming from your water heater, such as rumbling or popping sounds, can indicate sediment buildup or a malfunctioning heating element.
  • Increased Energy Bills: If you notice a sudden spike in your energy bills without a significant change in your usage patterns, it could be a sign that your water heater is losing efficiency and consuming more energy than before.
a plumber replacing a water heater in chicago.

Once you have decided to replace your water heater, the next crucial step is selecting the right type and size of water heater for your Chicago home.

Choosing the Right Water Heater

Once you have decided to replace your water heater, the next crucial step is selecting the right type and size of water heater for your Chicago home. There are several options available in the market, each with its advantages and considerations. Here are the most common types of water heaters:

  • Conventional Storage Tank Water Heaters: These are the traditional water heaters that store and heat a large volume of water in a tank. They are relatively affordable but occupy significant space. They are available in various sizes to accommodate different household needs.
  • Tankless Water Heaters: Unlike storage tank water heaters, tankless models heat water directly as it flows through the unit. They are space-saving, energy-efficient, and provide a continuous supply of hot water. However, they can be more expensive upfront.
  • Heat Pump Water Heaters: Heat pump water heaters extract heat from the surrounding air or ground and use it to heat the water. They are highly energy-efficient but require a suitable installation location and operate best in moderate climates.
  • Solar Water Heaters: Solar water heaters use energy from the sun to heat the water. They are environmentally friendly and have low operating costs in the long run. However, their effectiveness depends on the availability of sunlight in your area.

When selecting the right water heater for your Chicago home, it is essential to consider factors such as:

  • The size and needs of your household
  • The space available for installation
  • Your budget and energy efficiency preferences
  • The availability of energy sources

Hiring a Professional Water Heater Replacement Service

Replacing a water heater involves complex installation, electrical connections, and plumbing work. Therefore, it is highly recommended to hire a licensed Chicago plumber to ensure the job is done safely and efficiently. The following are some reasons why hiring experts is a wise decision:

  • Expertise and Experience: Professional plumbers have the necessary knowledge, skills, and experience to handle water heater replacements, ensuring proper installation and minimizing the risk of any issues.
  • Licensing and Certification: Reputable water heater replacement services hold the required licenses and certifications, demonstrating their adherence to industry standards and regulations.
  • Advanced Equipment and Tools: Professionals use specialized equipment and tools to perform the installation accurately and efficiently.
  • Assistance with Permits and Codes: A reliable water heater replacement service will assist you with obtaining any necessary permits and ensure compliance with local building codes.
  • Warranty and Guarantees: Reputable companies offer warranties and guarantees on their work, providing you with peace of mind knowing that the job is backed by their commitment to customer satisfaction.
a person disconnecting the power to their water heater tank.

If your water heater operates on electricity, turn off the power supply from the circuit breaker. For gas-powered heaters, shut off the gas valve leading to the unit.

Preparing for Water Heater Replacement

Before the replacement process begins, there are a few essential steps to follow:

  • Disconnect the Power: If your water heater operates on electricity, turn off the power supply from the circuit breaker. For gas-powered heaters, shut off the gas valve leading to the unit.
  • Shut Off the Water Supply: Locate the water shut-off valve connected to the water heater and close it to stop the water flow.
  • Drain the Tank: Connect a hose to the drain valve on the tank and direct the other end to a suitable drainage location. Open the valve to allow the water to drain completely. Once drained, open a nearby hot water faucet to relieve any residual pressure.
  • Clear the Surrounding Area: Remove any obstacles or belongings near the water heater to provide ample space for installation and easy access for the technicians.

The Water Heater Replacement Process

Once the necessary preparations are complete, the water heater replacement process can begin. Here is an overview of the typical steps involved:

  • Removal of the Old Water Heater: Technicians will disconnect the plumbing and electrical connections, drain the remaining water, and safely remove the old water heater from its current location.
  • Installation of the New Water Heater: The new water heater will be carefully positioned and secured in place. Plumbers will reconnect the plumbing and electrical connections to ensure proper functioning.
  • Testing and Verification: The technicians will test the newly installed water heater thoroughly to ensure it is working correctly and there are no leaks or other issues.
  • Clean-Up and Debris Disposal: Any debris or packaging material resulting from the replacement process will be cleaned up and disposed of responsibly.
  • Instruction and Explanation: The technicians will provide you with instructions on operating and maintaining the new water heater, as well as answer any questions you may have.

Maintaining Your New Water Heater

Once your new water heater is installed, it is important to maintain it properly for optimal performance and longevity. Here are some key maintenance practices:

  • Regular Inspection: Periodically check for any signs of leaks, rust, or unusual noises. If you notice any issues, contact a professional promptly.
  • Drain Flushing: Regularly flushing the tank helps remove sediment buildup and maintains the efficiency of your water heater. Consult the manufacturer’s guidelines or seek professional assistance for the proper procedure.
  • Temperature and Pressure Relief Valve Testing: Test the temperature and pressure relief valve annually to ensure it is functioning correctly. Follow the manufacturer’s instructions or consult a professional if needed.
  • Insulation: Consider insulating the water heater and the hot water pipes to reduce heat loss and increase energy efficiency. Use appropriate insulation materials recommended for water heaters.
  • Professional Maintenance: Schedule regular professional maintenance at least once a year to keep your water heater in optimal condition. This includes inspection, cleaning, and any necessary adjustments.

Conclusion

Water heater replacement in Chicago requires careful consideration of various factors, including the right time to replace, selecting the appropriate type and size of water heater, hiring professional services, and proper maintenance. By following the best practices outlined in this guide and seeking advice from industry experts, homeowners can ensure a smooth and successful water heater replacement process. Enjoy the benefits of a reliable and energy-efficient water heating system in your Chicago home, providing you with hot water all year round.

Are you in need of a water heater replacement in the Chicagoland area? Contact us at 773-599-9181 or by form below:

Maintaining a Smooth Plumbing System in Apartment Complexes: The Hydro Jetting Solution

Maintaining a Smooth Plumbing System in Apartment Complexes

As a property manager or owner of an apartment complex, maintaining a smooth plumbing system is paramount to the satisfaction and well-being of your tenants. A properly functioning plumbing system ensures that water flow is consistent and uninterrupted, preventing inconvenience and potential damage to the property. One effective solution that has gained popularity in recent years is hydro jetting. Below we will explore the pro’s and con’s of hydro jetting and why it is an ideal solution for maintaining a smooth plumbing system in apartment complexes.

Understanding Hydro Jetting

Hydro jetting is a highly efficient method of cleaning and unclogging pipes that utilizes high-pressure water to remove debris, scale, and various obstructions. It involves the use of a specialized nozzle that releases water at pressures ranging from 1,500 to 4,000 pounds per square inch (PSI), effectively scouring the interior surfaces of the pipes and restoring them to their optimal condition.

The process involves inserting a flexible hose with the specialized nozzle into the plumbing system. Once in position, water is introduced at high pressure, propelling the nozzle forward through the pipe while breaking down any buildup or obstructions in its path. The debris is effectively removed and flushed out of the system, leaving the pipes clean and free-flowing.

The Benefits of Hydro Jetting

Hydro jetting offers several advantages over traditional methods of pipe cleaning. Let’s explore some of the key benefits:

Efficient and Thorough Cleaning

Unlike a sewer rodding service or chemical cleaning methods, hydro jetting provides a comprehensive cleaning solution that effectively removes all types of blockages, including grease, mineral deposits, tree roots, and more. The high-pressure water effectively scours the interior surfaces of the pipes, leaving them clean and free from obstructions.

Preventative Maintenance

Regular hydro jetting helps prevent future plumbing issues by removing the buildup that can lead to blockages and clogs. By proactively maintaining the plumbing system, you can minimize the risk of costly and disruptive repairs down the line.

Environmentally Friendly

Hydro jetting utilizes only water and does not require the use of any harsh chemicals. It is a safe and environmentally friendly method of pipe cleaning, ensuring that no harmful substances are introduced into the plumbing system or the surrounding environment.

Cost-Effective

While hydro jetting may have a higher upfront cost compared to traditional methods, it offers long-term cost savings. By maintaining a smooth plumbing system and preventing major blockages, you can avoid the costs associated with emergency repairs and extensive sewer line replacement.

Improved Water Flow

One of the most noticeable benefits of hydro jetting is the immediate improvement in water flow. By removing obstructions and buildup, water can flow freely through the pipes, minimizing the risk of low water pressure and ensuring a consistent supply to all units within the apartment complex.

hydro jet plumbing.

Develop a regular maintenance schedule for hydro jetting the plumbing system in your apartment complex.

Implementing Hydro Jetting in Apartment Complexes

Now that we understand the benefits of hydro jetting, let’s explore how it can be effectively implemented in apartment complexes:

Regular Maintenance Schedule

Develop a regular maintenance schedule for hydro jetting the plumbing system in your apartment complex. This ensures that the pipes are consistently cleaned and prevents the buildup of debris and obstructions.

Partner with Professional Plumbing Services

It is essential to partner with a reputable plumbing service that specializes in hydro jetting service. Experienced professionals have the expertise and equipment necessary to perform the procedure safely and effectively.

Communication with Tenants

Inform your tenants of the benefits and necessity of hydro jetting for maintaining a smooth plumbing system. Encourage them to report any plumbing issues promptly to prevent further damage and schedule hydro jetting as required.

Combine Hydro Jetting with Other Plumbing Solutions

Hydro jetting can be combined with other plumbing solutions, such as sewer camera inspections, to identify any underlying issues within the plumbing system. This proactive approach allows for targeted maintenance and prevents future problems.

To Sum It Up

Maintaining a smooth plumbing system in apartment complexes is crucial for the satisfaction and comfort of tenants. Hydro jetting offers an efficient, cost-effective, and environmentally friendly solution to ensure optimal water flow and prevent plumbing issues. By implementing a regular maintenance schedule and partnering with professionals, you can proactively maintain your apartment complex’s plumbing system and provide a hassle-free living experience for your tenants.

Avoiding Costly Water Damage: How to Safeguard Your Home from Burst Pipes

How to Safeguard Your Home from Burst Pipes

Water damage caused by burst pipes can be a costly and devastating problem for homeowners. From ruined furniture and flooring to extensive repairs, the consequences of water damage can be overwhelming. However, with some simple precautions and preventative measures, you can safeguard your home from burst pipes and avoid the headache of dealing with water damage. In this article, we will provide you with valuable tips and guidance on how to protect your home and mitigate the risk of burst pipes.

Understanding the Causes of Burst Pipes

Before we dive into preventative measures, it is crucial to understand the common causes of burst pipes. By identifying and addressing these potential issues, you can significantly reduce the risk of water damage from burst pipe emergencies in your home.

Extreme Temperatures: One of the main causes of burst pipes is freezing temperatures. When water freezes inside the pipes, it expands, putting immense pressure on the pipes. This pressure can cause weak points in the pipes to burst, leading to significant water damage.

Poor Insulation: Inadequate insulation is another factor that contributes to burst pipes. Uninsulated or poorly insulated pipes are more susceptible to freezing and bursting during cold weather.

Age and Wear: Over time, pipes can become weakened due to corrosion, rust, or general wear and tear. Older pipes are more likely to develop cracks or burst under pressure.

Now that we have identified the primary causes of burst pipes let us discuss some effective measures you can take to safeguard your home.

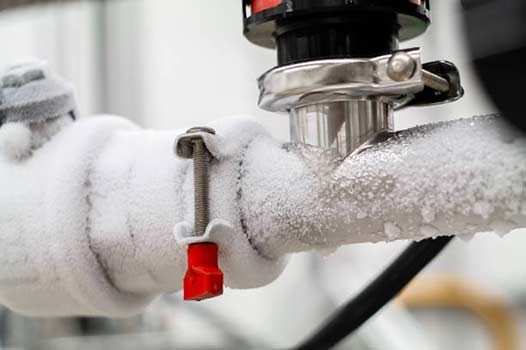
pipe insulation to prevent burst pipes in wintertime.

To protect your pipes from freezing temperatures, make sure they are adequately insulated.

Preventative Measures: How to Safeguard Your Home from Burst Pipes

1. Insulate Your Pipes:

To protect your pipes from freezing temperatures, make sure they are adequately insulated. Insulation sleeves or foam pipe covers can be easily installed to keep the heat contained within the pipes. Focus on areas with exposed pipes, such as basements, attics, and crawl spaces.

2. Seal Air Leaks:

Air leaks around pipes can lead to a drop in temperature and increase the chances of freezing. Inspect your home for any gaps or cracks near pipes and use caulk or insulation to seal them. This will help maintain a stable temperature and reduce the risk of burst pipes.

The Importance of Proper Maintenance

Besides taking preventative measures, regular maintenance plays a vital role in preventing burst pipes and mitigating water damage. Here are some essential maintenance tasks to prioritize:

Visual Inspections:

Regularly inspect your pipes for any signs of damage, such as cracks, leaks, or corrosion. Pay close attention to areas prone to moisture, such as under sinks, around appliances, and near the water heater. If you notice any issues, address them promptly to prevent further damage.

Drain and Insulate Outdoor Faucets:

Before the winter season arrives, make sure to drain and disconnect any garden hoses. Shut off the outdoor water supply and insulate any outdoor faucets or pipes. This will prevent water from freezing and causing damage to the pipes.

Schedule Professional Inspections:

Consider scheduling regular inspections with a qualified plumber. A professional can assess the condition of your pipes and identify potential vulnerabilities that may lead to burst pipes. They can also provide guidance on the best course of action to mitigate any risks.

call an emergency plumber for burst pipe repair.

Contact an emergency plumber or emergency water damage restoration service as soon as possible.

Take Action in Case of a Burst Pipe

Despite our best efforts, emergencies can still occur. If you experience a burst pipe, it is crucial to act quickly to minimize water damage and protect your home. Here are the immediate steps you should take:

Shut Off the Water:

Locate your main water shut-off valve and turn it off immediately to stop the flow of water. It is essential to familiarize yourself with the location of this valve before an emergency occurs.

Open Faucets:

Next, open all faucets in your home to drain the remaining water from the pipes. This will relieve pressure and help prevent further damage.

Call a Professional:

Contact an emergency plumber or 24 hour plumbing service as soon as possible. They have the expertise and equipment to assess the situation, repair the burst pipe for you, and minimize water damage.

Conclusion

Water damage caused by burst pipes can be a nightmare for homeowners. However, by understanding the causes of burst pipes and implementing preventive measures, you can significantly reduce the risk of water damage. Insulating pipes, sealing air leaks, conducting regular maintenance, and knowing how to react in case of a burst pipe are all essential steps towards safeguarding your home. Remember, your proactive actions today can save you from costly repairs and the stress of dealing with water damage in the future.

Sump Pump Installation Made Simple: Step-by-Step Guide to Safeguarding Your Basement from Water Damage

Sump Pump Installation Made Simple

Welcome to our comprehensive guide on sump pump installation! Your basement is a valuable space that provides numerous benefits, from extra living area to storage space. However, water damage can quickly turn your basement into a nightmare. It is crucial to safeguard your basement from potential water damage, and one of the most effective ways to do so is by installing a sump pump.

In this step-by-step guide, we will walk you through the process of installing a sump pump in your basement, ensuring that you have all the information you need to protect your home and belongings from water damage.

Understanding the Importance of a Sump Pump

Before we dive into the installation process, let’s first understand why a sump pump is crucial for your basement’s protection. A sump pump is a device that helps prevent water from infiltrating your basement by collecting excessive groundwater and directing it away from your home’s foundation.

During heavy rainfalls or when the water table rises, groundwater can seep into your basement through cracks in the foundation or basement walls. If left unchecked, this water can lead to a host of problems, including mold growth, structural damage, and damage to your belongings.

A sump pump is installed in a specially constructed pit, known as a sump pit, in your basement. It collects water that enters the pit and pumps it away from your home, typically to a drainage system or a storm sewer.

Gathering the Necessary Tools and Materials

Before you begin the installation process, it is important to gather all the necessary tools and materials. Here is a list of items you will need:

  • Sump pump
  • Sump pit
  • Check valve
  • PVC pipes (with appropriate diameter)
  • PVC cement
  • Tape measure
  • Hacksaw or PVC pipe cutter
  • Screwdriver
  • Adjustable wrench
  • Teflon tape
  • Bucket
  • Gloves
  • Safety goggles
installation of a sump pit.

The first step in the installation process is to choose the right location for the sump pit.

Step 1: Choosing the Right Location for the Sump Pit

The first step in the installation process is to choose the right location for the sump pit. Here are some factors to consider when selecting the location:

  • Identify the lowest point in your basement: The sump pit should be placed in the lowest point of your basement where water is most likely to accumulate.
  • Keep the sump pit away from obstacles: Ensure that the location you choose is free from any obstacles, such as utility lines or water pipes.
  • Accessibility: It is important to choose a location that allows easy access for maintenance and repairs.

Step 2: Digging the Sump Pit

Once you have determined the location for your sump pit, it’s time to start digging. Follow these steps to dig the pit:

  • Using the tape measure, mark the dimensions of the sump pit on the basement floor.
  • Put on your gloves and safety goggles for protection.
  • Using a shovel or a digging tool, carefully dig the pit according to the marked dimensions. The depth of the pit should be approximately two feet.
  • Remove any debris or loose dirt from the pit using a bucket.

Step 3: Installing the Sump Pit

Once the pit is dug, it’s time to install the sump pit. Follow these steps:

  • Place the sump pit in the center of the hole you dug.
  • Ensure that the pit is level and stable.

Step 4: Installing the Sump Pump

Now that the sump pit is in place, it’s time to install the sump pump. Here’s how:

  • Remove the cover from the sump pit.
  • Place the sump pump inside the pit.
  • Position the pump in a way that the float switch is unobstructed and can move freely.
  • Attach the check valve to the pump’s discharge pipe, ensuring that it is securely tightened.
  • Connect the PVC pipe to the check valve and extend it to the desired location for water discharge.
  • Secure the PVC pipe using PVC cement.
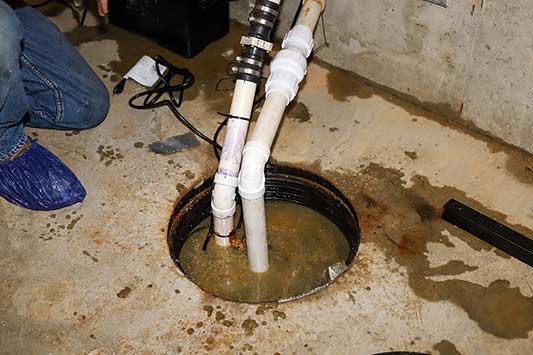
a newly installed sump pump.

With the sump pump successfully installed, it is important to test its functionality and perform regular maintenance to ensure it continues to operate effectively.

Step 5: Testing and Maintenance

With the sump pump successfully installed, it is important to test its functionality and perform regular maintenance to ensure it continues to operate effectively. Here are some essential steps:

  • Fill the sump pit with water until the float switch is activated.
  • Observe the pump as it starts pumping water out of the pit.
  • Check for any leaks in the discharge pipe or the connections.
  • Remove any debris or sediment that may accumulate in the pit.
  • Test the sump pump periodically to ensure it is in proper working condition.

Conclusion

Congratulations! You have successfully installed a sump pump in your basement, providing an essential layer of protection against flooding and water damage. By following this step-by-step guide, you have taken a significant step towards safeguarding your basement and preserving the value of your home.

Remember, proper installation and regular maintenance are key to ensuring your sump pump operates effectively. If you encounter any issues or feel unsure at any point during the installation process, it is always recommended to seek assistance from a local plumber.

Now that you have the knowledge and tools, take action to protect your basement from water damage and enjoy peace of mind, knowing that your valuable space is safe and secure.

How to Fix a Leaking Toilet Base: A Complete Guide

How to Fix a Leaking Toilet Base

Toilets are an essential part of every household, providing convenience and hygiene. However, a leaking toilet base can be a frustrating and potentially costly problem. Ignoring a leaking toilet can lead to water damage, mold growth, and increased water bills. In this comprehensive guide, we will walk you through step-by-step on how to fix a leaking toilet base.

Identify the Source of the Leak

The first step in fixing a leaking toilet base is to identify the source of the leak. There are several potential causes, including:

  • Wax ring deterioration
  • Loose or damaged toilet bolts
  • Cracked toilet base
  • Incorrect toilet installation

To determine the cause, carefully inspect the area around the toilet base for any signs of water pooling or dampness. Additionally, check for any cracks or looseness in the toilet itself.

Turn Off the Water Supply

Before attempting any repairs, it is crucial to turn off the water supply to the toilet. Locate the shut-off valve, usually located near the base of the toilet or on the wall behind it, and turn it clockwise until it is fully closed. Flush the toilet to drain any remaining water from the tank and bowl.

Remove the Toilet

In order to access and repair the leaking toilet base, you will need to remove the toilet. Follow these steps:

  • Disconnect the water supply line from the bottom of the toilet tank.
  • Remove the nuts from the toilet bolts securing the toilet base to the floor.
  • Gently rock the toilet back and forth to break the wax seal and lift it off the floor.
  • Place the toilet on a towel or old newspaper to prevent any water or debris from spreading.
a toilet wax ring replacement.

A common cause of a leaking toilet base is a deteriorated wax ring. The wax ring creates a watertight seal between the toilet base and the floor.

Replace the Wax Ring

A common cause of a leaking toilet base is a deteriorated wax ring. The wax ring creates a watertight seal between the toilet base and the floor. To replace the wax ring:

  • Remove the old wax ring from both the toilet base and the flange on the floor.
  • Clean the flange and the toilet base thoroughly.
  • Place the new wax ring onto the flange, ensuring a snug fit.
  • Carefully lower the toilet onto the wax ring, aligning the toilet bolts with the mounting holes.
  • Press down firmly to compress the wax ring and create a proper seal.
  • Tighten the toilet bolts, being careful not to overtighten and crack the toilet.

Inspect and Repair Toilet Bolts and Base

Examine the toilet bolts and the base itself for any signs of damage or looseness. If the bolts are loose or damaged, replace them with new ones. If the toilet base is cracked or damaged, it may need to be replaced. Contact a nearby plumber if necessary.

Reinstall the Toilet

Once you have replaced the wax ring and addressed any issues with the toilet bolts or base, it is time to reinstall the toilet.

  • Lower the toilet back onto the flange, aligning the bolts with the mounting holes.
  • Apply downward pressure to compress the wax ring and create a tight seal.
  • Replace the nuts onto the toilet bolts and tighten them until snug.
  • Reconnect the water supply line to the bottom of the toilet tank.
  • Turn on the water supply and allow the tank to refill.
a plumber testing for any toilet leaks.

Once you have replaced the wax ring and addressed any issues with the toilet bolts or base, it is time to reinstall the toilet.

Test for Leaks

After reinstalling the toilet, it is essential to test for any remaining leaks. Flush the toilet and carefully inspect the area around the base for any signs of water seeping out. If you notice any leaks, repeat the necessary steps to ensure a proper seal.

Wrapping It Up

Fixing a leaking toilet base is a manageable task with the right tools and guidance. By following the steps outlined in this complete guide, you can successfully repair a leaking toilet base, preventing further damage and ensuring the continued functionality of your bathroom. However, if you encounter any difficulties or are unsure about any step, it is recommended to seek the assistance of a local residential plumber for expert advice and assistance.