Blog

Do I Need to Leave My Home During a Main Water Line Repair?

Do I Need to Leave My Home During a Main Water Line Repair

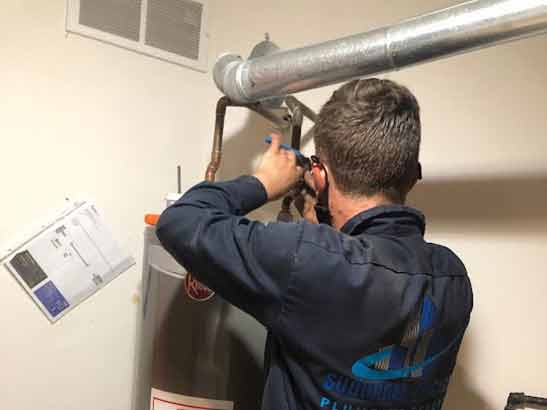
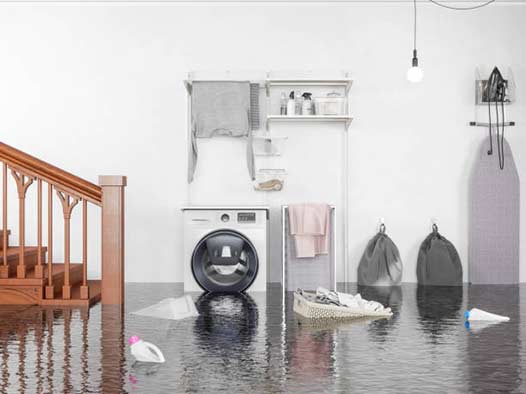
When it comes to home maintenance and repairs, few things can cause more stress and inconvenience than a problem with the main water line. This critical component of your home’s plumbing system is responsible for delivering clean and fresh water to every faucet, shower, and toilet in your house. So, when the main water line needs repair, it’s natural to wonder whether or not you will have to leave your home during the process.

Here we will explore the factors that determine whether or not you need to leave your home during a main water line repair. We will also provide some tips and considerations to help make the process as smooth and stress-free as possible.

Factors to Consider

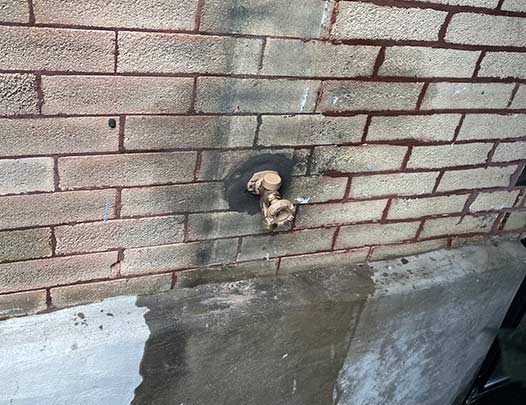
Extent of the Damage

The extent of the damage to your main water line plays a significant role in determining whether or not you will need to temporarily vacate your home. In some cases, minor repairs can be completed without disrupting the water supply to your house. However, if the damage is extensive and requires major repairs or replacement of the entire main water line, it is more likely that you will need to find alternate accommodations during the repair period.

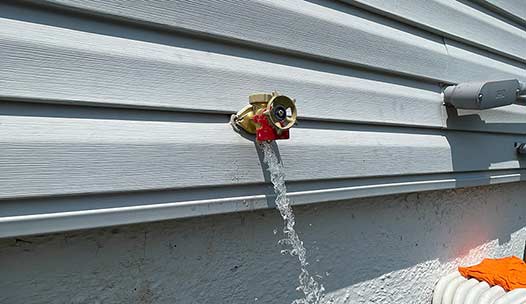
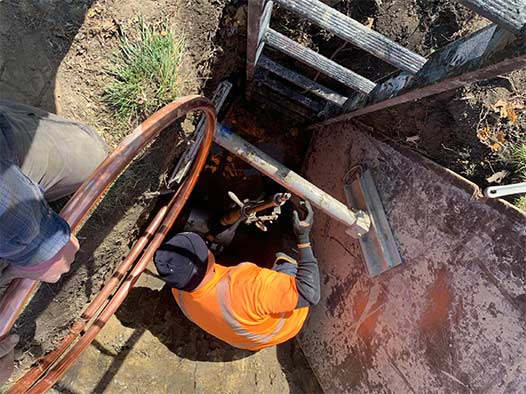
Access to the Main Water Line

Another important factor to consider is the accessibility of the main water line. If the line is located underground or in a hard-to-reach area of your property, the repair process may involve digging or excavation, which can be disruptive and messy. In such cases, it is advisable to temporarily leave your home to avoid the inconvenience and potential hazards associated with these repair techniques.

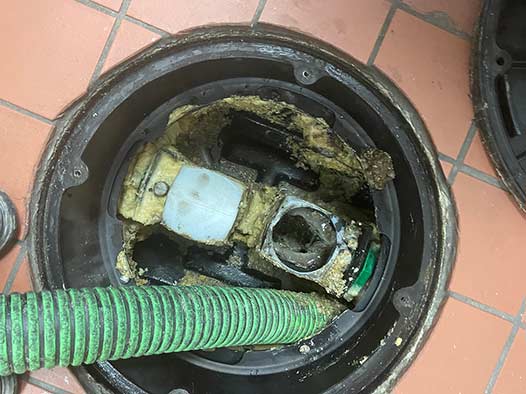
Duration of the Repair

The duration of the repair is also an essential factor to consider. Minor repairs can often be completed within a few hours or a day, allowing you to stay in your home during the process. However, major repairs or replacements may take several days or even weeks to complete, making it necessary for you to make alternative arrangements for accommodation.

Tips for a Smooth Repair Process

If you find yourself needing a main water line repair, here are some tips to help make the process as smooth and hassle-free as possible:

Plan Ahead

If you suspect that your main water line may need repairs in the future, it is a good idea to plan ahead. Start by researching reputable plumbers in your area and save their contact information for easy access when needed. By being prepared, you can minimize the time it takes to find a reliable professional and get your repair scheduled.

Communicate with Your Repair Provider

Once you have selected a repair provider, be sure to communicate openly with them about your expectations and concerns. Ask them about the estimated duration of the repair, the extent of the disruption, and whether or not you will need to temporarily leave your home. By having a clear understanding of the repair process, you can plan accordingly and make necessary arrangements.

Arrange Alternative Accommodations

If it is determined that you will need to leave your home during the main water line repair, it is essential to arrange alternative accommodations. This may include staying with family or friends, booking a hotel room, or renting a temporary residence. Consider the duration of the repair and choose an option that is most convenient and comfortable for you and your family.

Take Precautions

Before the repair begins, take some precautions to protect your belongings and minimize potential damage. Move valuable items away from the affected area, cover furniture and electronics with plastic sheets or tarps, and secure any loose items that may get in the way of the repair work.

Follow Safety Instructions

If you choose to stay in your home during the repair process, be sure to follow any safety instructions provided by the repair provider. This may include avoiding certain areas of your home, limiting water usage, or temporarily disconnecting specific appliances or fixtures.

In Conclusion

In conclusion, whether or not you need to leave your home during a main water line repair depends on several factors, including the extent of the damage, accessibility of the line, and duration of the repair. Communication with your repair provider and careful planning can help make the process as smooth as possible. If you do need to temporarily vacate your home, arrange alternative accommodations and take necessary precautions to protect your belongings. Remember to follow any safety instructions provided to ensure a successful and hassle-free repair process.

FAQ’s on Water Heater Repairs in Chicago

FAQ's on Water Heater Repairs in Chicago

Water heaters are an essential appliance in every household, providing us with hot water for various purposes such as bathing, cooking, and cleaning. However, like any other appliance, water heaters are prone to malfunctions and breakdowns. When faced with a water heater issue, it is essential to understand the common problems and solutions to ensure a quick and efficient repair.

1. How do I know if my water heater needs repair?

There are several signs indicating that your water heater may require repair:

  • Lack of hot water
  • Inconsistent water temperature
  • Strange noises coming from the water heater
  • Water leaks around the unit
  • Foul-smelling or discolored water

If you notice any of these signs, it is advisable to call a local plumber to prevent further damage or potential hazards.

2. Can I attempt to repair my water heater myself?

While some minor water heater issues can be resolved with DIY methods, it is generally recommended to leave water heater repairs to trained professionals. Water heaters involve complex electrical and plumbing components, which can be dangerous to handle without proper knowledge and experience. Attempting repairs without expertise may not only worsen the problem but also pose a risk to your safety.

3. How much does water heater tank repair cost in Chicago?

The cost of water heater repair in Chicago can vary depending on several factors, including the type and extent of the problem, the brand and model of the water heater, and the service provider you choose. On average, homeowners in Chicago can expect to pay between $150 and $500 for water heater repairs. It is advisable to obtain quotes from multiple professionals to compare prices and ensure a fair deal.

4. Can water heater repairs be covered by insurance?

Whether repairs are covered by insurance depends on the type of insurance policy you have. In some cases, homeowners’ insurance may cover the cost of repairs if the damage is caused by a covered peril, such as a burst pipe emergency. However, it is essential to review your insurance policy or consult with your insurance provider to determine the specific coverage for water heater repairs.

a professional plumber repairing a water heater.

Consulting with a professional plumbing technician can help you make an informed decision based on your specific situation.

5. How long does a hot water heater tank repair take?

The duration of a water heater tank repair can vary depending on the nature of the problem and the availability of replacement parts. In general, minor repairs can be completed within a few hours, while more complex issues may require a day or two to resolve. It is recommended to inquire about the estimated repair time when contacting a professional technician.

6. Should I repair or replace my water heater?

Deciding whether to repair or replace a water heater depends on several factors:

  • Age of the water heater: If the water heater is nearing the end of its expected lifespan, replacement may be more cost-effective in the long run.
  • Extent of the damage: Minor issues such as a faulty thermostat or heating element can usually be repaired, but significant problems like a leaking tank may warrant replacement.
  • Energy efficiency: Older water heaters tend to be less energy efficient compared to newer models, so replacing an outdated water heater can result in long-term energy savings.
  • Budget: The cost of repairs should be compared to the cost of a new water heater. If the repair cost is close to or exceeds the price of a replacement, opting for a new unit may be a more economical choice.

Speaking with a professional plumber can help you make an informed decision based on your specific situation.

7. How can I prevent water heater issues in the future?

While some water heater problems are unavoidable, there are preventive measures you can take to minimize the risk of future issues:

  • Regular maintenance: Schedule annual maintenance checks with a qualified technician to inspect and clean your water heater.
  • Monitor water pressure: High water pressure can strain your water heater, leading to leaks or other damages. Install a pressure regulator if necessary.
  • Address minor issues promptly: Don’t ignore small signs of trouble. Fixing minor problems early on can prevent them from escalating into major repairs.

By following these preventive measures, you can prolong the lifespan of your water heater and reduce the need for frequent repairs.

To Conclude

Water heater tank repairs in Chicago are a common necessity for homeowners. Understanding the signs of a malfunctioning water heater, the importance of professional repairs, and the factors to consider when deciding between repair and replacement can help you navigate the repair process with confidence. Additionally, taking preventative measures and scheduling regular maintenance can help extend the lifespan of your water heater and minimize the risk of future problems. If you encounter any issues with your water heater, it is advisable to seek the assistance of certified technicians who can provide efficient and reliable repair services.

How to Repair or Replace an Outdoor Hose Bibb

How to Repair or Replace an Outdoor Hose Bibb

Outdoor hose bibbs are a vital component of any outdoor watering system. Whether you use them to water your garden, wash your car, or clean outdoor surfaces, hose bibbs provide a convenient water source. However, over time, these fixtures may develop leaks or become damaged, requiring repair or replacement. Knowing how to repair or replace an outdoor hose bibb can save you time and money, as well as ensure a proper and efficient water flow.

Understanding the Outdoor Hose Bibb

Before diving into the repair or replacement process, it’s important to understand what an outdoor hose bibb is and how it functions. A hose bibb, also known as a spigot or faucet, is an outdoor water fixture with a valve that controls the flow of water. It is typically connected to a water supply pipe that extends from inside the house and protrudes through the exterior wall.

Hose bibbs come in various types, including frost-proof, compression, and sillcock. Frost-proof bibbs are commonly used in regions with colder climates to prevent freezing and bursting during winter. Compression and sillcock bibbs are more common in warmer climates.

Signs of a Damaged Outdoor Hose Bibb

Identifying the signs of a damaged hose bibb is crucial in determining whether a repair or replacement is necessary. Here are some common signs to look out for:

  • Leaks: Notice any water dripping from the hose bibb, even when the valve is closed.
  • Cracks or Fractures: Inspect the bibb for any visible cracks or fractures in the body or handle.
  • Difficulty Turning On/Off: If the valve is hard to turn or requires excessive force, it may be due to internal damage.
  • Poor Water Flow: If water flow is weak or irregular, it could indicate a problem with the bibb.

Repairing an Outdoor Hose Bibb

If the hose bibb shows minor damage or leaks, repair might be a viable option. Follow these steps to repair an outdoor hose bibb:

  • Turn off the Water Supply: Locate the shut-off valve connected to the bibb and turn it clockwise to shut off the water.
  • Drain the Faucet: Open the hose bibb to drain any remaining water from the pipe.
  • Remove the Handle: Unscrew or remove the handle to access the internal components.
  • Inspect and Replace O-Rings: Check the o-rings for any damage or wear and replace them if necessary.
  • Replace Washers and Seals: Replace any worn-out washers and seals inside the faucet body.
  • Reassemble the Bibb: Put all the components back together, making sure they fit snugly.
  • Turn on the Water Supply: Slowly turn on the water supply to check for leaks. If there are no leaks, the repair is successful.
an outdoor hose bibb replacement.

Proper maintenance can help prolong the lifespan of your outdoor hose bibb and prevent frequent repairs or replacements.

Replacing an Outdoor Hose Bibb

If the hose bibb is severely damaged or the repair attempts fail, replacing the bibb becomes necessary. Here’s the process for replacing an outdoor hose bibb:

  • Turn off the Water Supply: Locate the main shut-off valve for your water supply and turn it off.
  • Drain the System: Open the hose bibb to drain any remaining water from the pipe.
  • Detach the Bibb: Unscrew the hose bibb from the water supply pipe using a wrench or pliers.
  • Clean the Pipe End: Remove any debris or old tape from the pipe end to ensure a clean connection.
  • Apply Thread Seal Tape: Wrap thread seal tape clockwise around the pipe threads to create a tight seal.
  • Attach the New Hose Bib: Screw the new hose bibb onto the pipe threads and tighten it securely.
  • Test for Leaks: Slowly turn on the water supply and check for any leaks around the new bibb.

Maintaining the Outdoor Hose Bibb

Proper maintenance can help prolong the lifespan of your outdoor hose bibb and prevent frequent repairs or replacements. Here are some maintenance tips to follow:

  • Disconnect Hoses in Winter: Before freezing temperatures arrive, disconnect and drain all hoses connected to the bibb.
  • Insulate Frost-Proof Bibbs: If you have frost-proof bibbs, make sure they are properly insulated to prevent freezing.
  • Check for Leaks Regularly: Inspect your hose bibb periodically for any signs of leaks or drips.
  • Replace O-Rings and Washers: If you notice any deterioration in the o-rings or washers, replace them promptly to maintain a proper seal.
  • Protect from Extreme Temperatures: Avoid exposing the bibb to extreme heat or cold, as it can cause damage.

In Summary

Repairing or replacing an outdoor hose bibb may seem daunting, but with the right knowledge and tools, it can be a manageable task. Regular maintenance and prompt repairs can help ensure the longevity and efficiency of your watering system. Remember to always prioritize safety and turn off the water supply before attempting any repairs or replacements. If you feel unsure about any step, it is recommended to seek professional assistance from a local plumber to avoid causing further damage. With proper care, your outdoor hose bibb will provide a reliable water source for all your outdoor needs.

Identifying the Right Time for Grease Trap Pumping: Key Signs to Watch out for

Identifying the Right Time for Grease Trap Pumping

Grease traps play an integral role in the smooth operation of any commercial kitchen, serving as a guardian against blockages in the plumbing system. While they operate out of sight, their maintenance should never be out of mind. Timely grease trap pumping service is critical to prevent the build-up that leads to unpleasant and costly complications. We will help you recognize the telltale signs that it’s time for a pump-out and offer practical advice to keep your kitchen running without a hitch.

Understanding Grease Traps

The Role of Grease Traps                      

In a busy commercial kitchen environment, a grease trap is more than just a component; it’s a necessity. It works tirelessly to capture fats, oils, and greases, known collectively as FOG, that come from cooking, preventing these substances from entering and clogging the municipal sewage system. Overlooking its importance can lead to a domino effect of plumbing issues that can halt kitchen operations and attract health code violations.

How Grease Traps Work

The mechanics of a grease trap are simple yet effective. Wastewater from kitchen sinks flows into the trap, designed to separate FOG from the water. The FOG rises to the top due to its lower density, while heavier solids settle at the bottom, allowing relatively clean water to exit the trap. However, the grease trap has a limit to how much FOG it can hold. When it approaches this limit, the efficiency of the separation process drops, signaling that it’s time for a pump-out.

Types and Maintenance

Understanding the kind of grease trap your kitchen utilizes is the first step toward proper maintenance. Whether it’s a small passive trap located directly beneath the sink or a larger in-ground unit serving an entire facility, each type requires a specific approach to pumping and cleaning. Identifying your system will help you establish a maintenance routine that ensures its longevity and reliability.

The Indicators of Grease Trap Distress

Slow Drainage

When water takes longer than usual to drain in your sinks, it’s not just a minor inconvenience; it’s a symptom of a grease trap nearing its capacity. Allowing the trap to overflow can lead to a total blockage, so slow drainage should prompt a call to your grease trap pumping service provider.

Bad Odors

A well-functioning grease trap is rarely smelled. If a strong odor begins to emerge from your drains, it’s a clear sign that the trap is filled with decomposing organic matter, and grease trap pumping should be arranged without delay.

Visible Grease

Grease making an appearance in places where it doesn’t belong is a red flag. When you start noticing grease in secondary drain areas or floating on the surface of standing water, it indicates that the trap can no longer contain the FOG, and a pump-out is necessary to prevent a slippery mess.

Increased Pest Activity

A surge in pest sightings can be an unexpected but accurate indicator that your grease trap needs attention. Pests are attracted to the food particles and FOG that accumulate in poorly maintained traps. Regular pumping can help prevent these unwelcome guests from invading your kitchen.

Monitoring Grease Levels

Keeping an eye on your grease levels is as important as any other maintenance task. Consistently monitoring levels can preclude many issues with cast iron stacks, which are particularly susceptible to grease buildup. 

a plumber performing a grease trap pumping service for a restaurant.

A customized maintenance schedule is the key to preventing grease trap problems.

The Consequences of Overlooking Grease Trap Pumping

Impact on Plumbing Systems

Letting your grease trap go without proper pumping is akin to ignoring a ticking time bomb. The buildup of FOG can lead to severe blockages, causing backups and potentially shutting down your kitchen—a nightmare scenario for any business.

Legal and Environmental Repercussions

The implications of failing to maintain your grease trap extend beyond the walls of your kitchen. Environmental regulations are strict when it comes to FOG disposal. Ignoring these regulations not only risks legal action and fines but also contributes to environmental pollution, which can damage your establishment’s reputation.

Emergency Costs

Consider the financial impact of neglecting your grease trap. Emergency plumbing services can be exorbitantly expensive compared to the predictable costs of regular maintenance. By scheduling routine pump-outs, you save on costs and protect your business from the unpredictability of plumbing emergencies.

When to Schedule Grease Trap Pumping

Frequency Guidelines

Determining the ideal frequency for pumping out your grease trap is not a one-size-fits-all solution. Factors such as the size of your establishment, the amount of FOG produced, and local regulations play a role. However, a general rule of thumb for most commercial kitchens is to schedule pumping quarterly.

Seasonal Considerations

Adjusting your grease trap maintenance schedule to account for seasonal variations can prevent many plumbing woes. For instance, colder weather can thicken grease, leading to faster accumulation. Incorporating such seasonal factors, especially as part of your winter plumbing preparations, can avert the need for emergency services during the busiest times of the year.

Customized Schedules

A customized maintenance schedule is the key to preventing grease trap problems. Like the tailored strategies that a moving company, such as professionalmoverottawa.com, implements for each business move, your grease trap cleaning schedule should be personalized to fit your kitchen’s specific needs and usage patterns.

Proactive Grease Trap Management Tips

Regular Inspections

In addition to professional grease trap pumping, it’s advisable to carry out regular inspections of your grease trap. Catching issues early on can prevent larger, more expensive problems down the line.

Kitchen Best Practices

Educating your staff on the importance of minimizing FOG waste can go a long way in extending the lifespan of your grease trap. Simple practices, such as wiping down dishes before washing them, can significantly reduce the amount of FOG that enters the trap.

Professional Partnerships

Building a partnership with a professional grease trap maintenance service can eliminate the guesswork of managing your system. They can provide valuable insights and reminders for when it’s time to schedule your next pump-out.

Basement Flood Control System

For those establishments with a basement, remember that a functioning grease trap is a crucial component of an effective basement flood control system. A backed-up trap can lead to broader plumbing issues, potentially resulting in wastewater flooding into lower levels and causing significant damage and disruption to your operations.

Conclusion

Regular grease trap pumping is not an option but a necessity for any commercial kitchen. Staying vigilant for the signs of a full trap and acting quickly will keep your kitchen clean, compliant, and operational. Embrace the mindset of prevention rather than cure, and your grease trap, just like any well-maintained piece of equipment, will serve your business faithfully for years to come.

The Role of Battery Backup Sump Pumps in Ensuring Basement Safety During Power Outages

The Role of Battery Backup Sump Pumps in Ensuring Basement Safety During Power Outages

Power outages can be frustrating and disruptive, especially when they occur during heavy rainstorms. For homeowners with a basement, power outages pose an additional threat – potential basement flooding. Basements are particularly vulnerable to flooding as they are located below ground level, and heavy rainfall can lead to the water table rising and groundwater seeping into the basement.

Basement Flooding and Its Consequences

Basement flooding can cause significant damage to a home and its contents. The effects of a flooded basement can range from minor inconvenience to severe destruction, depending on the amount of water and the duration it remains stagnant. The consequences of basement flooding include:

  • Destruction of furniture, carpets, and other valuables
  • Damage to electrical systems and appliances
  • Mold and mildew growth, leading to health hazards
  • Compromised structural integrity of the foundation
  • Increased risk of waterborne diseases

The Importance of Sump Pumps in Preventing Basement Flooding

Sump pumps play a crucial role in preventing basement flooding and mitigating its consequences. A sump pump is installed in a sump pit, which collects water that accumulates in the basement. When the water level in the pit reaches a certain threshold, the sump pump activates, and the accumulated water is pumped out and away from the foundation.

Regular sump pumps are powered by electricity and are effective during normal operating conditions. However, they are rendered useless during power outages, which is precisely when homeowners need them the most. Without a backup solution, basements are left vulnerable and at risk of flooding if a power outage occurs during heavy rains.

sump pump battery backups are for power outages and preventing basement flooding.

The battery backup pump ensures that water continues to be pumped out of the basement even when there is no electricity.

The Role of Battery Backup Sump Pumps

Battery backup sump pumps are designed to provide an additional layer of protection for basements during power outages. These systems incorporate a battery-powered pump that activates automatically when the primary sump pump fails due to a power loss. The battery backup pump ensures that water continues to be pumped out of the basement even when there is no electricity.

The benefits of battery backup sump pumps include:

  • Continuous protection: With a battery backup sump pump, basements remain safeguarded even in the event of a power outage, ensuring water is effectively removed.
  • Added reliability: Backup systems are engineered to activate as soon as the primary sump pump fails, providing homeowners with peace of mind and uninterrupted flood protection.
  • Reduced damage and costs: By preventing basement flooding, backup sump pumps help homeowners avoid costly repairs and replacements of damaged belongings and structural components.
  • Maintenance alerts: Some backup sump pump models come equipped with advanced features such as notification systems that alert homeowners when maintenance or battery replacement is required.
  • Easy installation: Battery backups can be easily integrated with existing sump pump systems, making them a convenient and practical solution for homeowners.

Choosing the Right Battery Backup Sump Pump

When selecting a backup sump pump, several factors should be considered:

  • Battery capacity: The battery should have sufficient capacity to power the backup pump for an extended period. This ensures adequate protection during prolonged power outages.
  • Battery lifespan: It is essential to choose a battery with a long lifespan to avoid frequent replacements and ensure reliable operation.
  • Alarm system: Look for a backup sump pump with an alarm system that alerts homeowners in case of a battery failure or pump malfunction.
  • System compatibility: Ensure that the backup battery is compatible with your existing sump pump system to facilitate seamless integration.
  • Professional installation: For optimal performance, it is recommended to have a battery backup sump pump installed by a professional plumber or basement waterproofing specialist.
a sump pump battery backup installation.

Schedule regular professional maintenance to identify and address any potential issues before they escalate.

Maintaining Battery Backup Sump Pumps

Proper maintenance is crucial to ensure the effectiveness and longevity of battery backup sump pumps:

  • Battery inspection: Regularly check the battery for signs of corrosion or damage and clean the terminals if necessary.
  • Battery replacement: Replace the battery as recommended by the manufacturer to ensure optimal performance and prevent malfunctions during power outages.
  • Functional testing: Test the backup sump pump system periodically to ensure its proper functioning. Consult the manufacturer’s instructions for specific testing procedures.
  • Professional maintenance: Schedule regular professional maintenance to identify and address any potential issues before they escalate.

In Conclusion

Backup sump pumps are essential devices that help protect basements from flooding during power outages. By providing continuous and reliable flood protection, these systems safeguard homes from the devastating consequences of basement flooding, saving homeowners from significant expenses and disruptions. Investing in a quality battery backup sump pump and ensuring its proper maintenance is a proactive step towards basement safety and peace of mind.

Why You Should Start Showering With Filtered Water

Why You Should Start Showering With Filtered Water

Showering is an essential part of our daily routine, providing us with cleanliness and a refreshing start to the day. However, have you ever considered the quality of the water you use for showering? Most people don’t pay much attention to this aspect, but using filtered water for showering can have numerous benefits for your skin, hair, and overall health. Below we will explore why you should start showering with filtered water and the positive impacts it can have on your well-being.

The Importance of Water Filtration

Before getting into the advantages of showering with filtered water, it is crucial to understand the significance of water filtration itself. Water from our taps often contains impurities such as chlorine, bacteria, heavy metals, and other contaminants that can have adverse effects on our bodies. These impurities can not only damage our skin and hair but also cause potential harm when ingested or absorbed through our pores.

Water filtration plays a vital role in removing these harmful substances, ensuring that the water we use is safe and beneficial for our health. By investing in a quality shower filter, you can have peace of mind knowing that the water you expose your body to is free from harmful impurities.

Benefits of Showering with Filtered Water

Improved Skin Health

One of the most significant advantages of showering with filtered water is the positive impact it can have on your skin health. Tap water is often treated with chlorine, which can strip the skin of its natural oils and moisture, leading to dryness, irritations, and even exacerbating conditions such as eczema and acne. Filtered water, on the other hand, removes chlorine and other contaminants, providing your skin with a gentler and more nourishing cleansing experience.

Filtered water helps maintain the skin’s natural pH balance, allowing it to retain its moisture and elasticity. This can result in softer, smoother skin that is less prone to dryness and irritation. Additionally, showering with filtered water may alleviate symptoms of skin conditions, reducing redness, itchiness, and inflammation.

Healthier Hair

Just like our skin, our hair can also suffer the consequences of exposure to chlorine and other chemicals commonly found in tap water. These substances can strip the hair of its natural oils, leaving it dry, brittle, and prone to breakage. By showering with filtered water, you can protect your hair from the damaging effects of these chemicals and promote healthier, more vibrant locks.

Filtered water helps preserve the natural moisture balance of your hair, preventing it from becoming overly dry or greasy. It can also help reduce frizz and improve the overall texture and manageability of your hair. Additionally, by removing chlorine and other harsh chemicals, filtered water may prevent color-treated hair from fading quickly, allowing your vibrant hair color to last longer.

Respiratory Benefits

Many people experience respiratory issues such as asthma or allergies, which can be triggered by the inhalation of chlorine fumes present in steam while showering. Filtered water eliminates chlorine and reduces the risk of inhaling these fumes, providing a safer environment for individuals with respiratory conditions.

Furthermore, showering with filtered water can help reduce irritation in the nasal passages and throat, making it easier to breathe and reducing the likelihood of respiratory discomfort. This can be particularly beneficial for those who live in areas with poor air quality or suffer from seasonal allergies.

Enhanced Overall Health

Using filtered water for showering not only benefits your skin, hair, and respiratory system but also contributes to your overall health and well-being. By minimizing exposure to contaminants, you reduce the risk of absorbing harmful substances into your body through your skin.

Research suggests that the chemicals present in tap water, such as chlorine and chlorine byproducts, may have adverse effects on our health when regularly exposed to or consumed in large quantities. By showering with filtered water, you proactively protect yourself from potential health risks and maintain a healthier lifestyle.

enjoy the benefits of filtered water showering.

Check the compatibility of the shower filter with your existing showerhead or bathroom fixtures.

Choosing the Right Shower Filter

Now that you understand the advantages of showering with filtered water, it is essential to select the right shower filter for your needs. Here are a few factors to consider:

Filtration Technology

Look for shower filters that utilize advanced filtration technologies to remove a wide range of contaminants effectively. Some common filtration methods include activated carbon filters, KDF filters, and vitamin C filters. Each method has its benefits, so choose one that suits your specific requirements.

Longevity and Maintenance

Consider the lifespan of the shower filter and its required maintenance. Look for filters that are long-lasting and easy to replace. This ensures that you can enjoy the benefits of filtered water without the hassle of frequent filter changes or complex maintenance procedures.

Compatibility

Check the compatibility of the shower filter with your existing showerhead or bathroom fixtures. Some filters are designed to fit specific showerheads, while others are more universal.

Certifications

Look for shower filters that have been independently tested and certified by reputable organizations. Certifications such as NSF/ANSI Standard 177 ensure that the filter meets specific performance and safety standards.

Budget

Consider your budget when selecting a shower filter. While there are options available at various price points, investing in a high-quality filter ensures better performance and longevity.

In Conclusion

Showering with filtered water can significantly improve your skin, hair, and overall health. By removing chlorine, bacteria, and other impurities, filtered water provides a gentler and more nourishing cleansing experience. The benefits of showering with filtered water extend beyond the bathroom, contributing to your well-being and promoting a healthier lifestyle. Consider having a plumber install a shower filter that suits your needs, and experience the positive impacts on your body firsthand.

Common Issues with Cast Iron Stacks and How to Address Them

Common Issues with Cast Iron Stacks and How to Address Them

Cast iron stacks are commonly used in plumbing systems for their durability and strength. However, like any other plumbing material, they are not immune to issues. In this article, we will discuss some of the common issues that can arise with cast iron stacks and provide solutions for addressing them. Whether you are a homeowner, a plumber, or simply curious about plumbing systems, this article will provide valuable insights into maintaining and troubleshooting cast iron stacks.

Corrosion

Corrosion is one of the most common issues that can affect cast iron stacks. Over time, exposure to moisture and chemicals can cause the cast iron to rust and deteriorate. This can lead to leaks, blockages, and even structural damage if left untreated.

To address corrosion in cast iron stacks, regular inspections and maintenance are crucial. Here are some steps you can take:

  • Inspect the stack for any signs of rust, such as orange or brown stains.
  • If you find any areas of corrosion, sand it down to remove the rust and apply a rust-inhibiting primer.
  • Seal the repaired area with a high-quality epoxy coating to prevent further corrosion.
  • Ensure proper ventilation to minimize moisture buildup around the stack.

Blockages

Another common issue with cast iron stacks is blockages. Blockages can occur due to various reasons, such as debris accumulation, calcification, or tree root intrusion. These blockages can disrupt the flow of wastewater and lead to backups and unpleasant odors.

To address blockages in cast iron stacks, here are some possible solutions:

  • Regular maintenance: Schedule regular inspections and cleaning of the stack to prevent blockages from occurring in the first place.
  • Use drain cleaning tools: If you encounter a blockage, you can try using a drain snake or a plunger to dislodge the obstruction. Be cautious not to damage the cast iron stack during the process.
  • Enlist professional help: For stubborn or severe blockages, it is recommended to seek the assistance of a professional plumber who can utilize specialized tools, such as hydro jetting to clear the blockage effectively.

Leaks

Leaks are another common issue that can arise with cast iron stacks. The joints between the cast iron pipes can deteriorate over time, leading to water leaks. These leaks can not only cause water damage but also promote the growth of mold and mildew.

To address leaks in cast iron stacks, consider the following solutions:

  • Inspect the joints: Regularly inspect the joints for any signs of leakage, such as water stains or dampness around the pipe connections.
  • Repair or replace faulty joints: If you identify any leaking joints, you can attempt to repair them using a combination of rubber couplings and epoxy resin. However, if the damage is extensive, it may be necessary to replace the affected sections of the stack.
  • Use sealants: Apply plumber’s putty or a suitable sealant on the joints to provide an extra layer of protection against leaks.
  • Consider alternative materials: If leaks continue to be a persistent issue, you may want to explore the possibility of replacing your cast iron stack with a more modern and durable material, such as PVC or stainless steel.

Noise and Vibration

Noise and vibration from cast iron stacks can be an annoyance for homeowners. These issues can be caused by several factors, including water hammer, inadequate support, or poor installation.

To address noise and vibration in cast iron stacks, try the following solutions:

  • Inspect supports: Check if the stack is adequately supported and secured. Loose or inappropriate supports can contribute to noise and vibration. Ensure that all hangers, brackets, and fasteners are properly tightened.
  • Water hammer arrestor: Install water hammer arrestors near appliances or fixtures that may cause water hammer. Water hammer occurs when the flow of water is suddenly interrupted, leading to pressure waves and vibrations in the plumbing system.
  • Noise reduction fittings: Consider installing noise reduction fittings, such as foam insulation or rubber gaskets, to minimize vibrations and noise transmission.
a sump pump in need of repair.

Sump pump failure can lead to flooding, potentially causing extensive property damage and posing health hazards.

Sump Pump Failure

In homes with basements or low-lying areas, cast iron stacks are often connected to sump pumps to remove groundwater or wastewater. Sump pump failure can lead to flooding, potentially causing extensive property damage and posing health hazards.

To address potential sump pump failure, follow these steps:

  • Regular maintenance: Schedule regular maintenance for your sump pump, including cleaning and testing. This will help ensure that it operates reliably when needed.
  • Alarm system: Install a high-water alarm system that will alert you in case of pump failure or excessive water levels. This will allow you to take action before significant flooding occurs.
  • Professional inspection: Consider having a professional plumber inspect or repair your sump pump system to identify any potential issues and provide recommendations for improvement.

To Conclude

As with any plumbing system, cast iron stacks can experience issues over time. However, by being proactive and addressing these issues promptly, you can minimize the impact on your everyday life and avoid costly repairs. Regular inspections, maintenance, and seeking professional assistance when necessary are key to ensuring the longevity and functionality of your cast iron stack. By implementing the solutions mentioned in this article, you can effectively address common issues and maintain a reliable and robust plumbing system.

Choosing the Right Basement Flood Control System: Key Factors to Consider

Choosing the Right Basement Flood Control System

A basement flood can be a homeowner’s worst nightmare. Not only can it lead to significant property damage, but it can also pose health risks and disrupt your daily life. That’s why it’s crucial to have a reliable basement flood control system in place. With so many options available in the market, choosing the right system can be a daunting task. This article aims to provide you with key factors to consider when selecting a basement flood control system, ensuring that you make an informed decision.

Importance of Basement Flood Control

Before getting into the factors to consider when choosing a basement flood control system, it’s important to understand why flood control is essential for your basement.

A flooded basement can lead to a wide range of issues, including:

  • Structural damage: Excessive water can weaken the foundation of your home, leading to cracks and other structural issues.
  • Mold and mildew growth: Moisture in the basement creates an ideal environment for mold and mildew to thrive, which can negatively impact your indoor air quality and pose health risks.
  • Damage to personal belongings: Basements often serve as storage areas for valuable items. A flood can result in irreparable damage to these possessions.
  • Expense of repairs and renovations: Repairing a flooded basement can be a costly endeavor. In some cases, extensive renovations may be required to restore your basement to its original condition.
installation of a sump pump in a midwest basement.

If you live in an area prone to heavy rainfall or have experienced basement flooding in the past, you may require a more robust flood control system with additional features such as backup power or multiple pumps.

To avoid these potential problems, investing in a basement flood control system is crucial.

Factors to Consider When Choosing a Basement Flood Control System

When selecting a basement flood control system, it’s important to consider several key factors. Here are some of the most important aspects to keep in mind:

1. Type of System

There are various types of basement flood control systems available, each with its own advantages and disadvantages. The most common systems include:

  • Sump Pump System: This system uses a pump to collect and remove water from your basement. It is effective for preventing water accumulation and can be paired with a backup battery installation for your sump pump for added protection during power outages.
  • Flood Sensors and Alarms: These systems use sensors to detect water leaks or high water levels in your basement. When triggered, they sound an alarm to alert you of the potential flood and help you take immediate action.
  • Interior Drainage System: This system involves installing a network of pipes and drains below your basement floor to collect and redirect water away from your home. It is particularly effective in areas with frequent flooding.
  • Exterior Waterproofing: This approach involves applying waterproof coatings and sealants to the exterior walls and foundation of your home to prevent water infiltration. It is often combined with a drainage system for optimal flood control.

2. Level of Protection

Consider the level of protection you need based on your location, climate, and the potential risk of flooding. If you live in an area prone to heavy rainfall or have experienced basement flooding in the past, you may require a more robust flood control system with additional features such as backup power or multiple pumps.

3. Installation Process

Some basement flood control systems require professional installation, while others can be installed by homeowners. Consider your comfort level with DIY projects and your budget for professional services. Additionally, factor in the time required for installation, as some systems may take longer to set up than others.

4. Maintenance Requirements

Regular maintenance is essential to keep your basement flood control system functioning optimally. Consider the ongoing maintenance requirements of the system you are considering, including cleaning, testing, and potential repairs. Choose a system that fits your ability and willingness to perform the necessary maintenance tasks.

5. Cost

Cost is always an important consideration when making any home improvement decision. When comparing different basement flood control systems, consider not only the upfront costs but also the long-term expenses. Some systems may require more frequent maintenance or have higher energy consumption, which can add to the overall cost over time.

6. Reputation and Reviews

Research the reputation of the manufacturers and suppliers of the basement flood control systems you are considering. Read customer reviews and gather feedback from other homeowners who have installed the same systems. This will give you insights into the reliability, performance, and customer satisfaction associated with each system.

In Conclusion

Choosing the right basement flood control system is crucial for protecting your home and belongings from potential water damage. By considering the type of system, level of protection, installation process, maintenance requirements, cost, and reputation, you can make an informed decision that best suits your needs and provides you with peace of mind. Remember, prevention is always better than dealing with the aftermath of a flooded basement.

Winter Plumbing Preparations: Your Complete Checklist for a Stress-Free Season

Winter Plumbing Preparations

Winter is just around the corner, and your mind may be on planning all the fun activities for your holiday season. But while you focus on fun and family, do not forget to spare a thought for your home’s plumbing. Winter is when some of the worst plumbing disasters happen in homes; pipes readily freeze and burst at this time of the year.

Furthermore, Yellow Key Property Management warns it costs more money to fix plumbing emergencies in winter than in other seasons. But you can avoid these winter plumbing problems if you know how to protect your water pipes from the cold. Here are twelve steps to take if you want your plumbing to pass through winter without any unfortunate incidents.

Clear your drains

To avoid complications during winter, it is critical to clear your drains before winter sets in fully. The last week before winter fall is the best time to get rid of all the debris that has accumulated inside the drainpipes throughout summer and fall. A clogged drain is much harder to deal with in winter.

Fix any leaks in your plumbing

Leaking pipes in your plumbing is a problem at any time of the year, but in winter, they pose an even greater danger. That is because leaks are often indicative of weak spots in the pipeline. Leaks can easily result in ruptures if the water inside the pipes freezes.

Take steps to prevent drain clogs

A dirty dishwasher filter can cause drain clogs; clean the filter in your dishwasher. You also want to be extra careful about the things you put inside the garbage disposal. Fibrous and starchy foods, as well as grease in your drains, can cause major problems in winter.

Maintain your sump pump

The chances that a flood will happen in your home during winter are slim. However, with the onset of spring, melting snow can easily flood the basement. That is why you want to be sure that, going into winter, your basement sump pump is in good condition.

Insulate your pipes

The cost of insulating your water pipes is low compared to the cost of fixing a burst pipe, and the damage that burst pipe will do to your home. There are many ways to insulate the exposed water pipes in your home to protect them from the cold of winter.

Check your water heater

To avoid unpleasant surprises, check your water heater before winter. Flush the unit to remove sediment, stop corrosion, and improve efficiency. If you haven’t already done it this year, this may be the right time to have an expert inspect, repair, or replace your water heater tank.

Shut off outdoor faucets

As soon as it starts to get cold, turn off outdoor faucets to keep them from freezing. Shut the faucets from the shutoff valve and open the tap to drain the water inside the pipe. Failing to do this last part, faucets may still freeze and crack, even if shut off.

Store hoses and sprinklers

If you do not protect them from the freezing temperatures, your hose and sprinkler may freeze and crack. To avoid this, after disconnecting the hose and sprinkler, drain all the water out of them before you store them.

Install frost-free sill cocks

Due to its long stem – 6 to 12 inches long – a frost-free sill cock can keep your water pipes from freezing. Because the stem washer and seat valve are inside your home, it keeps cold air from creeping up the pipe. Frost-free sill cocks are an almost failsafe way to prevent frozen pipes.

Turn off the water if it is unused

Water sources in your home that will not be in use during winter pose a threat to your plumbing if you don’t shut them off. That includes faucets in the garage or basement. Ensure the faucets are turned off from the shutoff valve and no water is left inside the pipe.

Leave cabinet doors open

To help the warm air inside your home circulate to colder areas – such as inside the cabinets –keep cabinet doors slightly open. Do this for bathrooms and kitchen cabinets. You can improve air circulation inside the house with a fan or portable heater.

Let faucets drip

Leaving faucets slightly open to allow a trickle of water can help to prevent frozen pipes. The minor but constant flow of water within the pipe ensures that water doesn’t freeze and turn into a burst pipe emergency. It is cheaper to waste water in this way than to repair a burst pipe.

Lastly, given that winter is the worst season for your home’s plumbing, there is no better time than just before the winter to schedule this inspection. Annual plumbing inspections help to maintain the health of your plumbing by letting you detect and deal with preventable issues.

Also, your home can vastly benefit from having a professional plumber inspect your plumbing to recommend the best ways to winterize the system.

8 Plumbing Upgrades for your Bathroom Remodel

Plumbing Upgrades for your Bathroom Remodel

Bathroom updates consistently rank as one of the top improvements desired by home buyers. Buyers will routinely overlook an otherwise attractive home if they find that its bathroom is outdated. That is why Pro X Property Management – Swain Group says it is wise not to ignore your bathroom when doing upgrades to your home.

Why do bathrooms matter so much?

There are many reasons why buyers pay attention to the bathroom. The bathroom is where most people start and end their day. The act of taking a shower is a ritual that helps to put you in the right frame of mind for work or rest. Bathrooms serve as a showcase for your style.

However, not all bathroom upgrades will improve your home’s value to the desired level. All bathroom upgrades should improve the function and aesthetics of your home. But some upgrades do this better than others. What are the top performing bathroom upgrades to consider for your home?

Given that the main function of the bathroom is to ensure personal hygiene and the home’s sanitation, it makes sense to focus on your plumbing when planning upgrades for the bathroom. Improved bathroom plumbing is the foundation of a successful bathroom upgrade.

8 essential plumbing upgrades for your bathroom

Upgrade your bathroom pipes

When doing bathroom upgrades, the focus should not only be on things like faucets, toilets, showers, and sinks. The underlying systems that support them – water pipes and drainpipes – are vital. It doesn’t make sense to add a rainfall showerhead or spa tub to the bathroom (as an example) if your existing pipes cannot perform to the level required by these new installations. Begin the bathroom renovations by updating the size and quality of your water pipes and drain pipes.

Hide or disguise your plumbing lines

Visible piping in the bathroom makes the space ugly. You don’t want the pipes attached to bathroom fittings and appliances to be easily visible. Leaving the pipes naked will only diminish the overall aesthetics of your bathroom, regardless of the quality of the installed fixtures. There are many ways to hide the pipes in your bathroom; you may paint or decorate them, and you can also hide them inside storage units or within the bathroom walls.

Rainfall showerhead

a bathroom with a rainfall showerhead.

In addition to boosting the appearance of your shower, a rainfall showerhead upgrade makes shower times more enjoyable.

A rainfall showerhead is a luxurious but affordable upgrade. In addition to boosting the appearance of your shower, this upgrade makes shower times more enjoyable. But before you install this feature, ensure that your water heater can keep up with the increased demand. Another option for upgrading the shower is to install multiple showerheads. These are more versatile than rainfall showerheads; they typically include a standard showerhead, handheld wand, and body sprays.

Install a dual-flush toilet

Dual flush toilets offer more control over the home’s water usage than standard toilets. Depending on what you are trying to flush, you can use the low-flow or high-flow option. Instead of a low-flow toilet that locks you into a single flush mode, dual flush toilets give you options. Installing a dual-flow toilet gives you the best of two worlds; you can conserve water and retain access to the high-flush mode.

Replace your bathroom faucets

Faucets are one of the first things people see when they enter your bathroom. Faucets are more than mere plumbing fixtures; they play a role as decorative accessories in your bathroom. When replacing bathroom faucets, keep function and aesthetics well in mind. New bathroom faucets can help to reduce utility bills by conserving water and preventing leaks.

Add a curbless shower

Curbless showers do not have a ledge that you have to step over when entering the shower. This feature makes them a great choice for people with mobility issues. Adding this upgrade to your bathroom will make your home more attractive to a larger section of the market. Also, the seamless appearance of the shower and accompanying glass enclosure add style to your bathroom.

Include a freestanding bathtub

a bathroom with a freestanding bathtub.

Standalone tubs create the illusions of space. They offer easy access from all sides and are great for romantic evenings with your partner.

You want to have at least one bathtub in the home. Bathtubs are a big selling point for families with small children; a great time saver when you want to bathe all the kids at once. You can amplify the appeal of the bathtub by making it a standalone tub. Standalone tubs create the illusions of space. They offer easy access from all sides and are great for romantic evenings with your partner.

Install a tankless water heater

Traditional water heaters use more energy than tankless water heaters because they heat water continuously. A traditional water heater often has to reheat already heated water. You can solve this problem by installing a tankless water heater. However, depending on your home’s water usage, a single tankless water heater may not be enough for the household. It is often a good idea to install a dedicated tankless water heater for the bathroom.

Which of these eight bathroom upgrades makes the most sense for your home?

The answer depends on the needs of your home and what buyers in your area want the most. Before you begin your bathroom upgrade it is a good idea to sit down and speak with a professional bathroom plumbing specialist to assess the projected benefits of each of these eight options.