Blog

Identifying Water Leaks in Your Bathroom: Key Indicators

Identifying Water Leaks in Your Bathroom

Water leaks in your bathroom can lead to a series of costly problems if not detected early. From mildew and mold growth to structural damage, the consequences can be severe. By identifying the key indicators of a water leak early, you can take proactive measures to mitigate the risks and save on potentially expensive repairs.

Inspecting Visible Pipework and Fixtures

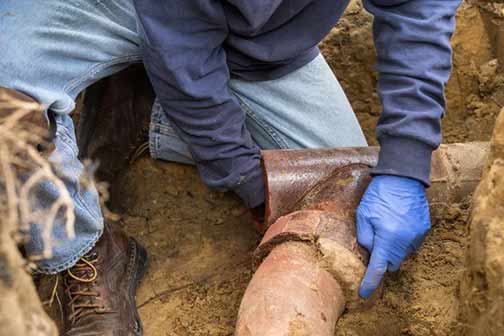
One of the primary steps in identifying water leaks in your bathroom is to inspect all visible pipework and fixtures. Pay close attention to the areas around faucets, showerheads, and under sinks. Look for any signs of moisture, discoloration, or corrosion on the pipes and the surrounding areas. Even a minor drip or dampness can be an early indicator of a leak.

Monitoring Water Bills for Unusual Spikes

Keep an eye on your water bills for any unusual spikes or increases in usage that cannot be accounted for. A sudden rise in water consumption without a corresponding change in your household activities could indicate a hidden leak in your bathroom. Regularly reviewing your bills can help you spot potential problems early.

Recognizing Signs of Mold and Mildew

Mold and mildew thrive in damp environments, making your bathroom a prime location for their growth if there is a leak. Check for any musty odors, as well as visible signs of mold and mildew on walls, ceilings, or tiles. Black, green, or brown spots on these surfaces can be a clear indication of excessive moisture due to a water leak.

Examining Tile and Grout Conditions

The condition of your bathroom tiles and grout can also provide important clues about potential water leaks. Loose or cracked tiles, as well as deteriorating grout, can allow water to seep into underlying structures. This can lead to hidden leaks and water damage over time. Regularly inspect these areas and address any issues promptly.

Checking for Water Stains and Discoloration

Water stains and discoloration on your bathroom walls, ceilings, and floors are clear signs of a water leak. Look for yellow, brown, or copper-colored stains, as these can indicate prolonged water exposure. Such stains often appear in corners, near plumbing fixtures, or along the edges of surfaces.

Testing for Soft or Warped Flooring

Soft or warped flooring in your bathroom can signal a water leak. Water damage can cause wooden subfloors to swell, leading to an uneven or spongy feel underfoot. If you notice any areas of your bathroom floor that are soft, warped, or discolored, investigate further to determine if there is a leak.

Listening for Unusual Sounds

Sounds can also be a helpful clue in identifying water leaks. Listen for the sound of running water when no fixtures are turned on. Additionally, dripping or gurgling noises from behind walls or under floors can indicate a hidden leak. Being attentive to such sounds can prompt an early investigation.

Utilizing Water Leak Detection Devices

Advanced technology has introduced various water leak detection devices that can assist homeowners in identifying leaks. These devices can be installed in your bathroom and will alert you to any abnormal water flow or moisture levels. Investing in such technology can provide peace of mind and prevent extensive damage.

a plumber performing an inspection.

Regular plumbing inspections can help ensure that your bathroom remains leak-free and in good condition.

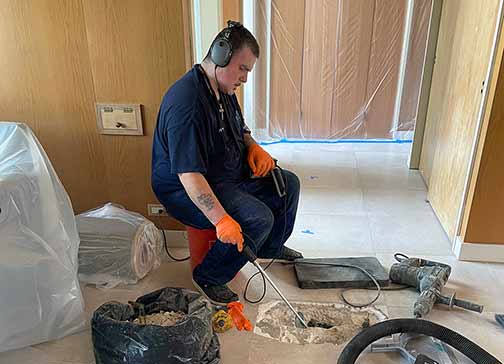
Professional Plumbing Inspections

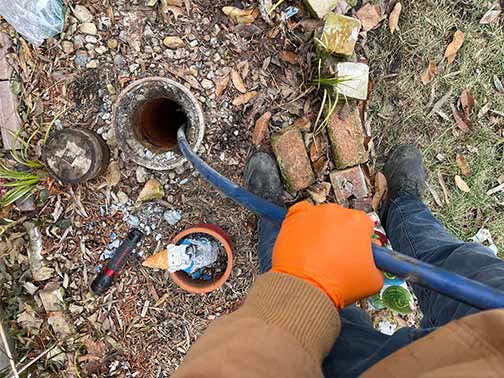
For a thorough and comprehensive assessment, consider hiring a professional plumber to detect for any leaks in your bathroom. Professionals have the experience and tools needed to identify even the most obscure leaks. Regular plumbing inspections can help ensure that your bathroom remains leak-free and in good condition.

Taking Immediate Action

If you do identify a water leak in your bathroom, it is crucial to take immediate action. Turn off the water supply to the affected area and contact a plumber for repairs. Delaying repairs can lead to further damage and increased costs. Addressing the issue promptly will minimize the impact on your home and finances.

Preventive Measures to Avoid Future Leaks

Taking preventive measures can help reduce the risk of future water leaks in your bathroom. Regular maintenance, such as re-caulking seals, checking pipe connections, and keeping an eye on water pressure, can go a long way in preventing leaks. Additionally, installing water-resistant materials and proper ventilation can help maintain a dry and leak-free bathroom environment.

Understanding the Long Term Benefits

Identifying and addressing water leaks in your bathroom not only protects your property but also contributes to better overall health and safety. By preventing mold growth and structural damage, you ensure a healthier living environment. Additionally, addressing leaks promptly preserves the value of your home and can save you money in the long term.

Conclusion: The Importance of Vigilance

Being vigilant and proactive in identifying water leaks in your bathroom is essential for maintaining your home’s integrity and safety. By following the guidelines outlined above, you can detect leaks early and take appropriate action to prevent further damage. Regular inspections, prompt repairs, and preventive measures are key to ensuring a leak free bathroom and peace of mind for homeowners.

Is It Safe to Dispose of Coffee Grounds in the Sink?

Is It Safe to Dispose of Coffee Grounds in the Sink

Coffee grounds can be deceptively problematic when disposed of down the kitchen sink, despite appearing harmless. Being mindful of the consequences associated with this practice can save homeowners time, money, and the frustration of plumbing repairs. The primary issues that arise from disposing of coffee grounds in the sink include clogging, damage to plumbing systems, and environmental concerns.

Clogging and Plumbing Damage

One of the most immediate and noticeable issues caused by disposing of coffee grounds in the sink is clogging. Coffee grounds do not dissolve in water; instead, they clump together and settle in pipes. Over time, these clumps can accumulate, leading to blockages that restrict water flow and can cause backups in the sink.

Furthermore, when coffee grounds combine with other substances like grease, oils, and food particles, they can create a more stubborn and difficult to remove clog. These clogs may eventually necessitate the intervention of a professional plumber, which can be costly.

Repeated exposure to coffee grounds can also lead to gradual damage to pipes. The abrasive nature of the grounds can wear away at the interior surfaces of pipes, especially if they are made of older materials like cast iron. Modern plumbing systems are designed to handle a wide range of substances, but the consistent disposal of coffee grounds can still pose a risk over time.

Environmental Concerns

The environmental impact of disposing of coffee grounds in the sink should not be overlooked. When coffee grounds enter the sewage system, they contribute to the overall burden on wastewater treatment facilities. These facilities must filter out solid materials like coffee grounds before treating the water.

Moreover, improperly managed wastewater that contains coffee grounds can eventually make its way into natural water bodies, potentially harming aquatic ecosystems. Nutrient rich organic materials such as coffee grounds can contribute to the growth of algae, which can disrupt the balance of aquatic environments and lead to issues such as oxygen depletion and harm to fish and other marine life.

composting coffee grounds is an alternative to putting in sink drains.

One of the best methods for disposing of coffee grounds is composting. Coffee grounds are rich in nitrogen, making them an excellent addition to compost piles.

Best Practices for Disposing of Coffee Grounds

To avoid the potential problems associated with disposing of coffee grounds in the sink, several alternative disposal methods can be employed. These methods are not only environmentally friendly but also practical and beneficial for homeowners and gardeners alike.

Composting Coffee Grounds

One of the best methods for disposing of coffee grounds is composting. Coffee grounds are rich in nitrogen, making them an excellent addition to compost piles. When used in compost, they help to create nutrient rich soil that can be used to nourish plants and gardens. Additionally, composting coffee grounds helps to reduce the amount of waste that ends up in landfills.

When composting coffee grounds, it is important to balance them with other compostable materials such as leaves, grass clippings, and kitchen scraps. This balance ensures that the compost remains healthy and breaks down effectively.

Using Coffee Grounds as Fertilizer

Coffee grounds can also be used directly as a fertilizer for plants. Many plants, including roses, tomatoes, and hydrangeas, can benefit from the nutrients found in coffee grounds. Sprinkling used coffee grounds around the base of plants can help improve soil structure, retain moisture, and deter pests.

When using coffee grounds as fertilizer, it is essential to use them in moderation. Too much coffee grounds can create an overly acidic environment, which may be harmful to some plants. Mixing coffee grounds with other soil amendments or compost can help mitigate this issue.

Crafting with Coffee Grounds

For those with creative inclinations, used coffee grounds can be repurposed in various craft and DIY projects. Coffee grounds can be used as a natural exfoliant in homemade soaps and scrubs. They can also be used as a natural dye for fabrics and paper, giving them a unique, rustic appearance.

In addition, coffee grounds can serve as an effective deodorizer. Placing dried coffee grounds in a small container or sachet can help absorb unwanted odors in refrigerators, closets, or cars. This practical use not only provides a second life for the coffee grounds but also offers a natural alternative to commercial deodorizers.

Summing it Up

Disposing of coffee grounds in the sink may seem convenient, but it can lead to significant plumbing issues and environmental concerns. By exploring alternative disposal methods such as composting, using coffee grounds as fertilizer, or incorporating them into creative projects, homeowners can mitigate these risks and enjoy the benefits of a more sustainable lifestyle. Embracing these practices not only protects plumbing systems but also contributes positively to the environment and offers practical advantages in daily life.

Plumbing Inspection Checklist for Chicago Homeowners

Plumbing Inspection Checklist for Chicago Homeowners

If you’re considering purchasing a new home or need to assess the condition of your existing plumbing system, you’ve come to the right place. Here we will provide you with a comprehensive plumbing inspection checklist designed specifically for Chicago homes. By following this checklist, you can ensure that your plumbing system is in good shape and avoid potential plumbing issues down the line.

Why is a Plumbing Inspection Important?

Before we get into the checklist, let’s briefly discuss the importance of conducting regular plumbing inspections. Your home’s plumbing system is a complex network of pipes, fixtures, and fittings that require regular maintenance to function optimally. By performing routine inspections, you can identify and address any potential problems early on, preventing costly repairs and water damage. Additionally, if you’re considering purchasing a new property, a thorough plumbing inspection can help you make an informed decision and negotiate the price accordingly.

Plumbing Inspection Checklist

Check for Visible Leaks

The first step in your plumbing inspection is to look for any visible leaks around your home. Check all faucets, toilets, and exposed pipes for signs of dripping or pooling water. Remember to inspect both the interior and exterior areas of your property, as leaks can occur anywhere.

Inspect Water Pressure

Next, check the water pressure in your home. Low water pressure may indicate a clogged or malfunctioning pipe, while high water pressure can lead to stress on your plumbing system and potential leaks. You can use a pressure gauge to measure the water pressure at different faucets throughout your home.

Test Drains

Ensure that all drains in your home are functioning properly. Test each drain individually by running water and observing the speed of drainage. Slow or clogged drains may indicate a problem further down the line, such as a blocked sewer line in need of cleaning.

Inspect Toilet Functionality

Check each toilet in your home for proper functionality. Flush each toilet and observe if it operates smoothly without any clogging or unusual sounds. Additionally, inspect the toilet tanks and bowls for any cracks or leaks.

Examine Water Heater

Inspect your water heater for any signs of corrosion, leaks, or malfunctioning components. Check the temperature and pressure relief valve, drain the sediment from the tank if necessary, and ensure the burner or heating element is in good condition.

Assess Pipe Condition

Inspect all visible pipes in your home for signs of corrosion, rust, or damage. Pay extra attention to pipes located in the basement, crawl spaces, or exposed areas. Additionally, check the pipe connections for any signs of leaks or loose fittings.

Test Sump Pump

If your property has a sump pump, it’s crucial to ensure it is functioning properly. Test the sump pump by pouring water into the sump pit and observing if it activates and pumps the water out. Make sure the discharge pipe is free from clogs or obstructions.

Check for Water Meter Leak

To determine if you have a water meter leak, turn off all faucets and water-consuming appliances in your home. Take note of the reading on your water meter and check it again after a few hours. If the reading has changed, it may indicate a hidden leak in your plumbing system.

Inspect Outdoor Plumbing

Don’t forget to inspect your outdoor plumbing fixtures as well. Check outdoor faucets, sprinkler systems, and irrigation lines for leaks or damaged components. Ensure that all outdoor pipes are adequately insulated to prevent freezing during harsh Chicago winters.

Consider a Professional Inspection

While this checklist can help you perform a preliminary plumbing inspection, it’s always a good idea to consider hiring a professional plumber for a more in-depth assessment. Professional plumbers have the expertise and specialized tools to identify potential issues that may not be apparent to the untrained eye.

In Conclusion

By following this plumbing inspection checklist, you can stay proactive in maintaining the integrity of your Chicago home’s plumbing system. Regular inspections can save you money in the long run by catching problems early and avoiding extensive repairs. Remember, if you’re unsure about any aspect of your plumbing inspection or encounter any issues, don’t hesitate to reach out to a licensed plumber for assistance.

What To Know Before Replacing Water Lines in Your Chicago Home

What To Know Before Replacing Water Lines in Your Chicago Home

Replacing water lines in your Chicago home can be a significant undertaking, but it is often necessary to ensure the efficiency and safety of your plumbing system. If you are dealing with old pipes that have deteriorated over time or you want to upgrade to more modern and durable materials, understanding what to know before starting the project is crucial. Below we will guide you through the essential considerations to keep in mind when replacing water lines in your Chicago home, providing you with the knowledge to make informed decisions and ensure a successful outcome.

Assessing the Need for Water Line Replacement

Before deciding to replace your water lines, it is essential to assess the need for replacement. Several signs can indicate potential issues with your current pipes, including:

  • Low water pressure
  • Frequent leaks
  • Discolored water
  • Strange odors

If you observe any of these signs, it is crucial to speak with a professional plumber to determine if a replacement is necessary. They will be able to assess the condition of your water lines and provide expert advice on the best course of action.

Understand the Different Types of Water Pipes

When replacing water lines in your Chicago home, it is important to understand the different types of water pipes available. The common options include:

  • Copper pipes: Copper has been a popular choice for water lines due to its durability and resistance to corrosion. However, it can be more expensive than other options.
  • PEX pipes: Cross-linked polyethylene (PEX) pipes have gained popularity in recent years due to their flexibility, affordability, and ease of installation. PEX pipes are also resistant to freezing and bursting.
  • Galvanized pipes: Galvanized pipes were commonly used in older homes but have fallen out of favor due to their susceptibility to deterioration and reduced water flow over time.

Understanding the pros and cons of each type will help you make an informed decision based on your budget, preferences, and the specific needs of your home.

Consider the Impact on Water Quality

When replacing your water lines, it is essential to consider the impact on water quality. Different materials can have varying effects on the taste, odor, and overall quality of your water supply.

If you have concerns about water quality, especially if you’ve experienced issues in the past, you may consider installing a water filtration system or consulting with a water quality professional. They can recommend appropriate measures to ensure clean and safe drinking water.

Obtain the Necessary Permits

Before starting any water line replacement project, it is essential to obtain the necessary permits from the local authorities. Chicago, like many other cities, requires permits for plumbing work to ensure compliance with building codes and regulations.

Working without the proper permits can result in hefty fines and potential legal complications. Hiring a licensed plumber will typically ensure that they take care of the permitting process on your behalf, giving you peace of mind.

a water line replacement taking place in chicago.

By selecting a reputable and experienced plumber, you can have confidence in the quality of their workmanship and the longevity of your new water lines.

Hire a Professional Plumber

Replacing water lines is a complex task that requires the expertise of a professional plumber. While it may be tempting to take on the project yourself to save money, hiring a professional is strongly recommended.

A licensed plumber will have the necessary knowledge and experience to handle the job safely and efficiently. They will also be familiar with local plumbing codes and regulations, ensuring that the installation is up to standard.

When choosing a plumber, it is important to:

  • Do thorough research and read customer reviews
  • Verify their licensure and insurance
  • Request multiple quotes to compare prices
  • Ask about warranties or guarantees on their work

By selecting a reputable and experienced plumber, you can have confidence in the quality of their workmanship and the longevity of your new water lines.

Plan for Disruption and Restoration

Replacing water lines in your Chicago home can cause some temporary disruption to your daily routines. It is important to plan for this and make necessary arrangements to minimize inconvenience.

Discuss the project timeline with your plumber, including estimated start and completion dates. This will allow you to make any necessary preparations, such as arranging alternative water sources or adjusting your schedule accordingly.

Additionally, it is crucial to discuss the restoration process with your plumber. Will they be responsible for repairing any damages caused during the installation? Will landscaping or other areas of your home be affected? Clarifying these details in advance will help ensure a smooth and hassle free experience.

Budgeting for the Project

Replacing water lines is an investment in the long term functionality and value of your Chicago home. It is essential to budget for the project accordingly to avoid any financial surprises.

When preparing your budget, consider the following expenses:

  • The cost of materials
  • Professional labor fees
  • Permit fees
  • Any additional plumbing upgrades or improvements

Obtaining multiple quotes from different plumbers will help you get a clearer idea of the overall costs involved. Keep in mind that while it may be tempting to opt for the lowest price, the quality of work and materials should be your top priority.

Maintain Regular Plumbing Inspections

Once your water lines have been replaced, it is crucial to prioritize regular plumbing inspections and maintenance. By identifying and addressing potential issues early on, you can prevent costly repairs and ensure the longevity of your plumbing system.

Schedule periodic inspections with a professional plumber who can assess the condition of your pipes, identify any leaks or vulnerabilities, and perform necessary maintenance tasks. Additionally, practicing proactive measures such as avoiding harsh chemicals and being mindful of what goes down your drains can help prevent future plumbing problems.

Wrapping It Up

Replacing water lines in your Chicago home is a significant undertaking that requires careful consideration and planning. By assessing the need for replacement, understanding different pipe materials, considering water quality, obtaining permits, hiring a professional plumber, planning for disruptions, budgeting appropriately, and prioritizing regular maintenance, you can ensure a successful water line replacement project.

Remember, when it comes to your home’s plumbing system, investing in quality materials and workmanship is crucial for long term efficiency and peace of mind.

Why You Should Avoid Plumbers Offering Cheap Services in Chicago

Why You Should Avoid Plumbers Offering Cheap Services in Chicago

When it comes to plumbing issues in your home or business, it’s important to find a reliable and trustworthy plumber to handle the job. While it may be tempting to choose a plumber offering cheap services, especially in a city like Chicago where expenses can quickly add up, it’s crucial to consider the potential risks and consequences of such a decision. Below we will discuss why you should avoid plumbers offering cheap services in Chicago and the importance of prioritizing quality and professionalism when hiring a plumber.

The Dangers of Hiring Cheap Plumbers

While cost is certainly an important factor to consider when hiring a plumber, opting for the cheapest option can often lead to more problems and expenses in the long run. Here are some of the dangers associated with hiring plumbers offering cheap services:

Lack of Experience and Expertise

Cheap plumbers often cut corners by hiring inexperienced or underqualified technicians to keep their costs low. This can result in subpar workmanship and potential damage to your plumbing system. Experienced plumbers have the necessary skills and knowledge to accurately diagnose and fix plumbing issues, ensuring that the job is done right the first time.

Low-Quality Materials

In order to offer cheap services, some plumbers may use low-quality materials that are prone to early deterioration or failure. These materials may not meet industry standards and can lead to leaks, clogs, and other plumbing problems. Investing in high-quality materials may be more expensive upfront, but it will save you money in the long run by preventing the need for frequent repairs or replacements.

Hidden Costs and Upcharges

Some plumbers advertise low prices to attract customers, only to add hidden costs and upcharges once they are on the job. This bait-and-switch tactic can leave you with an unexpectedly high bill at the end of the service. Reliable plumbers provide transparent pricing and clearly outline all the costs involved upfront, ensuring that you are not blindsided by additional charges.

Unlicensed and Uninsured

Plumbers offering cheap services may not always be licensed or insured. Hiring an unlicensed plumber puts you at risk as they may not have the necessary qualifications or legal requirements to perform the work. In the event of any accidents or property damage, an uninsured plumber will not provide the necessary coverage, leaving you financially responsible.

a professional plumber in chicago making repairs.

Professional plumbers have the experience and expertise necessary to provide efficient and reliable solutions to your plumbing issues. They can quickly diagnose the problem, offer effective solutions, and complete the repairs or installations in a timely manner.

Why Quality and Professionalism Matter

Now that you understand the potential dangers of hiring cheap plumbers, let’s explore why prioritizing quality and professionalism is essential when it comes to plumbing services:

Longevity and Durability

Investing in quality plumbing services ensures that the repairs or installations performed will stand the test of time. Quality workmanship and materials contribute to the longevity and durability of your plumbing system, reducing the likelihood of frequent breakdowns and costly repairs in the future.

Efficient and Reliable Solutions

Professional plumbers have the experience and expertise necessary to provide efficient and reliable solutions to your plumbing issues. They can quickly diagnose the problem, offer effective solutions, and complete the repairs or installations in a timely manner. This saves you both time and money in the long run.

Safety and Compliance

Qualified plumbers prioritize safety and ensure that all work is carried out in compliance with relevant building codes and regulations. This not only protects you and your property but also ensures that the plumbing work meets the required standards. Safety should always be a top priority when dealing with plumbing systems.

Peace of Mind

Hiring a reputable and professional plumber provides peace of mind. You can trust that the job will be done correctly, and in case of any issues, the plumber will take responsibility and rectify them. Professional plumbers also offer warranties on their work, giving you further assurance that you are receiving high quality service.

Choosing the Right Plumber in Chicago

When selecting a plumber in Chicago, it’s important to consider the following factors:

Credentials and Licenses

Ensure that the plumber you choose is licensed, insured, and has the necessary credentials to perform plumbing work. This ensures that you are hiring a qualified professional with the required expertise.

Reputation and Reviews

Do thorough research and read reviews about different plumbers in Chicago. Check their reputation and customer feedback to get an idea of the quality of their work and customer service.

Transparent Pricing

Avoid plumbers who provide vague or unclear pricing information. Look for plumbers who offer transparent pricing, providing a detailed breakdown of all costs involved before starting the work.

Quality Assurance

Inquire about the warranty or guarantee offered by the plumber. A reputable plumber will stand behind their work and offer a warranty period to address any issues that may arise after the service.

While cheap plumbing services may seem alluring, they often come with hidden risks and potential long-term expenses. Opting for quality and professionalism when hiring a plumber ensures that your plumbing issues are addressed effectively and reliably. Take the time to research and choose a reputable plumber in Chicago who provides transparent pricing, has the necessary licenses and credentials, and prioritizes customer satisfaction. Investing in high quality plumbing services will save you both time and money in the long run, and most importantly, give you the peace of mind that your plumbing system is in capable hands.

Addressing Poor Outdoor Drainage Issues During Summer

Addressing Poor Outdoor Drainage Issues During Summer

If you’re fed up with the annoying and potentially damaging effects of improper outdoor drainage, you’ve come to the right place. Below we will explore various causes of poor drainage, practical solutions, and preventive measures to ensure a dry and enjoyable outdoor space throughout the summer.

The Importance of Proper Outdoor Drainage

To fully understand why addressing poor outdoor drainage is crucial, we need to grasp the potential consequences of water accumulation on our properties. The effects of inadequate drainage can range from mild inconvenience to severe damage, both to our landscapes and even to our homes. Here are some key reasons why proper outdoor drainage is essential:

  • Prevents water pooling: When water doesn’t drain properly, it forms pools or puddles that can lead to slippery surfaces and make our outdoor areas unusable.
  • Protects plant health: Excess water can drown plants’ roots, leading to the demise of your beautiful garden or landscaping. Adequate drainage helps maintain proper moisture levels for healthy plant growth.
  • Prevents soil erosion: Poor drainage can cause soil erosion, washing away precious topsoil and destabilizing the foundation of your property.
  • Avoids structural damage: If water finds its way into your home’s foundation, it can cause cracks, mold growth, and other structural issues. This can be a costly problem to fix.
  • Controls basement flooding: For properties with basements, improper outdoor drainage can lead to water seepage, dampness, and even flooding, posing a threat to your belongings and the structural integrity of your home.

Now that we’ve established the importance of addressing poor drainage issues, let’s explore common causes and effective solutions.

Identifying the Causes of Poor Drainage

Before we get into the solutions, it’s important to identify the root causes of poor outdoor drainage. By understanding the underlying issues, we can implement targeted solutions that will effectively address the problem. Here are some common causes to consider:

  • Insufficient slope: Inadequate slope or grading is one of the leading causes of poor drainage. If your property doesn’t have enough slope, water will naturally accumulate in low-lying areas.
  • Compacted soil: Soil compaction restricts water absorption and drainage. This is often a result of heavy foot traffic or improper landscaping practices.
  • Clogged or inadequate gutter systems: Gutters and downspouts play a vital role in redirecting water away from your property. If they are clogged with debris or too small to handle the water volume, drainage problems can arise.
  • Improperly installed or damaged drainage systems: If your property has an existing drainage system, it may be poorly installed or damaged, hindering its effectiveness.
  • Insufficient or damaged drainpipes: Drainpipes that are too small or damaged can impede water flow, leading to excess moisture build-up.
  • Localized soil saturation: Areas with high water tables or heavy clay soil can struggle with drainage issues as water fails to permeate the soil properly.

Now that we have a better understanding of the potential causes, let’s explore some practical solutions to address poor outdoor drainage issues.

a home having french drains installed.

French drains are a popular and effective solution for redirecting water away from areas prone to pooling.

Solutions for Poor Outdoor Drainage

When it comes to addressing poor outdoor drainage, several effective solutions can help alleviate the problem. The appropriate solution will depend on the specific causes identified on your property. Consider the following remedies:

  • Grading and re-sloping: If your property has insufficient slope or uneven grading, regrading the landscape can promote proper water drainage. This involves reshaping the soil to create a gentle slope directing water away from your home.
  • Adding French drains: A French drain installation is a popular and effective solution for redirecting water away from areas prone to pooling. These underground trenches filled with gravel and perforated pipes help catch and divert water to a more desirable location.
  • Installing catch basins: Catch basins are another practical solution for managing excess water. They collect water from surface runoff and direct it into the drainage system, preventing pooling and soil erosion.
  • Repairing or extending gutter systems: Ensure your gutters and downspouts are free from debris and securely attached to your property. Consider extending downspouts to divert water further away from your home’s foundation.
  • Resolving soil compaction: Aerating and loosening compacted soil can improve its ability to absorb and drain water. This can be achieved through core aeration or incorporating organic matter into the soil.
  • Repairing or upgrading sewer lines: If your sewer lines are damaged or too small to handle water flow, it may be necessary to repair or upgrade them. Speak with a professional to ensure proper sewer line replacement.

By implementing these solutions, you can significantly improve your outdoor drainage and mitigate potential problems caused by water accumulation.

Preventive Measures for Future Drainage Issues

Addressing poor outdoor drainage isn’t just about solving existing problems—it’s also about preventing them from recurring. Here are some preventive measures to keep your outdoor space dry and free from drainage issues in the future:

  • Direct downspouts away: Ensure downspouts extend at least six feet away from your home’s foundation to prevent water from seeping into the basement.
  • Landscaping with proper grading: When planning new landscaping features, consider the natural slope of your property and incorporate elements that promote proper drainage.
  • Choose water-friendly plants: Opt for plants that thrive in moist conditions and have deep root systems to absorb excess water.
  • Regularly inspect drainage systems: Periodically check your drainage systems for any signs of damage or blockages. Address issues promptly with a professional drain cleaning service if needed.
  • Monitor irrigation practices: Avoid overwatering your lawn or garden, as excessive irrigation can contribute to poor outdoor drainage.

By implementing these preventive measures and staying proactive, you can significantly reduce the likelihood of future drainage problems and enjoy a dry and functional outdoor space.

Wrapping it Up

You are now equipped with the knowledge to tackle poor outdoor drainage issues during the summer months. By understanding the causes, implementing appropriate solutions, and taking preventive measures, you can ensure a dry and enjoyable outdoor space for years to come. Remember, proper outdoor drainage not only enhances the aesthetic appeal of your property but also protects it from potential damage. So roll up your sleeves, put these tips into action, and bid farewell to those pesky drainage problems!

Basement Flooding and How to Prevent it From Happening

Basement Flooding and How to Prevent it From Happening

Basement flooding can be a homeowner’s worst nightmare. It not only causes significant damage to the property but also poses health risks and can be a hassle to clean up. Understanding the causes of basement flooding is essential to prevent it from happening in the first place. Here we will explore the common causes of basement flooding and provide effective strategies to avoid this costly and frustrating ordeal.

The Devastating Effects of Basement Flooding

Basement flooding can have severe consequences for both the structure and residents of a home. Excessive water accumulation in the basement can lead to:

  • Structural damage: Water can weaken the foundation, compromise the structural integrity of the building, and result in costly repairs.
  • Mold and mildew growth: Excess moisture promotes the growth of mold and mildew, which can damage furniture, walls, and contribute to respiratory issues.
  • Electrical hazards: Flooding can damage electrical systems, increasing the risk of electrical shock or fire.
  • Property damage: Basement flooding can ruin personal belongings, such as furniture, carpets, appliances, and valuable items.
  • Health risks: Exposure to mold and contaminants in floodwater can pose significant health risks, including respiratory problems and allergic reactions.

Common Causes of Basement Flooding

Basement flooding can result from various factors. Understanding these causes can help homeowners take proactive measures to prevent flooding. The following are some common reasons for basement flooding:

Inadequate Waterproofing

Poor waterproofing is one of the leading causes of basement flooding. If the foundation walls or floors have cracks or gaps, water can seep through during heavy rain or when the groundwater level rises. Insufficient waterproofing measures can allow water to infiltrate the basement, leading to flooding.

Poor Drainage System

A faulty or inadequate drainage system can contribute to basement flooding. If the gutters and downspouts are clogged or not properly directing water away from the foundation, it can accumulate near the basement walls. Over time, the pressure from the water can cause seepage and flooding.

Sump Pump Failure

A sump pump is a vital component of a basement’s waterproofing system. It efficiently removes excess water from the sump pit and prevents rising groundwater from flooding the basement. However, if the sump pump fails due to power outages, mechanical issues, or improper maintenance, it can leave the basement vulnerable to flooding.

Plumbing Issues

Leaking or burst pipe emergencies can quickly lead to basement flooding. Whether it’s a faulty plumbing installation, aging pipes, or extreme weather conditions, any water leakage in the plumbing system can cause significant damage and result in a flooded basement.

a french drain to help prevent basement flooding.

In some cases, homeowners may need to implement exterior drainage solutions, such as French drains or curtain drains. These systems can redirect water away from the foundation, minimizing the risk of basement flooding.

Preventing Basement Flooding

Fortunately, there are several proactive measures homeowners can take to prevent basement flooding. By addressing the root causes and implementing preventative strategies, the risk of basement flooding can be significantly reduced. Here are some effective tips to prevent basement flooding:

Ensure Proper Exterior Grading

Proper exterior grading is crucial to keep water away from the foundation. The ground should slope away from the house, directing water towards the yard or a drainage system. This prevents water from accumulating near the basement walls and reduces the risk of seepage and flooding.

Maintain a Functional Gutter System

Regularly clean and maintain gutters and downspouts to ensure proper water drainage. Remove leaves, debris, and any blockages that can hinder the flow of water. Consider installing gutter guards to prevent clogs and direct water away from the foundation. Extend downspouts at least five feet away from the house to prevent water from pooling near the basement.

Invest in Proper Basement Waterproofing

Consult with a professional contractor experienced in basement waterproofing to assess your home’s unique requirements. Proper waterproofing techniques, such as sealing cracks, installing interior or exterior drainage systems, and applying waterproof coatings, can mitigate the risk of basement flooding.

Maintain and Test Your Sump Pump

Regularly inspect and maintain your sump pump to ensure it is in proper working condition. Test the pump periodically to verify that it activates when water enters the sump pit. Consider installing a sump pump battery backup system to ensure the pump functions even during power outages.

Install a Water Alarm

A water alarm is an inexpensive device that can provide early detection of water accumulation in your basement. It alerts homeowners through a loud sound or notification, allowing them to address the issue promptly and prevent extensive damage.

Inspect and Maintain Plumbing Pipelines

Regularly inspect your plumbing system for any leaks, cracks, or potential issues. Pay attention to areas such as laundry rooms, bathrooms, and kitchens. Replace worn-out pipes, repair leaks, and ensure proper insulation to prevent pipe bursts and subsequent basement flooding.

Consider Exterior Drainage Solutions

In some cases, homeowners may need to implement exterior drainage solutions, such as a French drain installation or curtain drain installation. These systems can redirect water away from the foundation, minimizing the risk of basement flooding.

Basement flooding can cause significant damage to homes and pose health risks to occupants. Understanding the common causes of basement flooding and implementing preventative measures is essential to safeguard your property. By ensuring proper exterior grading, maintaining a functional gutter system, investing in basement waterproofing, and regularly inspecting and maintaining your sump pump and plumbing system, you can greatly reduce the risk of basement flooding. Take the necessary steps to protect your home and avoid the costly and stressful consequences of basement flooding.

High Water Bills With No Visible Leaks

High Water Bills With No Visible Leaks

Water bills can be a major source of concern for homeowners, especially when they suddenly spike without any apparent reason. One common issue that many homeowners face is receiving high water bills despite not having any visible leaks in their plumbing system. This can be frustrating and perplexing, as it seems like there’s no logical explanation for the increased water usage. Here we will get into the possible causes of high water bills with no visible leaks and provide some solutions to help resolve this issue.

Potential Causes

When faced with a high water bill, the first instinct is to search for leaks. However, it’s not uncommon for the leaks to be hidden or have no visible signs. In such cases, it’s essential to consider other factors that could contribute to the increased water usage:

Faulty Meter

Water meters are the primary tool for measuring water consumption in households. However, like any other mechanical device, they can experience faults or inaccuracies. A malfunctioning meter may provide incorrect readings, leading to higher than normal water bills. It’s worth contacting your water utility company to have your meter tested or replaced if you suspect it to be faulty.

Seasonal Changes

Seasonal variations in water usage can have a significant impact on your bills. For example, during hot summer months, families tend to use more water for outdoor activities, such as filling up pools or watering gardens. This increased usage might not be immediately noticeable but can result in higher bills. By monitoring your water consumption patterns throughout the year, you can identify any seasonal changes that may contribute to the spike in your bills.

Increased Occupancy or Lifestyle Changes

Changes in occupancy or lifestyle can also lead to higher water usage. If you’ve had guests staying over, your water consumption is likely to increase. Additionally, adopting new habits like more frequent showers, running dishwashers or washing machines more often, or even having a new pet that requires regular baths can all contribute to increased water usage. It’s important to evaluate any recent changes in your household and their potential impact on water consumption.

Undetected Running Toilets

A running toilet is a common culprit behind wasted water and escalated bills. Even a small leak can add up to a significant amount of water over time. To check for a running toilet, put a few drops of food coloring in the tank and wait for ten minutes without flushing. If the color appears in the bowl, it indicates a leak. Most running toilet issues can be easily fixed by replacing the flapper valve or other faulty components.

Underground Leaks

Sometimes, leaks can occur in underground pipes, making them challenging to detect. These leaks often go unnoticed until they cause substantial damage or result in abnormally high water bills. Signs of an underground leak may include areas of lush green grass or unexplained wet spots in your yard, the sound of running water when no fixtures are in use, or a drop in water pressure. If you suspect an underground leak, it’s crucial to contact a professional leak detection plumber to conduct a thorough inspection and repair any potential issues.

a professional plumber checking for unseen water leaks.

A plumber will be able to conduct a comprehensive assessment of your plumbing system and advise you on the best course of action.

Solutions and Prevention

Now that we’ve explored some potential causes of high water bills with no visible leaks, let’s discuss possible solutions and preventive measures:

Monitor Your Water Usage

Keeping track of your water consumption is the first step towards detecting any unusual patterns or sudden spikes. Regularly read your water meter and compare the readings to your daily activities. By being more aware of your usage, you can quickly identify any drastic changes and take appropriate action.

Conduct a Meter Test

If you suspect that your water meter is faulty, reach out to your water utility company and request a meter test. They will be able to determine whether the meter is accurately measuring your consumption. If the meter is indeed faulty, they will replace it, ensuring that future bills reflect your actual water usage.

Seek Professional Plumbing Assistance

If you’ve exhausted all other possibilities and are still unable to identify the cause of your high water bills, it’s best to contact a professional plumber. They have the expertise and specialized tools to detect hidden leaks and diagnose any underlying plumbing issues. A plumber will be able to conduct a comprehensive assessment of your plumbing system and advise you on the best course of action.

Practice Water Conservation

Regardless of the cause of your high water bills, adopting water conservation practices is always beneficial. Simple habits like turning off the faucet while brushing your teeth, using a dishwasher or laundry machine only when you have a full load, and fixing minor leaks promptly can help reduce water wastage and lower your bills.

Install Water-Saving Fixtures

Consider upgrading your plumbing fixtures to more water-efficient alternatives. Install low-flow showerheads, faucets, and toilets to minimize water usage without compromising functionality. These fixtures are designed to reduce water consumption while still providing adequate water pressure and performance.

Remember, resolving high water bills with no visible leaks may require a combination of troubleshooting, maintenance, and professional assistance. By understanding the potential causes and implementing preventive measures, you can gain control over your water consumption and ensure that your bills reflect accurate usage.

Stay vigilant and proactive in monitoring your water usage, and don’t hesitate to reach out to professionals if needed. By taking these steps, you can minimize the financial burden of unexpectedly high water bills and contribute to a more sustainable future.

Best Ways to Clear a Sewer Line Blockage

Best Ways to Clear a Sewer Line Blockage

Sewer line clogging is a huge problem that can create major issues in your plumbing system, from slow drains to bad odors or even a sewer backup. If the debris inside a sewer line is not quickly removed, it can eventually cause the line to leak or become blocked completely, asserts Whole Property Management.

What causes sewer line blockage, and what are the best solutions for the problem?

Causes of sewer line blockage

As long as there is debris inside the water that enters a sewer line, there is a chance that the line will clog and ultimately block. That is because debris will be deposited inside the pipes, impeding water flow and causing even more debris to remain inside the line.

This process will continue until enough debris has built inside the pipes to stop the water flow. When this happens, the blockage will cause various drain problems inside the home. Factors that promote sewer line blockage include:

  • Flushing fats, oil and grease (FOG) into the drain
  • Dumping starchy foods, stringy vegetables, coffee grinds, eggshells, etc. into the drain
  • Flushing things other than toilet paper and human waste into the toilet
  • Soap scum and mineral scale buildup within the pipes as a result of hard water
  • Tree roots intrusion into the sewer line
  • Ground movements that result in the formation of low points along the sewer line

The best ways to clear a blocked sewer line

The best way to deal with a blocked sewer line is to have the line cleaned professionally.

Although it is possible to clear a blocked drain using home remedies, these methods only work for clogs and blockages near the drain opening. If the problem is deep inside the sewer system, it is often not possible to fix it with DIY methods like:

  • Pouring a baking soda and vinegar mix into the drain
  • Melting the clog with a solution of salt and hot water
  • Using a plunger to release a clogged toilet or sink
  • Snagging the debris with a handheld drain snake or clothes hangar

Most times, these methods do not remove the debris inside the pipes; they push it further down the line. To clear a blocked drain with minimal risk of the problem coming back shortly, here are the best methods to use:

Mechanical/motorized drain snake

This traditional method is still widely used because of its effectiveness. Mechanical drain snaking is also known as a sewer rodding service. It uses a mechanical auger or cutting head attached to a flexible metal cable to remove blockages from a sewer line.

The metal cable, with the attached cutting head, is inserted into the sewer line via a floor drain or cleanout. It is then pushed through the line until it reaches the site of the blockage. The spinning head at the end of the cable is used to cut through or snag the debris. This method is effective for removing blockages caused by hair, food fiber or soft materials.

Drain snakes can also be motorized instead of manually operated. Motorized drain snakes can deal with the worst kind of sewer line blockages, including tree roots and sludge removal. Motorized drains snakes can travel further into the sewer line. All drain snakes usually come with a set of cutting heads for different clogs.

a plumber performing a hydro jetting on a blocked sewer line.

Hydro-jetting has the added advantage of scouring the walls of the sewer pipes and washing the dislodged debris from the sewer line. That makes hydro-jetting a perfect method for preventing buildup inside a sewer line.

Hydro-jetting

Hydro-jetting is a modern method for clearing blocked sewer lines. It uses water as its primary agent for unclogging blocked drains. To clear a clogged sewer line, high-pressure water is sent into the line using a special machine called a “jetter.”

The typical hydro-jetting equipment consists of a water tank, a jetter to supply the required pressure, a flexible high-pressure water hose and a specialized stainless steel nozzle.

The hose is inserted into the sewer line with the nozzle at one end. Water is sprayed into the line at pressures between 4,000 and 5,500 psi. The water pressure used in a hydro-jetting service is enough to remove tree roots, scale and other stubborn materials from the pipes.

Hydro-jetting has the added advantage of scouring the walls of the sewer pipes and washing the dislodged debris from the sewer line. That makes hydro-jetting a perfect method for preventing buildup inside a sewer line.

Sewer camera inspection

Sewer camera is not a drain-cleaning method but a step which must be taken to ensure the effectiveness of the two drain-cleaning methods discussed above. Sewer camera inspection should be done before attempting to clear a blocked sewer line.

The inspection allows for a close-up visual inspection of the sewer line. That makes it possible to locate the blockage and determine the best method for dealing with the problem. Sewer camera inspection helps you save time and money.

Conclusion

Finally, which of these two methods is the right for solving your home’s sewer line problems? It depends on the nature of the blockage. To find out what is blocking your sewer line and the best way to remove it, talk to a professional drain cleaning company.

Dealing with Burst Pipes: Step-by-Step Solutions for Homeowners

Dealing with Burst Pipes

As the saying goes, “Home is where the heart is.” We understand how much you cherish your homes, and we want to help you protect and maintain them. One of the most common challenges homeowners face is dealing with burst pipes. Burst pipes can cause extensive damage and inconvenience, but fear not! Below we will provide you with step-by-step solutions to tackle this issue effectively.

Understanding Burst Pipes

Before we get into the solutions, it’s essential to have a basic understanding of burst pipes. Burst pipes occur when water freezes and expands in the pipes, causing them to crack or rupture. It typically happens during colder seasons or in unheated areas of your home, such as attics, basements, or crawl spaces. Burst pipes can cause water leakage, leading to property damage, flooding, and costly repairs if not addressed promptly.

Step 1: Shut Off the Water Supply

The first and most crucial step in dealing with burst pipes is to shut off the water supply to your home. Locate the main shut-off valve, which is usually in the basement or near your water meter. Turn the valve clockwise until it is fully closed. This will stop the water flow and prevent further damage. It’s important to familiarize yourself with the location of the shut-off valve beforehand, so you can act swiftly during emergencies.

Step 2: Open Faucets

Once you have shut off the water supply, open all the faucets in your home, including both hot and cold water taps. By doing this, you will help relieve the pressure inside the pipes and minimize the potential for further bursting. Leave the faucets open until the issue is resolved, and keep an eye out for any changes in the water flow.

Step 3: Identify the Burst Pipe

Now that you have taken immediate measures to prevent further damage, it’s time to identify the location of the burst pipe. Start by inspecting the areas where pipes are exposed, such as the basement, crawl spaces, or utility rooms. Look for signs of water leakage, wet patches on walls or ceilings, or the sound of dripping water. Also, pay attention to any unusual smells or mold growth, as these can indicate water damage.

Step 4: Temporary Repair

While waiting for professional assistance, it’s crucial to perform temporary repairs to minimize the damage caused by the burst pipe. Here are a few temporary solutions you can implement:

  • Use a pipe clamp: If the burst is a clean split, you can use a pipe clamp to secure the area temporarily. Place the clamp over the affected section and tighten it using a screwdriver or a wrench. This will provide stability until a permanent fix is applied.
  • Apply epoxy putty: Epoxy putty is a waterproof adhesive that can be used to seal small cracks or leaks. Knead the putty according to the manufacturer’s instructions and apply it to the affected area. Smooth it out and let it cure as per the recommended drying time.
  • Wrap with rubber or silicone tape: Another temporary solution is to wrap the burst section with rubber or silicone tape. Start a few inches before the crack and continue a few inches beyond it. Wrap the tape tightly in overlapping layers to create a watertight seal.

Step 5: Seek Professional Help

While temporary repairs can help manage the situation for the time being, it is essential to seek professional help to permanently fix the burst pipe. Contact a licensed plumber who specializes in burst pipe repairs to assess the damage and provide a professional solution. They have the expertise and proper tools to ensure a long-lasting repair and prevent future incidents.

pipes with insulation around them.

Insulation helps protect the pipes from freezing temperatures and reduces the risk of bursting.

Preventing Burst Pipes in the Future

Now that you have successfully dealt with a burst pipe, it’s crucial to take preventive measures to avoid similar situations in the future. Here are some tips to keep in mind:

  • Insulate pipes: Properly insulate exposed pipes, especially those in unheated areas or near exterior walls. Insulation helps protect the pipes from freezing temperatures and reduces the risk of bursting. Use pipe sleeves, heat tape, or foam insulation to provide an extra layer of protection.
  • Maintain heating: Keep your home well heated, even during colder seasons or when you’re away for an extended period. Maintaining a consistent temperature helps prevent pipe freeze-ups.
  • Seal openings: Seal any gaps or openings near pipes that allow cold air to enter. Use caulk or insulation to close these gaps effectively.
  • Allow faucets to drip: During extremely cold weather, allow faucets connected to vulnerable pipes to drip slightly. This will promote water flow and prevent freezing.
  • Keep interior doors open: Keep interior doors open to allow heat to circulate evenly throughout your home. This helps in preventing cold spots that can lead to frozen pipes.
  • Drain outdoor faucets: Before the freezing temperatures set in for winter, disconnect and drain any garden hoses or outdoor faucets. This prevents water from freezing and causing damage to the pipes.

In Conclusion

Congratulations! You have successfully learned how to deal with burst pipes step by step. By following the solutions we’ve provided in this article, you can minimize damage and prevent further complications. Remember, shutting off the water supply, temporary repairs, and seeking professional help are key steps in addressing burst pipes. Additionally, implementing preventive measures can help you avoid such situations in the future. Stay proactive, maintain your home, and enjoy peace of mind knowing you can handle burst pipes effectively!